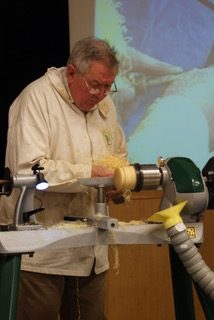
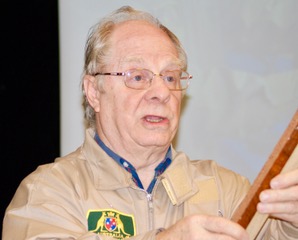
Gerald Hubbard undertook this demonstration which was designed to provide instruction and little nuggets of knowledge from a very experienced woodturner.
His first part was to produce a garden dibber which he showed us at normal speed to show how quickly they can be made. He then proceeded to show the process as a step by step guide including use of the skew chisel and a marking out template.
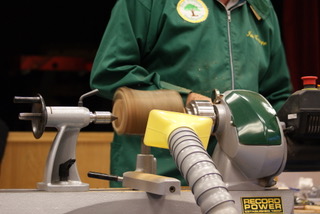
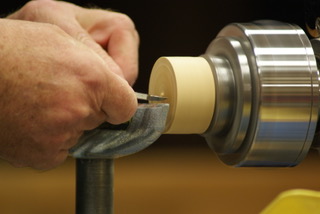
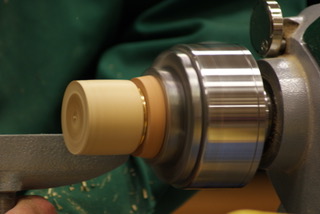
The second part was to make a small lidded box often described as a tooth fairy box. Gerald described it as a one handed fit lidded box. This means that the lid is sufficiently loose to be able to remove it using just one hand. Gerald started this process from first principles and explained actions such as measuring, facing off, hollowing, witness marks, Jam chucks and much more.
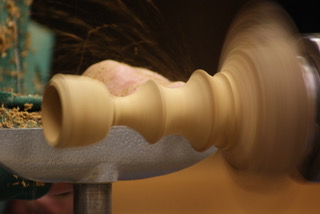
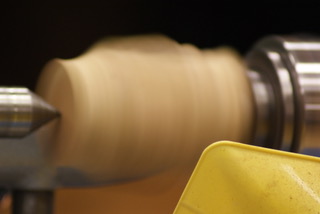
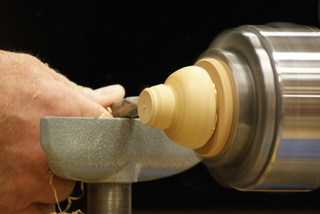
The final part was to fill the time so he made a 2 part mushroom.
All in all this was a very entertaining, informative and inspirational demonstration.
This evening was a hands on session which ended up with Roger Gilbert making a lidded box, Duncan Anderson providing a little tuition and Mick Denton doing a sharpening workshop. Many thanks to those contributors to the evening, there were plenty of opportunities to learn something of use.
The evening also hosted the September competition which was well subscribed with many varied projects all of high quality, it was difficult to decide which was your favourite.
1st place went to Geoff Warr with a Laburnum vase
Equal 2nd were Bob Green with a lidded box along with Glyn Jennings also with a box
3rd place went to Clive Bryant with a pen holder in the shape of an elephant and a pen.
Mick Denton has been experimenting with resin as part of his turning and this evening he regaled us with the progress that he has made so far. This included the errors and mishaps and then the gradual understanding of the process.This was a very interesting and entertaining evening giving an insight into the problems and rewards that resin brings to the turning process.
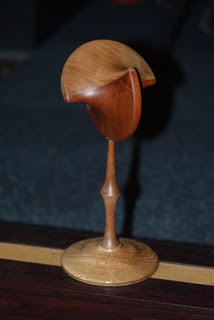
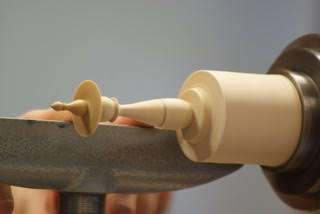
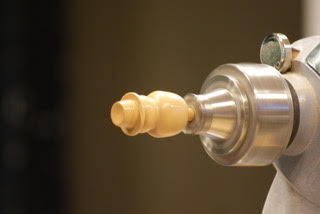
The demonstrator tonight was one of our members Geoff Warr who said that he wanted to demonstrate the turning of a Femisphere, which had everyone in the room saying “a what?”.
The thing on top of the pedestal is a femisphere
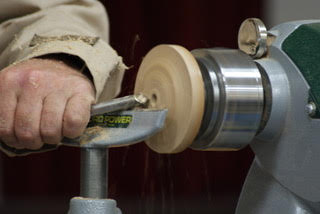
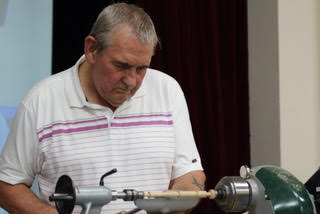
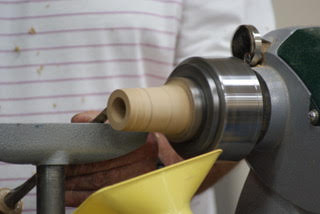
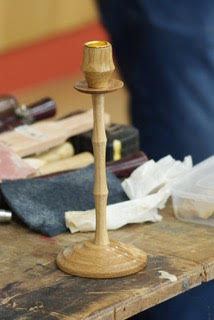
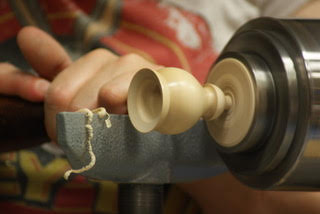
The form required split turning and 2 axis turning apparently. Geoff had made up the blank already and it was held together with double sided tape. We are not sure if Geoff’s comment about the double sided tape always holding was the kiss of death but unfortunately with a heavyish catch the blank split. Without any backup Geoff had to abandon that and continued with creating a candlestick made up in 3 sections. This demonstrated faceplate and spindle turning including making spigots for gluing pieces together.
The baseThe spindleMore of the spindleThe cupThe finished candlestick
We also had the August competition which was really well represented this month with a table full of pieces to peruse.
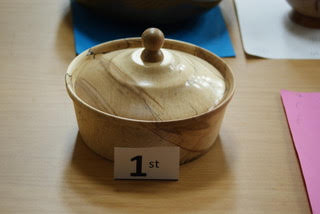
First place was a lidded pot which fittingly was made by our demonstrator Geoff Warr. (The lid was made from a core from the centre of the bowl).
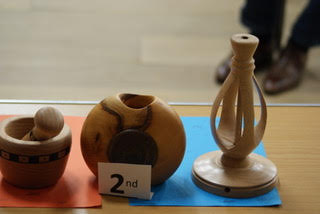
2nd place was a 3 way tie with a pestle and mortar by Clive Bryant, A flask type vase by Bryan Turner and an inside out turned lamp by Roger Gilbert
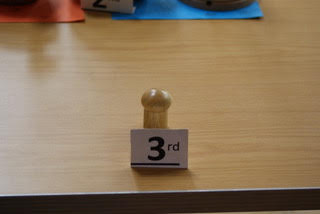
3rd place went to a nice little threaded thimble box by Gerald Hubbard.
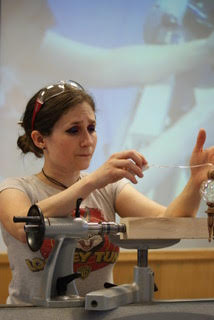
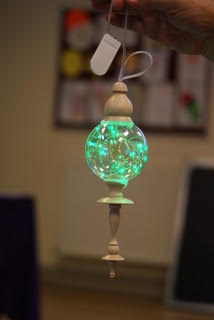
This was a much anticipated demonstration by Emma Cook who proposed to make a LED lit Christmas tree decoration. The several examples that she had on show certainly whetted our appetite for this demonstration. The project consisted of a glass bauble and a string of very small LED lights with finely turned finials. To try to describe everything that Emma demonstrated is not an option, as she covered most of what is involved with spindle turning of finials. There were tips and tricks coming almost continuously with Emma’s running commentary. Needless to say everyone learned something from the night or were reminded of something that they had forgotten. This was an excellent demonstration and all of the attendees appreciated the expertise on show.
Creating the finialUndercut to fit the globeTop finialThreading the lights into the globeThe finished decorationAll lit up
This was a hands on evening with 3 lathes set up and all in use plus the sharpening station in place. The members using the lathes were practising their tool skills and also testing out some new tools. The other lathe was being used for instruction by Mick Denton on the art and techniques of creating finials. The sharpening station had some use with instructions on sharpening different tools. Overall this was a relaxed but informative evening with the opportunity to socialise and discuss turning (and non turning) related topics. It is well worthwhile attending the hands on events because there is always something you can pick up on and take away to try yourself.
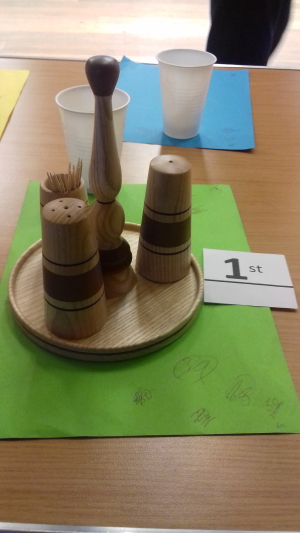
The July competition table was a little sparse but held some quality pieces which was nice to see. The winner was Clive Bryant with a well constructed and decorative condiment set.
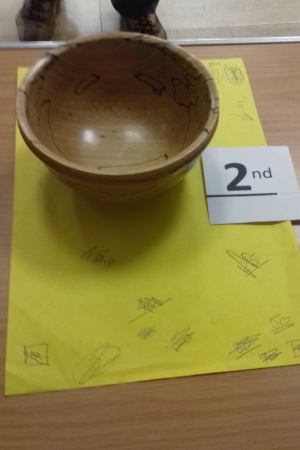
Second was Roger Gilbert with a very nicely presented spalted beech bowl.
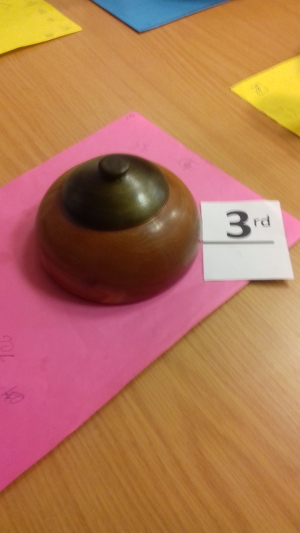
Third spot went to one of our newer members (and very aptly named) Bryan Turner with a well crafted and practical lidded box.
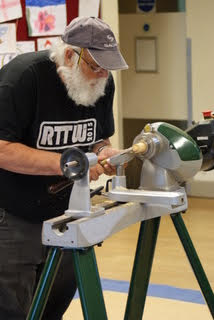
This evening was billed as the Three Musketeers with a difference. One of the usual line up was unavailable so the guys called upon a trusty D’Artagnan to help, so the line up was Mick Denton, Roger Gilbert and Geoff Warr. Between themselves they set a task of producing their own individual take on a bottle stopper.
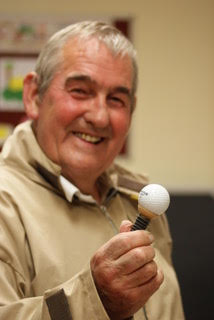
The woodturning principles for each of them was basically the same, using standard spindle turning techniques and tools. However, the designs were subtly different with Mick using a glued up blank to produce a striped pattern, Roger produced a snowman themed stopper for Christmas (yes it is coming around again!!) and Geoff used a golf ball as a finial.
There were also 2 options for the seal for the bottle with the use of drilled corks glued onto a small spigot and rubber seal from drinks optics which had to be trimmed slightly in length to fit snuggly in the bottle. This did not involve gluing but relied on a bead retainer and interference fit. Maybe you can come up with your own ideas on this.
The demonstrations also included the techniques of reverse chucking, wooden jam chucks, finishing with wax sticks, the dreaded skew chisel (although this demo debunked some of the reasons for this fear) along with many other tips and tricks that these experienced turners gave us.
Not only that, there was a nice balance between the serious stuff and the banter and light heartedness that made the evening pass quickly and made it really entertaining.
The June competition was well represented with the result throwing up a tie for first place. The 2 pieces that came first were and inside out turned vase and bullrush made by Clive Bryant and a large salad bowl by Mick Denton. Third place was a dish made by Tony Lack. Well done to all participants and especially to the top three for their excellent work.
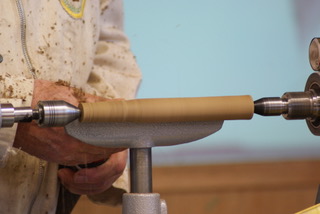
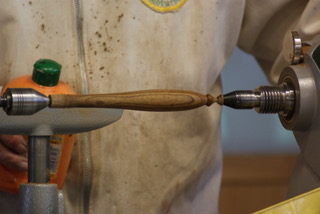
Tonight Gerald Hubbard stood in for the evenings demonstration. He said the decision on what to do was simple bearing in mind the excellent result at Woodworks (see Club Notices page). The practice he put in for the gavel and anvil were ideal preparation for the evening. First he created the handle from a piece of laburnum as a spindle turning between centres, turning the shape and adding decoration as required.
It was sanded and then finished with sanding sealer and a wax finish. The gavel body was turned from a pre-constructed blank with a hole drilled for the handle made from a box wood body with ebony ends bonded to it. This too was set between centres and turned to almost complete, adding embellishments as wanted.
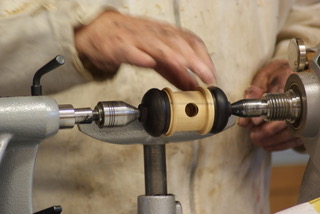
Great care was taken to ensure the body was reproduced as a mirror image either side of the centre hole. The body was sanded but Gerald had to be very careful that the dark wood dust did not contaminated the light colour. To achieve this separate abrasives were used on the different colours. The light wood was sealed with sanding sealer again being careful about contamination. The body was then mounted in wood jaws which were made from pieces of wood screwed to special chuck jaws and then turned specifically to hold the body.
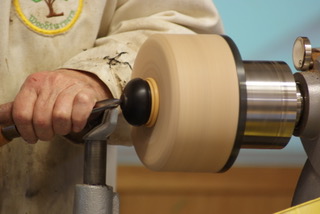
This allowed Gerald to drill a hole in the end for a decorative insert, which were turned and glued into the body. The ends of the gavel were then finish turned and sanded, sealed and finished as required. The anvil black was mounted in a chuck and turned to a pleasing design then finished as required.
The body and the handle could then be glued and assembled. All in all this was a very interesting demonstration and bearing in mind the short time frame for the evening was completed really well. There are lots of techniques and tips that could be taken from the demonstration.
The evening’s entertainment was provided by one of our members Ian George who produced 2 projects for us. The first was an offcentre turned candle stick/ t light holder and the second a small box with brass threaded insert.
The offcentre project was started between centres with the tailstock having the offcentre. This allowed Ian to turn the spigot for the chuck.
Once completed the piece was mounted in the chuck and the body and t light recess were turned.
Unfortunately Ian was thwarted in finishing the piece because of serious woodworm in the log he used, but the principles and techniques were very well demonstrated.
The second project was a box with brass threaded insert which was started using a piece of Box wood mounted between centres.
This was turned to round and spigots created at both ends for the chuck.
The piece was then mounted in the chuck and the lid parted off using a thin parting tool. This meant that the grain match would be the best. The threaded ring was measured and this dimension transferred onto the endgrain of the piece. Ian then carefully turned the recess to fit, taking a small amount off at a time and checking the fit regularly. Once the fit was established he turned out the inside of the box and then sanded and finished it, only then did he glue the threaded ring to place.
The lid was then mounted in the chuck and the same process carried out.
At this point Ian needed to get the grain matched before bonding the ring in the lid (however, he forgot in this instance but never mind). Once both sections of the threaded ring were bonded to place the outside can be finished. Ian had already prepared 2 temporary chucks for this by mounting spare rings on scrap wood. This meant that all he had to do was mount the block in the chuck and screw the corresponding part of the box to it.
The bottom and lid were then turned to a finish.
This was a great project and was a nice change from push fit lids on a box.
The May competition was well subscribed with quite a number of intriguing and well executed pieces. Third place went to Clive Bryant with his pedestal table and goblet and tumbler, Second was Geoff Warr with an intricate segmented vase and first place went to Ted Sargent with a very well executed segmented bowl. Overall this was a really strong competition which we hope will be continued over the following months.
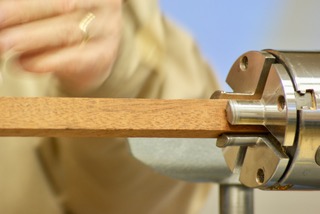
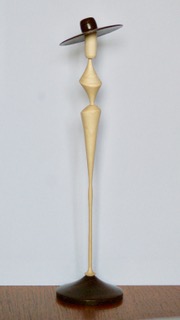
Tonight we welcomed Stan Bryan who offered us a demonstration that would give us an insight into 2 tricky subjects, offcentre turning and thin turning. The project for the night is a figure with thin turned legs. A nominal 20mm square blank of straight grained strong wood was centre marked and one end only marked with 2 off 10mm offsets diagonally opposite.
The blank was mounted in a chuck with pin jaws at the offset end and the tailstock brought up for support.
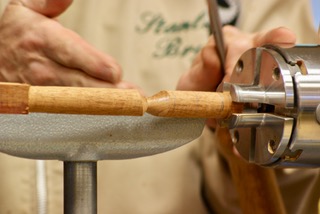
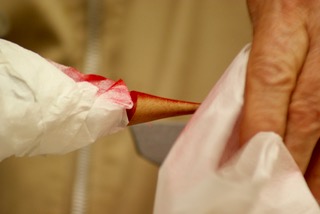
Stan gave a major technique tip here, the tailstock is purely for support at all times in this project. It should only just touch the piece. A test for this is that you should be able to stop the revolving centre spinning by just touching it, any more pressure than this will risk the piece breaking. This was turned to a cylinder except for 20 mm by the tailstock as this will be turned to make a ball mount for reverse chucking. This allows the piece to be offset without stressing the workpiece. The piece was reversed and the tailstock located lightly in one of the offset points and the chuck tightened. The waist of the figure was turned to about 3mm with a cove and round.
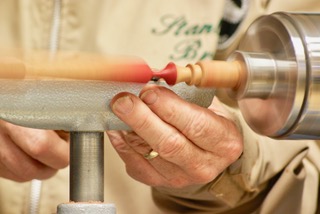
This was sanded using an emery board working up to the highest point to retain the crisp edges. This area was then sprayed with a clear lacquer, denibbed and then sprayed with a colour. A couple of quick squirts is all that was needed. The piece was then reset into the other offset mark and the chuck retightened. To make sure that the tailstock was not stressing the piece Stan disconnected it and the piece did not move so it was all ok. The tailstock was reconnected and the neck section was turned up towards the chuck.
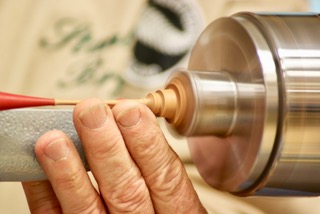
This area was sanded as before and the piece reset on the centre mark and the head turned to 10mm to accept the hat. This was sanded and then cut off with a hacksaw as parting may break the piece. The piece was reversed in the chuck and a cup revolving centre was used to support the head again very lightly and with some tissue paper inside for protection.
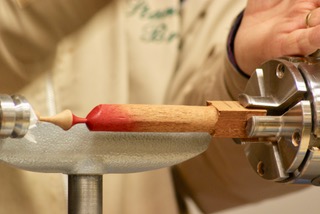
The body was turned down to the leg, sanded and after masking off the other sections was sprayed as before to finish the body.
The legs were then turned to about 2.5 to 3mm with a blob for the knees and the “ankles” made with a tenon on the bottom to take the base.
After sanding the piece was again cut off with the hacksaw.
All in all this was a very interesting demonstration and Stan provided loads of technique explanations and tips so it seems that everyone took away something from the night.