Club Night – 17th January 2018

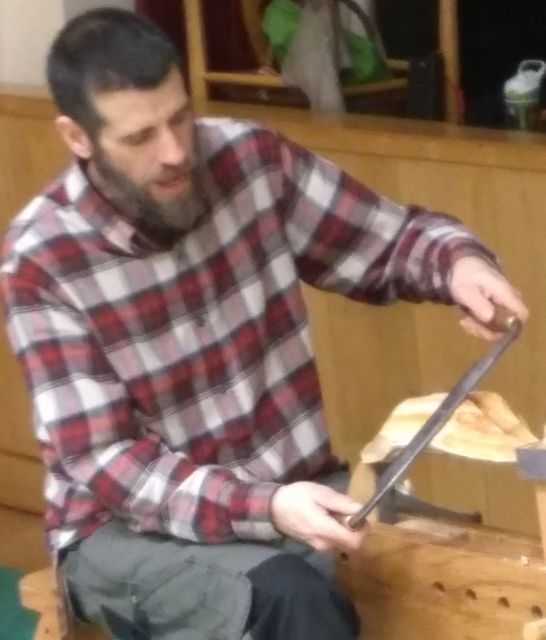
The meeting today was almost entirely given over to the demonstration by Paul Jones. The equipment and chairs were set up, an introduction made by Mick, and Paul launched into his demo. There was a quick break for tea and then Paul resumed the demo, continuing until it was time to clear everything away.

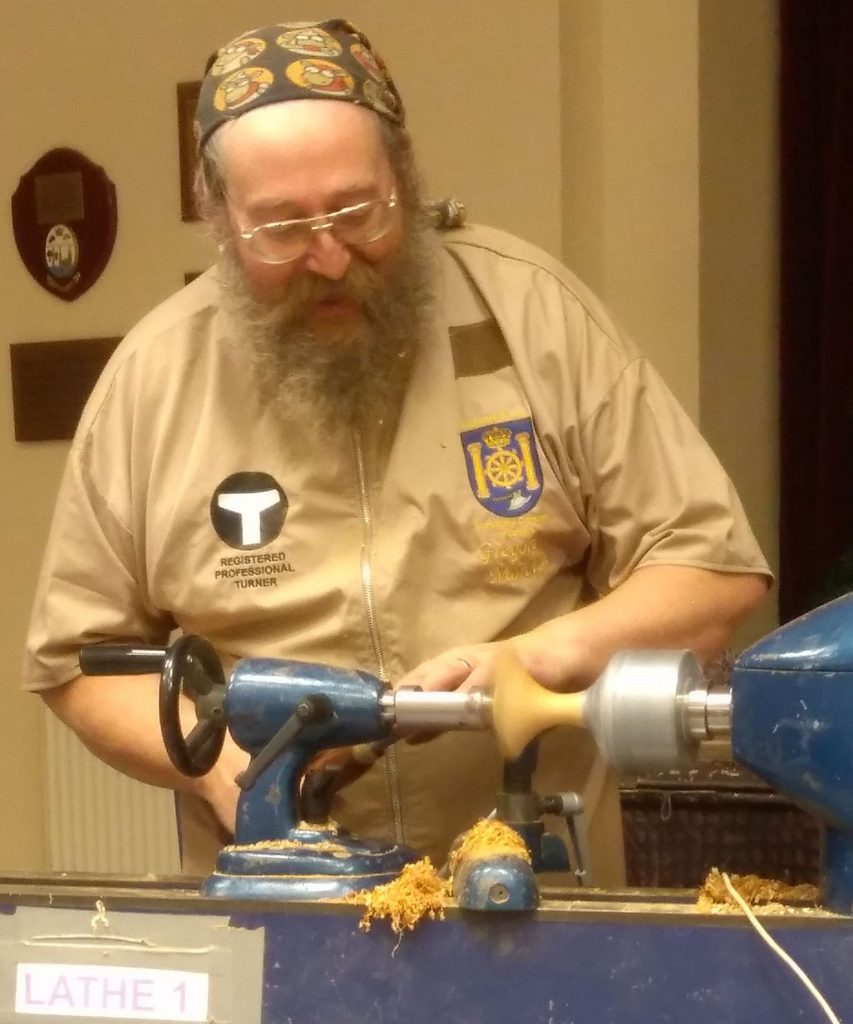
Demo by Paul Jones (www.pauljoneswoodturning.co.uk/)

Paul planned to show us how to make a hollow form on a very long and slender stem.

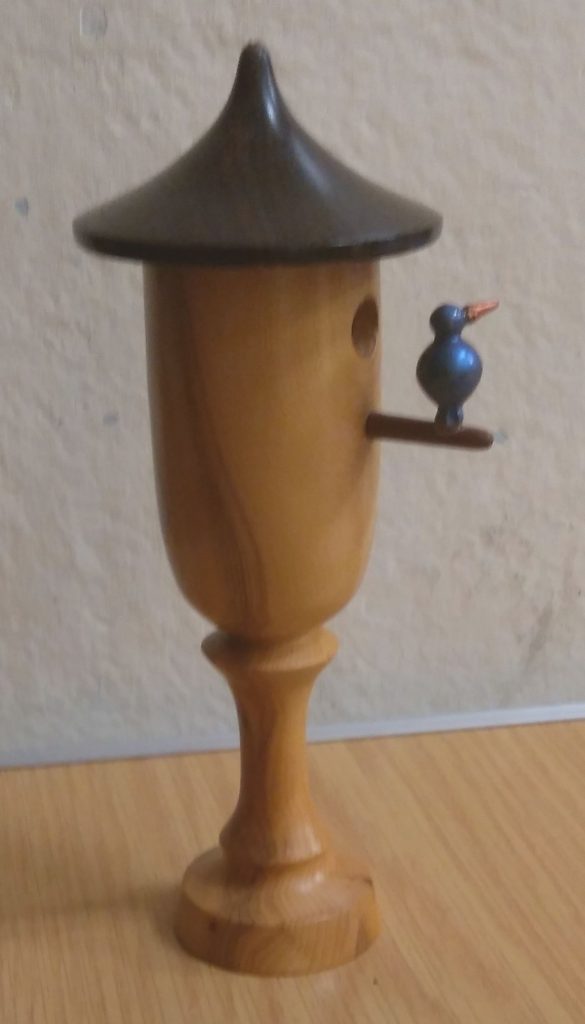
The hollow form consists of a “trumpet” and a “bowl” turned separately from tulipwood and then glued together.

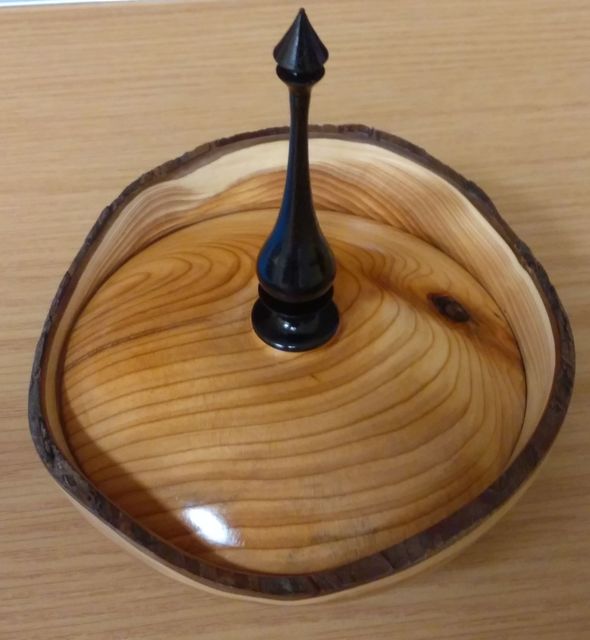
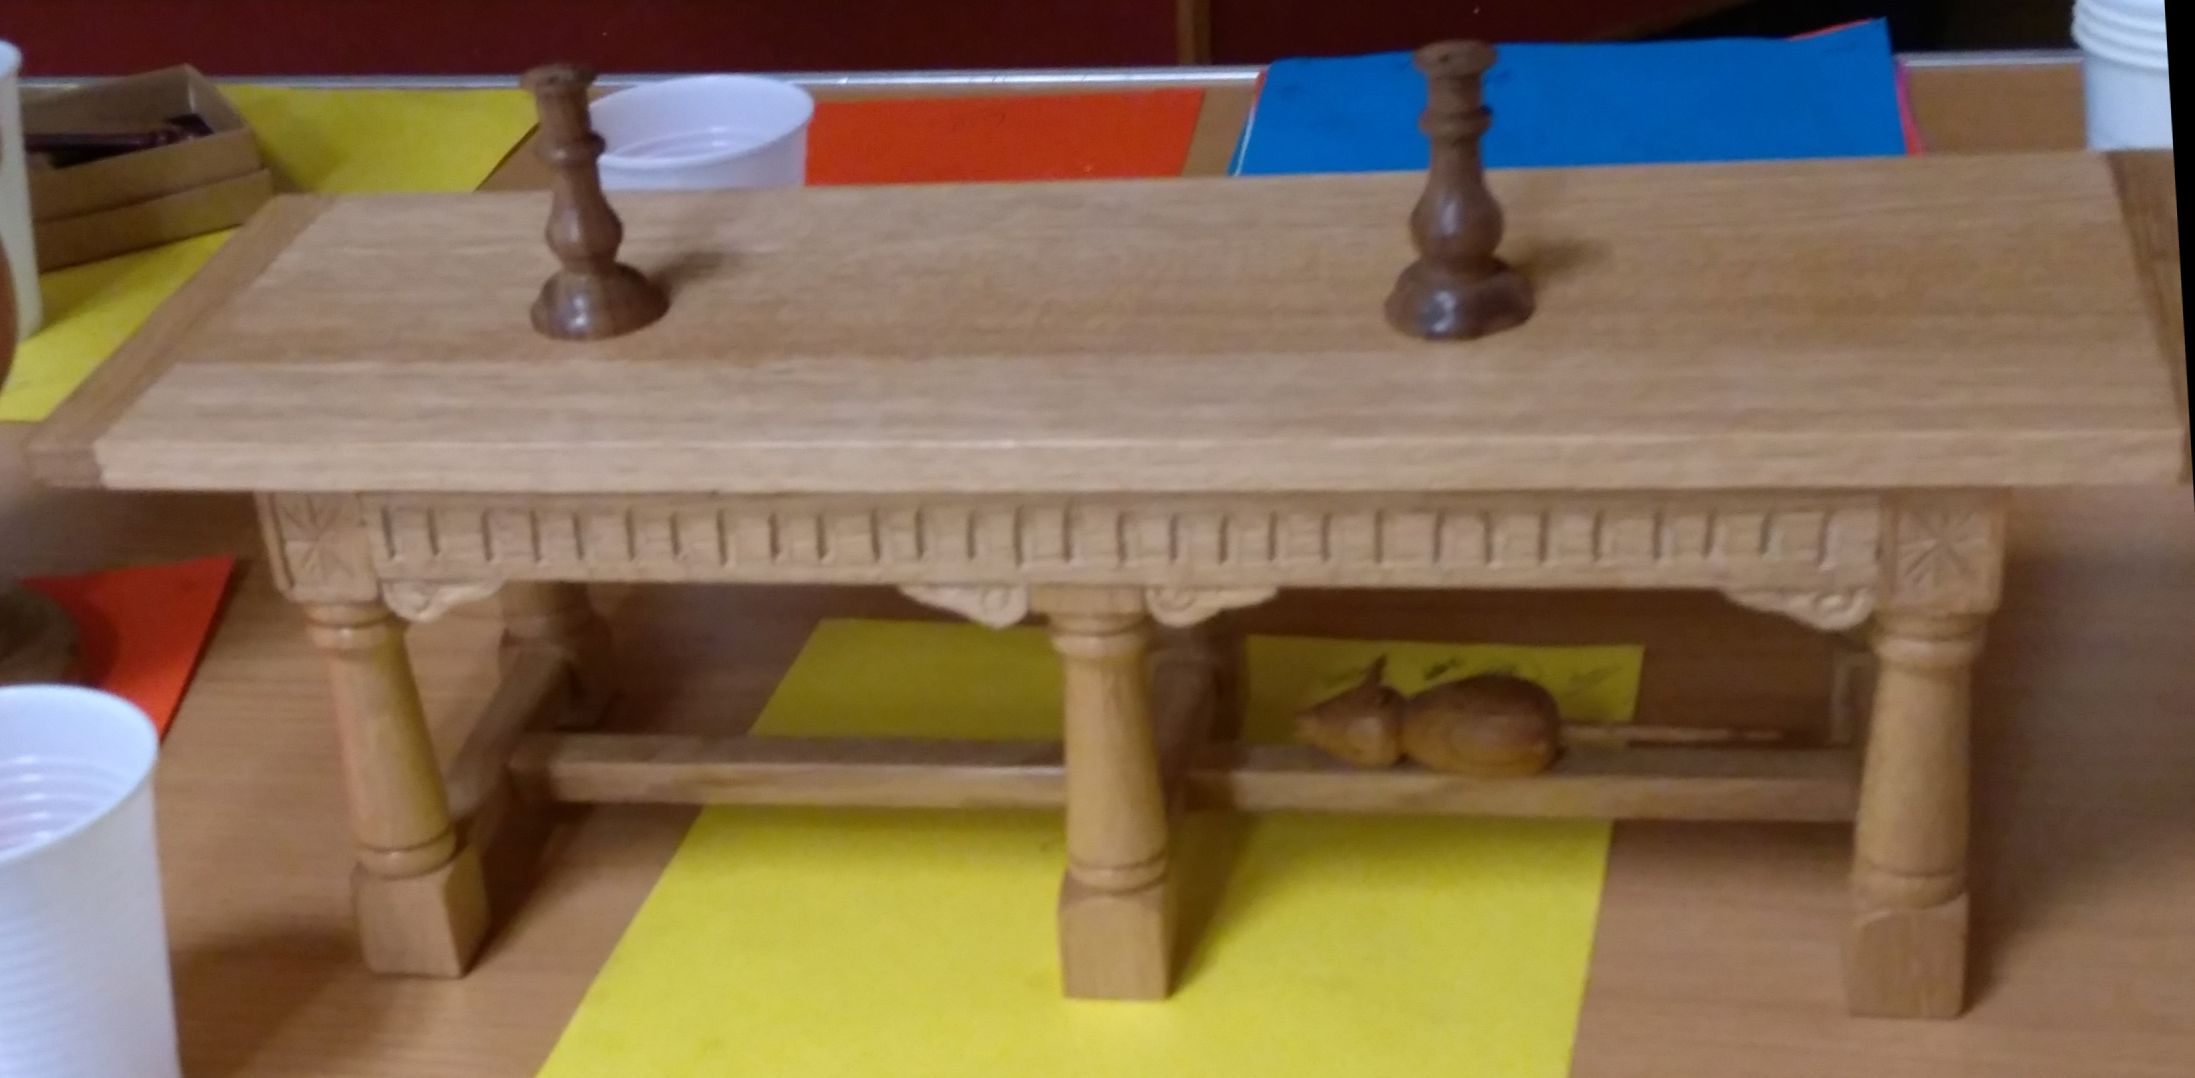
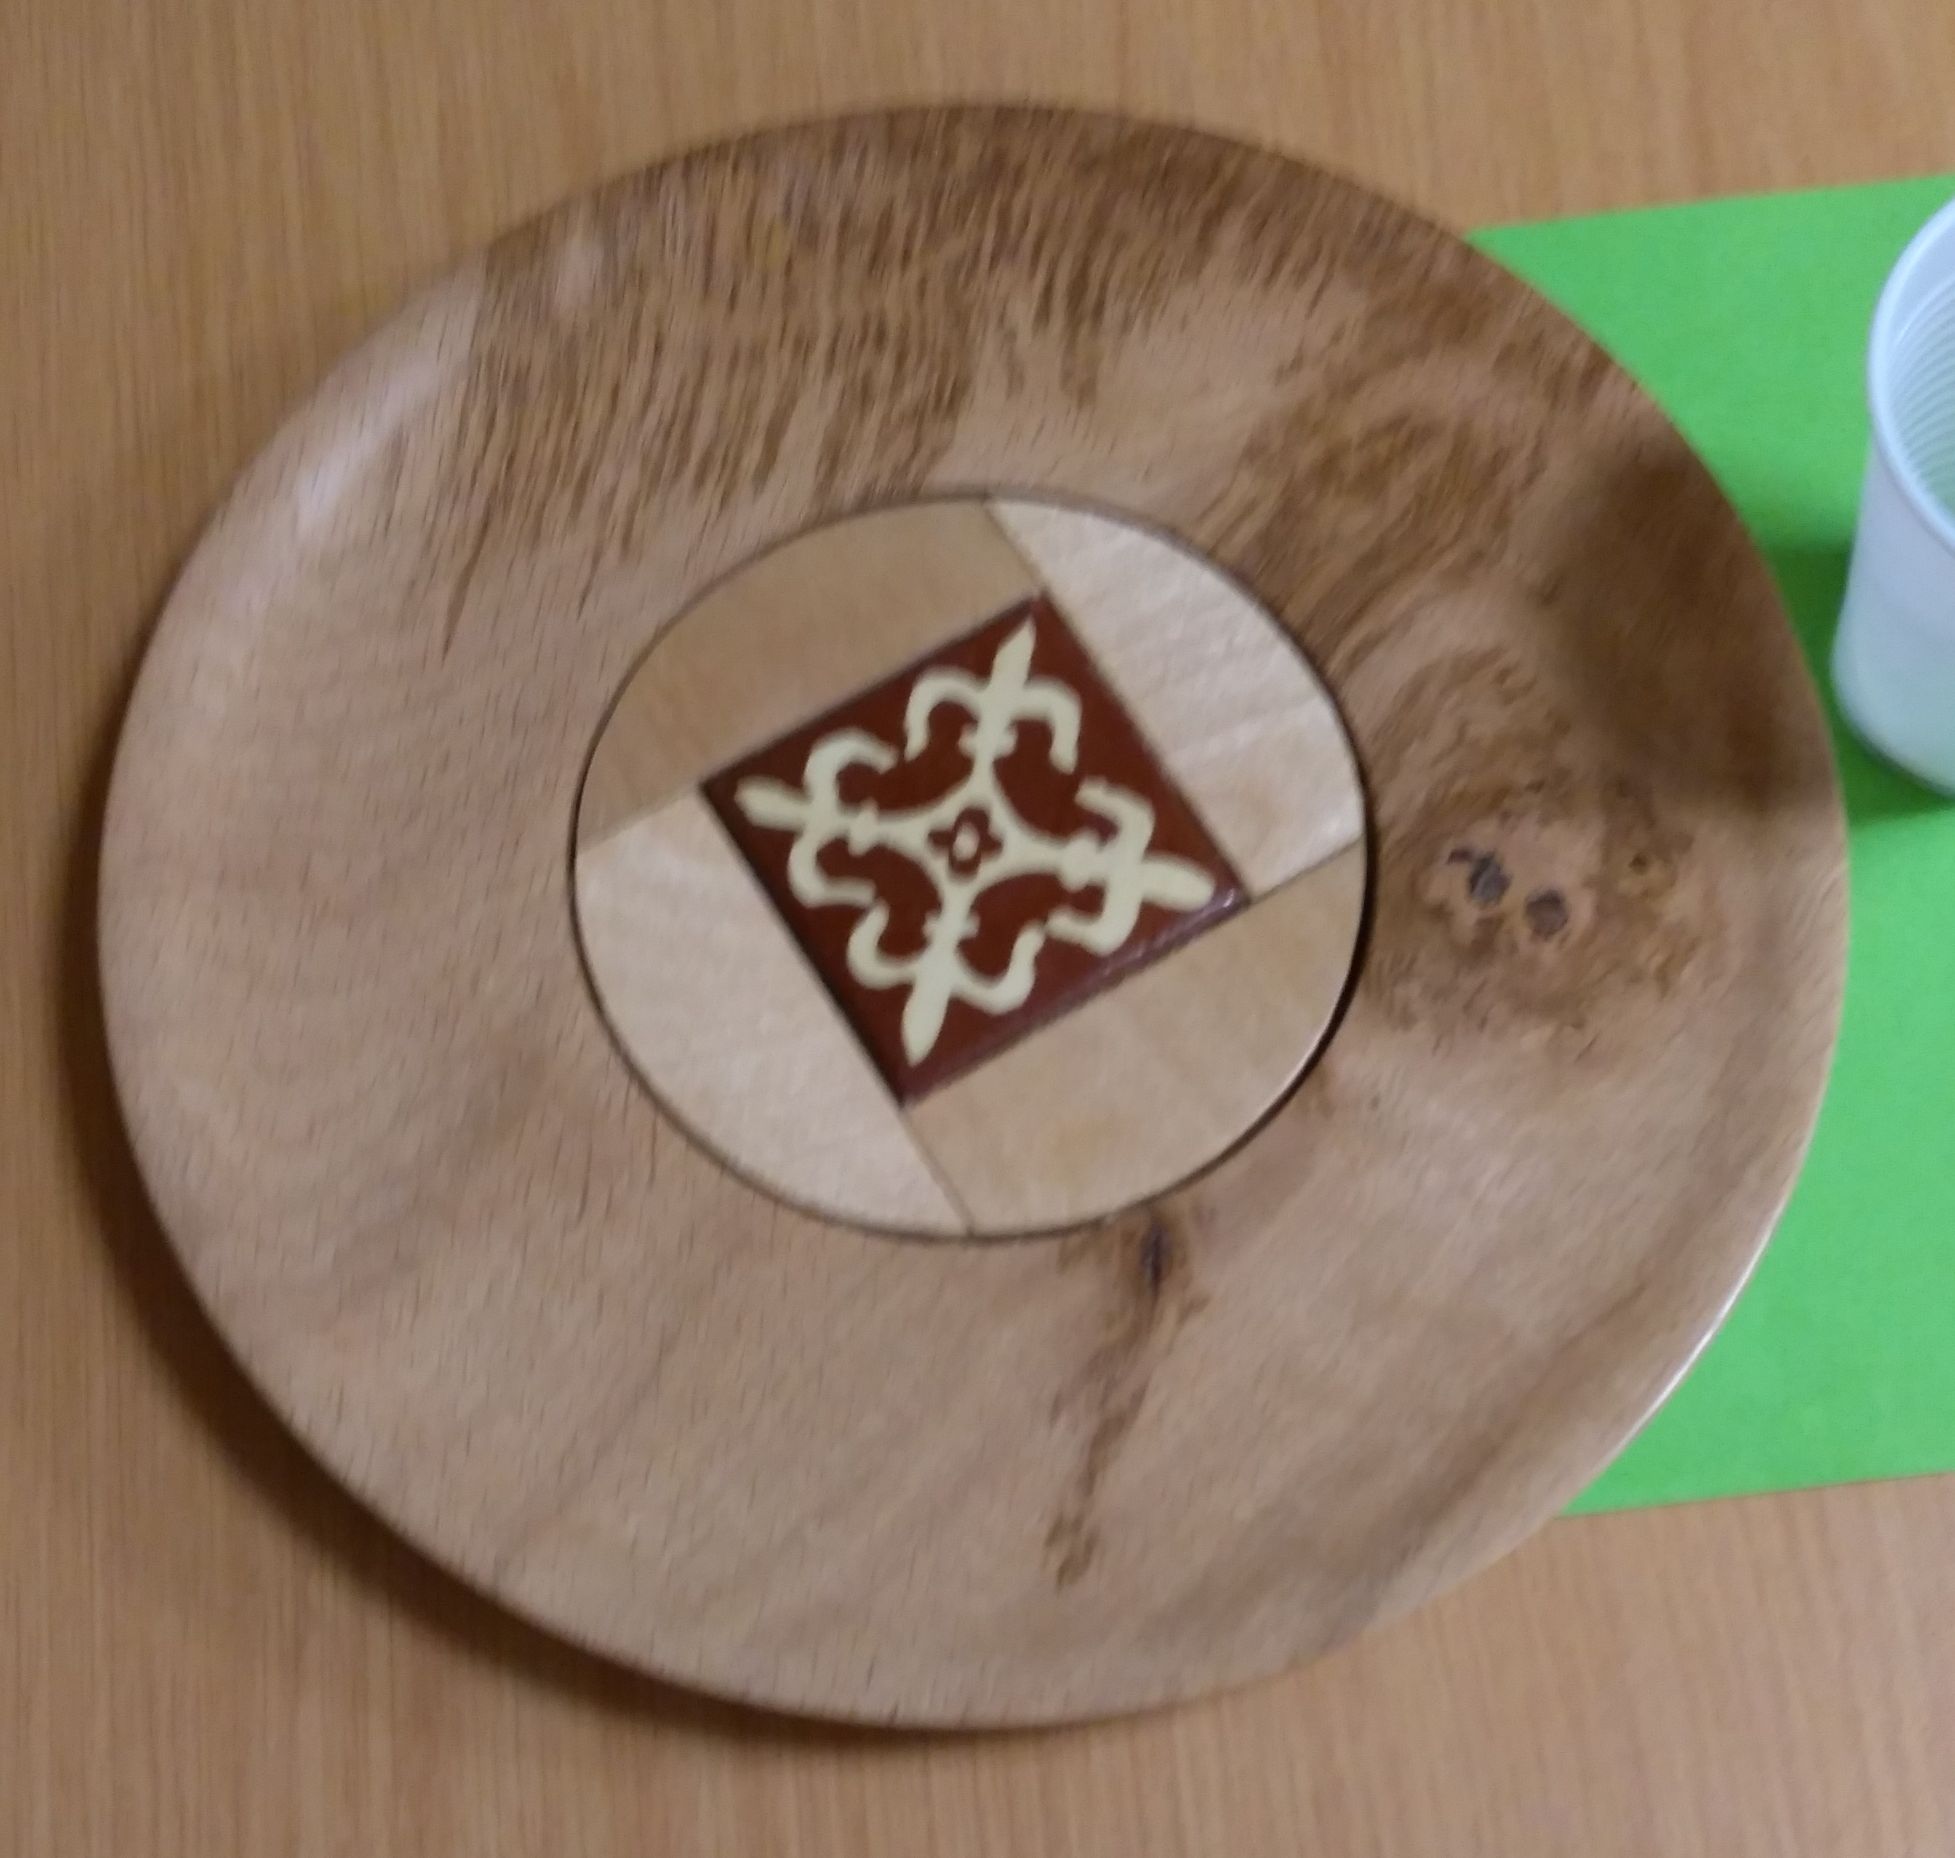
The stem and the base are also separate parts but unfortunately there was no time to make them – the picture shows one that Paul had previously made. In this instance the stem was to be made from sapele.

It was an enjoyable demo and Paul made it look easy, well within the capabilities of ordinary turners, although the long and thin stem is rather daunting and it would have been nice to see the techniques employed. He explained clearly what he was doing at all times and passed on a few comments regarding his preferences for doing things in a particular way, some of which I have included below

Preparation

He said that he likes to run the lathe no faster than necessary, to be gentler on the wood.

Started with a square blank of tulipwood between centres.

Rounded with a roughing gouge, leaving a bit of square on the edge to aid location in chuck jaws.

Put a 40mm long straight sided tenon on one end with a beading/parting tool, to suit the O’Donnell jaws, which hold the long unsupported length of wood very securely.

Mounted the wood in the jaws and brought the tailstock up for initial support.
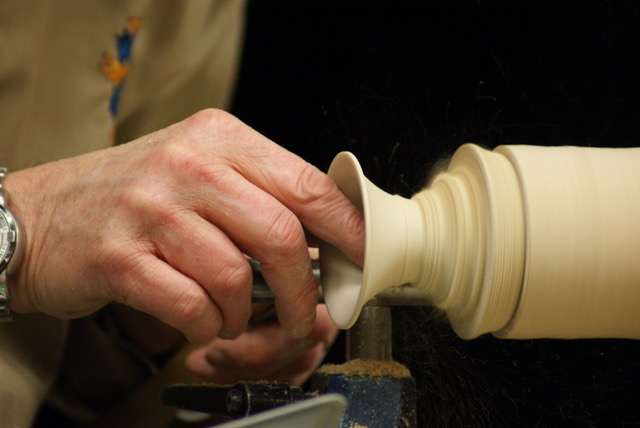
Trumpet

The first difficulty showed up immediately when Paul tried to mount a 10mm dia drill in the tailstock – the small Vicmarc lathe is too short to accommodate the length of the wood plus drill and chuck. No problem, he hollowed out the trumpet for a short distance with a spindle gouge, until there was room to insert the drill bit and then to drill to about 70mm, defining the depth of the trumpet.

Reduced the outside to approx the final diameter and marked the base of the trumpet. (Skew and spindle gouge).

Used a spindle gouge and Simon Hope 10mm hollowing tool to hollow out the inside.

Hollowing The Trumpet

Paul prefers to define the shape by cutting on the bevel from outside to inside as he finds this gives him better control of the shape and finish, although it is slower than cutting on the edge from inside to outside.

Tucking the tool handle under the arm and moving the body gives better control than purely hand/arm control when using the long Hope tool.

Sanded the inside.

Spindle gouges used to shape the outside of the trumpet.

Testing Trumpet Wall Thickness

He used fine cuts and sharp tools as it got thinner, steadying it with his fingers. Paul uses calipers to gauge the even thickness of the wall thickness as he finds fingers can deceive. Final wall thickness was around 1.5mm, and 1.5/2.0mm at the joint to the bowl.

Reduced to around 16mm diameter at the base, blended into the curve and sanded.

The slightly tapered joining tenon of around 38mm dia was formed and then parted off from the blank.
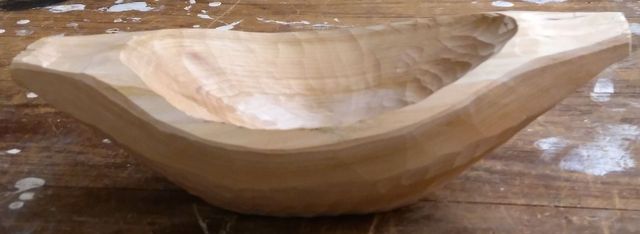
Bowl

Marked out a 38mm dia circle on the end of the blank and drilled with a 35mm dia Forstner bit to about 35mm depth.

Hollowed out the inside with the Hope hollowing tool. The bowl is not functional so doesn’t strictly need to be hollowed, but it is done to reduce weight on the thin stem and improve the balance of the completed object. There’s no need to go too thin and it is advantageous to leave a fairly heavy rim, to accept the tapered joining tenon.

Marked the intended bottom of the bowl on the outside and shaped the outside of the bowl.

Refining The Inside Of The Bowl

Refined the inside of the bowl to match the external profile.

Ensured there was an accurate centring mark in the bottom of the bowl and drilled a 7mm hole through the bottom – this will accept the tenon on the top of the stem.

Assemble Trumpet & Bowl

Refined the 35mm bowl rim to suit the trumpet tapered joining tenon. Paul likes to use a round skew for this as it avoids fouling the rim and makes it easier to creep up on the correct size and taper.

When it appeared correct, he tested it by using a padded cup centre in the tailstock to push the trumpet in – not too hard! Once the tenon was a nice fit, and slightly proud of the bowl rim, he removed the trumpet.

Gluing Trumpet to Bowl

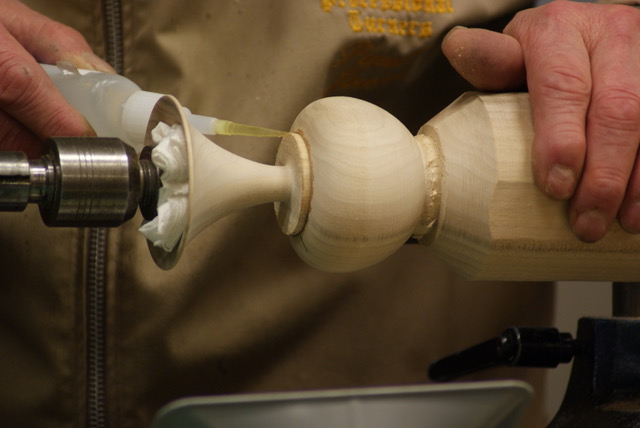
He then applied CA glue and pushed the trumpet tenon back in, taking care to align the grain of bowl and trumpet. More glue was then run around the join; capillary action will take it right into the joint.

Cleaned up the tenon and bowl with a shear scraping spindle gouge until the surfaces flowed in a smooth curve, the join visible only due to the line of CA glue.

He hid the glue line by scoring it with a tri-point tool, and scored two further lines inside the glue line.

Blacked the lines with a piece of Formica pressed into the grooves, then skimmed very lightly over the surface with a spindle gouge to remove any overburn.

Formed a shouldered spigot about 16mm diameter at the bottom of the bowl – this had the previously drilled 7mm hole through it, ready to receive the stem.

Finally, he sanded all over, and parted off the assembly.

The Completed Item

Stem & Base

At this point, time ran out and Paul was unable to make either the stem or the base, but the picture shows a completed item.

Club Night – 3rd January 2018

This was the first meeting of the month so we had both a competition and a demonstration, details below.

Competition

The winners are shown here, with some other pictures in the 2018 Gallery.

Yew bowl with lid and finial, Mick

1st  Signs of Mick trying to muscle in on Gerald’s territory here, with a lovely little lidded yew bowl with a finial.

Natural edged yew bowl, Roger

2nd  This natural edged yew bowl by Roger is simple but attractive.

Table with Star Trek, Adrian

3rd  Star Trek by Adrian,  guarding the table with the other entries. Complete with multi-coloured lights.

Demonstration by Lee Stoffer of Covert Craft (www.covertcraft.com)

This was a very different sort of demonstration as it was nothing to do with woodturning! Lee is a wood carver, and a previous demonstration by him was very popular, so he was invited back again. Although not woodturning, there are similarities, including a need to “read” the wood and work with it not against it, and to cut downhill where possible.

On this occasion he made an oval bowl out of green wood from a willow tree, with the work carried out on a carving horse of his own design.

He first split log through the pith using a froe. The flat side of the log was to become the bottom of the bowl, the curved side the top.

Splitting the log

Using an asymmetrically bevelled axe for easier control, he straightened up the edges, and flattened the bottom of the bowl to provide a reference face, working both along and across the grain. He also squared up the ends.

Mounted on the horse,  the flat faces were cleaned up with a scrub plane, a drawknife and a No.4 smoothing plane.

With the round side up, he marked the centre then put screws in the wood on  the longitudinal axis about 140mm either side of centre (280mm apart). Lee then made up a loop of string about 305mm long when pulled tight, placed it round the screws and pulled the string out with a pencil to describe an ellipse – the inside of the bowl rim.

He started hollowing out with a hollowing adze by making an initial hollow across the minor axis and then worked along the major axis towards this hollow, thus reducing the likelihood of a slip damaging the rim of the bowl. A roughing gouge could have been used – more accurate but slower.

Hollowing with a roughing gouge

Finishing to the line of the rim was carried out with a roughing gouge and mallet. The inside of the bowl is shaped before the outside as there is less likelihood of splitting.

To clean up, a hand pushed gouge with a sharp curved edge was used. A spoon gouge could also have been used – in fact any sharp curved edge would do.

The rim outer edge and the handles were next marked out; the rim is about 20mm thick.

Lee used the axe to trim the ends around the handles, and remove surplus wood at the sides and underside.

At this point, the shape was now roughed out – but still faceted as the flat facets made it easier to control the axe.

Shaping continued with an adze, including finger grooves on the underside of the handles.

Refining the shape with a drawknife

He then rounded off the edges with a drawknife, working downhill to avoid lifting the grain.

The bottom was made flat, with just a slight hollow in the middle – but it is expected that the wood will move as it dries out and some finishing will be required.

The last stage tonight involved more shaping, now with a spokeshave – pushing not pulling. Another technique involves using a gouge to apply a scalloped finish.

Finished – now wait to dry

The bowl will now be allowed to dry then finished off with gouges.

Club Night – 20th December 2017

As the last meeting before Christmas, this was more of a social event than anything else, although there were informal demos by Gerald and Mick.

Gerald turned a lovely oak apple that just begged to be handled, such was it’s appearance and shape. Perhaps a new line in stress relievers is on the way?

Mick turned a quick box for Colin and Roger and then started another project but ran out of time due to more pressing business…

…namely, eating the various goodies brought in for this, the pre-Christmas, meeting. There was too much food for our abstemious bunch, with plenty left over – better than not having enough. Very many thanks go to Joan and the others who brought in the food, set it up on the tables and then served the tea and coffee to wash it all down.

The raffle was held, as usual, for cash prizes, but was augmented by a good variety of Christmas prizes – whisky, cakes etc. First prize was won – as is becoming the norm – by John!

After this, tables and chairs were cleared away, lathes put back into storage, and the hall swept before we wished each other a Merry Christmas and went on our way.

My apologies, there are no pictures due to a technical glitch – I forgot to take them as I was too busy eating!

Club Night – 6th December 2017

This was the first meeting of the month so we had both a competition and a demonstration, details below.

Competition

Competition Table
Yew Lidded Pots

1st Three delightful lidded yew pots by Mick. Well deserved.

Hollow Turned Christmas Trees

2nd A zipper vase and some ring turned hollow Christmas trees by Geoff Warr helped him to 2nd place, the latter items based upon Richard Wright’s demo at the last meeting.  See the picture of the competition table, above, for the zipper vase.

Bird Box, Tony

3rd A nice little bird box by Tony – his first entry into the charts I believe. Congratulations!

Demonstration by Gregory Moreton

A NE bowl made out of robinia pseudoacacia burr (false acacia) was demonstrated by Greg for the first part of the evening. He commenced by removing as much bark as possible to prevent it flying off whilst turning.

The blank was mounted between centres, oriented to provide a fairly even top rim and therefore a reasonably even top rim thickness – something to look out for when turning NE bowls.

A  bowl gouge was used to shape the outside and a chucking tenon was cut with a spindle gouge (less tearout than a skew chisel). In the restricted space available, Greg took care to keep the gouge steady.

Once satisfied with the shape, he power sanded it through the grits, finishing with 320 grit before reverse mounting it onto the chuck and hollowing out.

Throughout the demo, there were plenty of little asides and comments as to why Greg did things in a particular manner – useful tips, e.g. when hollowing, if the form is deeper than it is wide, a 45° bevel won’t go round the bottom; use a 55-65° bevel, with a relief bevel to avoid too much rubbing.

Leaving a step in the centre of the bowl makes the final cut easier to engage cleanly when starting with the 65° gouge. Sharpen before the final cut, to get the best possible finish off the tools.

Even wall thickness is important as the edge is heavily indented meaning that the rim is visible well down the sides of the bowl and it will look odd if noticeably thicker or thinner than other parts of the edge.

Notwithstanding the above, as this bowl will be made without a foot, it was  left thicker at the base to add weight and stop it rolling over.

Following this, Greg power sanded most of the inside of the bowl with the lathe stationary (lots of sharp edges!) and then finished off the bottom by power sanding with the lathe rotating.

The last scraps of bark were removed from the natural edge with a wire brush and then finally cleaned up with a nylon brush in a drill.

The bowl was reversed again, this time onto a foam jam chuck, held in place by a live centre with a washer placed on the point to avoid splitting the spigot – a home-made ring centre in effect. The tenon was removed initially with a bowl gouge, changing to a spindle gouge for the final cuts. The final cut left a scored line to enable breaking off the remainder cleanly.

Although not done for the demo, he usually finishes off with around three coats of finishing oil, allowing 24 hours between coats, rubbing back lightly with Webrax between the coats.

After the raffle draw and a welcome tea break, Greg demonstrated making one of his signature yew forms.

Yew Tube. A piece of yew branch cut diagonally across the ends was mounted eccentrically between a 19mm augur in the headstock and a live ring centre in the tailstock. The eccentricity is to make the most of the yew figuring.

With the lathe turning slowly, the tailstock was used to press the wood onto the augur thereby boring a hole throughout it’s full length, stopping just short of contact between the augur tip and the live centre.

Next, a ready-made wooden arbour was mounted in the chuck and the tube mounted upon it with the tailstock brought up as support while the outside of the tube was shaped and brought down to about 1.5mm wall thickness in the centre.

The ends were faced off and the tailstock end hollowed out, leaving a tenon.

He removed the tailstock and parted through to the arbor at the headstock end before reversing the workpiece onto the chuck and tidying up the end with a spindle gouge so that both ends matched.

The spigot was removed by cutting towards the centre drilling.

Duct tape for additional security

Greg reversed the tube once more, onto a jam chuck. He brought up the tailstock and then used duct tape around the chuck and workpiece for additional security.

Finally, he tidied up the end and used the tailstock for support whilst cutting through to the drilled hole to release the completed item.

The final stage would be to sand and finish the Yew Tube but we had run out of time and so Greg finished the demonstration at that point.

Completed YewTube next to demo item

Club Night – 15th November 2017

Although there was no competition at this, the second meeting of the month, there was a table full of goodies turned by Richard Wright, our demonstrator today. He made these for a charity sale and I’ve added a picture below because there was a good variety of items, always helpful when looking for ideas or inspiration. There are more pictures of these in the 2017 Gallery.

Richard’s output

Demonstration by Richard Wright, club member

Richard demonstrated how to make ring turned Christmas trees. Ring turning involves profiling a disc of wood to form a ring with the shape of the desired item, commonly animals or trees. Once completed, the ring is sliced radially to produce multiple copies of the shape. Keeping the slices thin minimises the wedge shape that would otherwise be formed if taking large slices. Ring turned items are usually solid but Richard’s trees are hollow, being made up of two sections glued together.

Ring turned Christmas trees. There was some discussion over the merits of turning the ring with the top of the tree on the inside of the ring or on the outside. Richard’s view is that the former is better as the tree naturally tapers towards the top when it is cut from the ring after turning is completed – as would be expected with a real Christmas tree.

The first step was to make a thin template out of thin ply for use in getting both the inner and outer ring profiles correct. The template was stained black to aid visual comparison in use.

The blank was mounted on the chuck and the face trued to make a disc. Richard used a steel rule to test it for flatness and said that, if struggling to get it flat, it can be sanded flat using abrasive wrapped around a piece of flat wood.

He cut a radial slot in the disc in order to allow insertion of the template later on so that it can be offered up against the developing ring profile.

Before commencing shaping of the disc, he placed the template in the slot and marked the external branches on the disc, then lightly scored the disc circumferentially in way of the marks with a parting tool.

With these preparations complete, he started by shaping the outside of the tree on the rim of the disc – the bottom of the tree – and then continued shaping using a variety of tools including a custom ground scraper.

Turning the outside of the trees

For the tool collectors among you, Robert Sorby have a few tools for ornamental work which were originally designed for making Christmas decorations. Good stocking fillers perhaps?

After a light sanding the disc was reverse chucked and dished on the other side in readiness for making the inside of the hollow tree form.

With the aid of the template as before, Richard marked out the inside branches and shaped them, taking care not to go through with regular checks against the template.

Once complete the ring was given a very quick and light sanding and parted off.

At this point the demo was considered complete as the next stage would be to cut the ring diametrically in half and then to glue the halves together.

A completed piece of Christmas Tree ring, ready for cutting into individual trees

Once the glue is set, it can be cut into the Christmas tree sections and decorated as required.

Tea light holder. After the ring was completed, there was still a little time left so Richard made a tea light holder of which, unfortunately I don’t have any pictures.

It was a very simple affair made out of an old square tableleg, rounded off on the top and bored out to accept a tealight holder (it is unsafe to put tealights directly onto wood). Despite being simple and quick, it was visually very effective, with bags of character due to the distressed nature of the wood.

That was it for the evening, Richard was thanked for his very interesting demonstration, and everything was cleared away until the next time.


Club Night – 4th October 2017

Hands-On

This was a hands-on session with a number of people beavering away at various projects, but no pictures I’m afraid as I was busy being shown how to get a good finish on a large lump of awful, nameless, Welsh pine. Thanks Mick!

Competition

This month’s competition had an unusual diversity of styles with, amongst other things, a lovely little table complete with mouse and candlesticks, a beautiful lignum vitae vase and a very nice inlaid platter.

Mouse Table


Lignum Vitae Vase


Inlay Platter