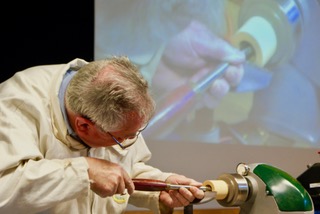
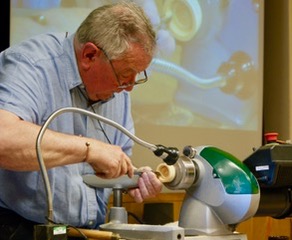
For today’s meeting, Gerald was demonstrating the techniques and tools he uses to make his lovely little boxes with screw tops. He also had a selection of other boxes on show to illustrate a few of the many variations on the box-making theme.
Demo by Gerald Hubbard
Boxwood Box – After a short introduction, Gerald mounted the boxwood blank onto the scroll chuck and parted off one third of it for the lid. Upon inspection, the parted faces looked good, with no voids as are quite often found in boxwood.

He hollowed out the box using a long-grind spindle gouge, forming a slight undercut to the opening and finishing off with a scraper to clean up the inside.

Next, he shaped the outside with a spindle gouge and formed a spigot for the lid using a beading and parting tool. Finally, a thin parting tool was used to form a rebate at the bottom of the spigot, for thread relief.
This spigot then had a thread of about 14 tpi formed upon its outside surface with the lathe running quite slowly. This is the bit that is considered difficult by many people but Gerald made it look easy, with deft use of the thread chaser supported on a Robert Sorby 893H tool support or similar type. The tool support is itself supported on the tool rest and allows free tool movement, invaluable when thread chasing. Gerald explained that, for thread cutting, the tool rest needs to be very smooth and the underside of the tool support needs to have a mirror finish to ensure smooth movement.
As best I can explain, the process was as follows. The thread chaser was first placed at an angle to the lathe axis against the top edge of the spigot to start the thread and then repeat cuts were progressively brought in closer to parallel to the lathe axis until actually parallel. As the thread chaser engaged with the newly formed thread it was engaged the thread and was pulled along to the bottom of the spigot, whereupon Gerald lifted it off before it struck the top of the box wall. This was repeated a few times until he was happy with the thread.
This left the top edge of the thread quite sharp and prone to binding up or breaking in use, so Gerald took the edge off it and then rubbed a bit of wax onto the thread to aid smooth operation.
He sanded the inside of the box and refined the outside shape using a skew chisel and a spindle gouge before sanding through to 320 grit, finishing off by applying a paste wax direct to the wood and buffing with a paper towel. The final finish was not gloss, but a very attractive matt sheen.
After a very welcome tea break, Gerald parted off the body of the box from the blank, and the (previously parted) lid was mounted in the chuck jaws.
Hollowing out the lid with a spindle gouge, there was more noise than expected; found to be due to a loose cover screw, quickly rectified. The lid was also checked for a secure fit in the chuck – just in case!
With nothing about to come flying off, Gerald continued with hollowing the lid, frequently offering up the box body to check the lid diameter, and to get a light witness mark to aid in the final shavings – which were taken with a scraper.
With the lid internal diameter now correct, he started cutting the thread at about 400 rpm. Although an internal thread, the procedure was the same as before, starting with the thread chaser at an angle to the edge of the lid, moving to parallel as the thread became established. This continued, with regular tests of the lid to check the diameter, until it would start to screw on, but then tightened up.

He explained that it is easy to carry on thread chasing until the fit is too loose so, at this point, he took the sharp edge off the top of the lid thread and tried the fit again. Perfect!
With the lid still in the chuck, the body was screwed onto it and the base cleaned up, taking light cuts with a spindle gouge, and detail lines added with a tri-point tool.
The base was sanded and waxed as for the other parts of the box.
In order to finish off the top of the lid, it needed to be parted off, reversed, and somehow held in the chuck. To do this, a piece of scrap was mounted in the chuck, turned to size, and an external thread put on it to suit the lid – same procedure as before. The lid was screwed onto this piece of scrap and shaped and decorated, the latter being in the form of beads generated with a tri-point tool. The technique here was to plunge the tool in, roll it, and drop the handle.
The lid was sanded and waxed as before, and the box was now finished.
A few tips:
- If there is torn grain, sand it with fresh wax on the wood.
- The body and lid edges can be adjusted so that the grain matches when the lid is screwed on.
- Don’t start the thread on the first thread of the tool; start one or two threads back.
- A thread may be easier to start if waxed the night before, giving the wax time to soak in.
For such a small box, this was a fascinating demo, and made to look very easy. Thread making definitely looks like a challenge worth taking on some time, although Gerald did say that most people need lots of practice to master it. Something else on the to-do list!
