Club Night – Wednesday 21st August 2024

We had a slightly unusual demo this evening, with Chairman Roger Gilbert and club member Gerald Hubbard both tasked with producing a natural-edged tazza from two similar pieces of yew.

The yew was still fairly moist so it turned nicely but that also meant that there was a risk of splitting from the pith – and some cracks were already visible. More of that below!
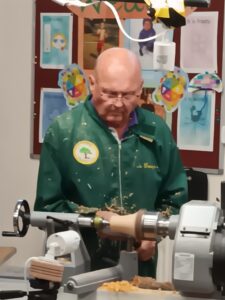
Roger

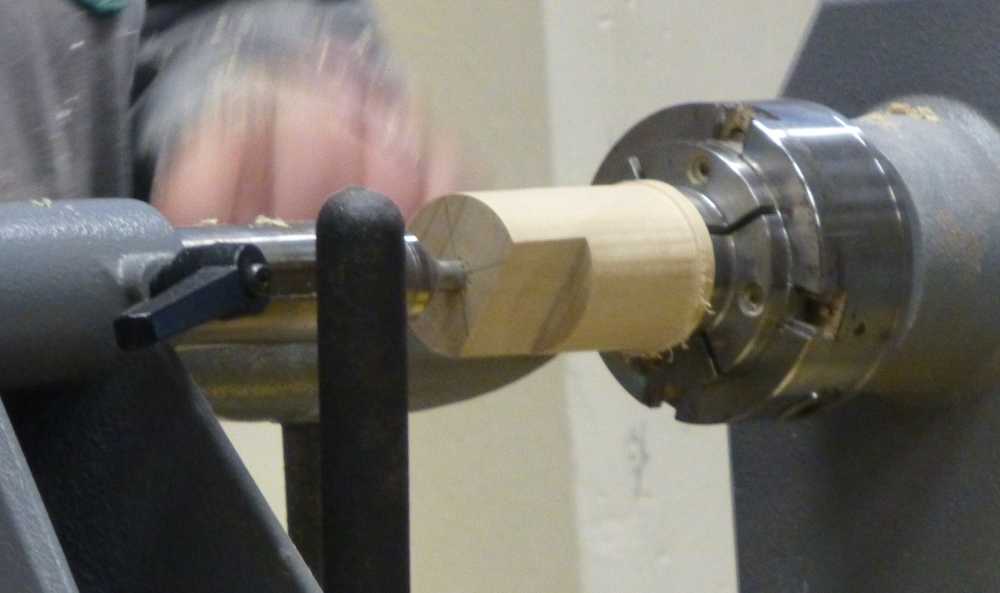
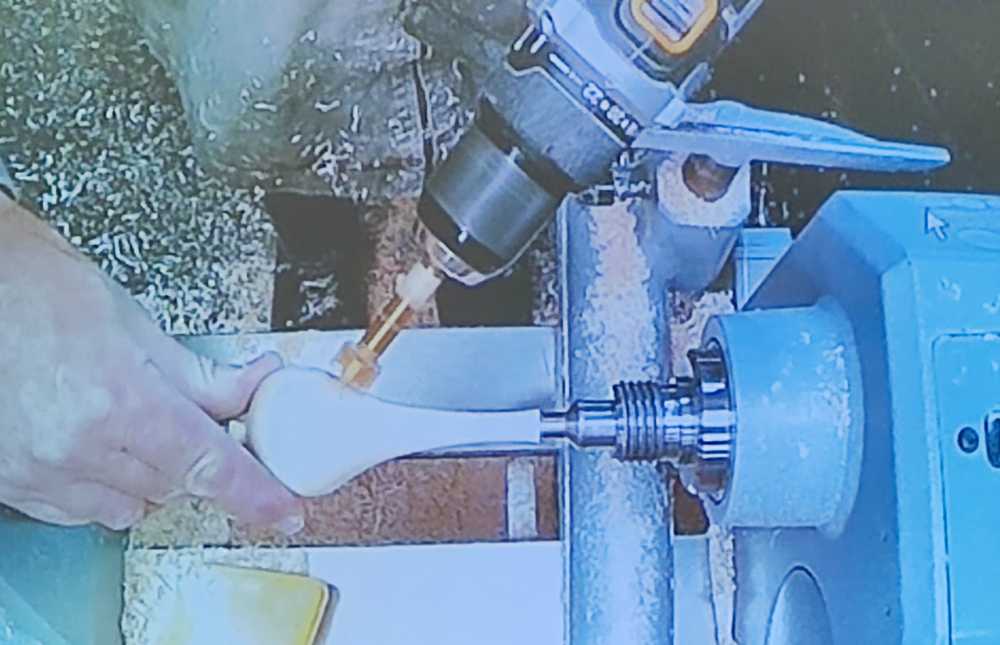
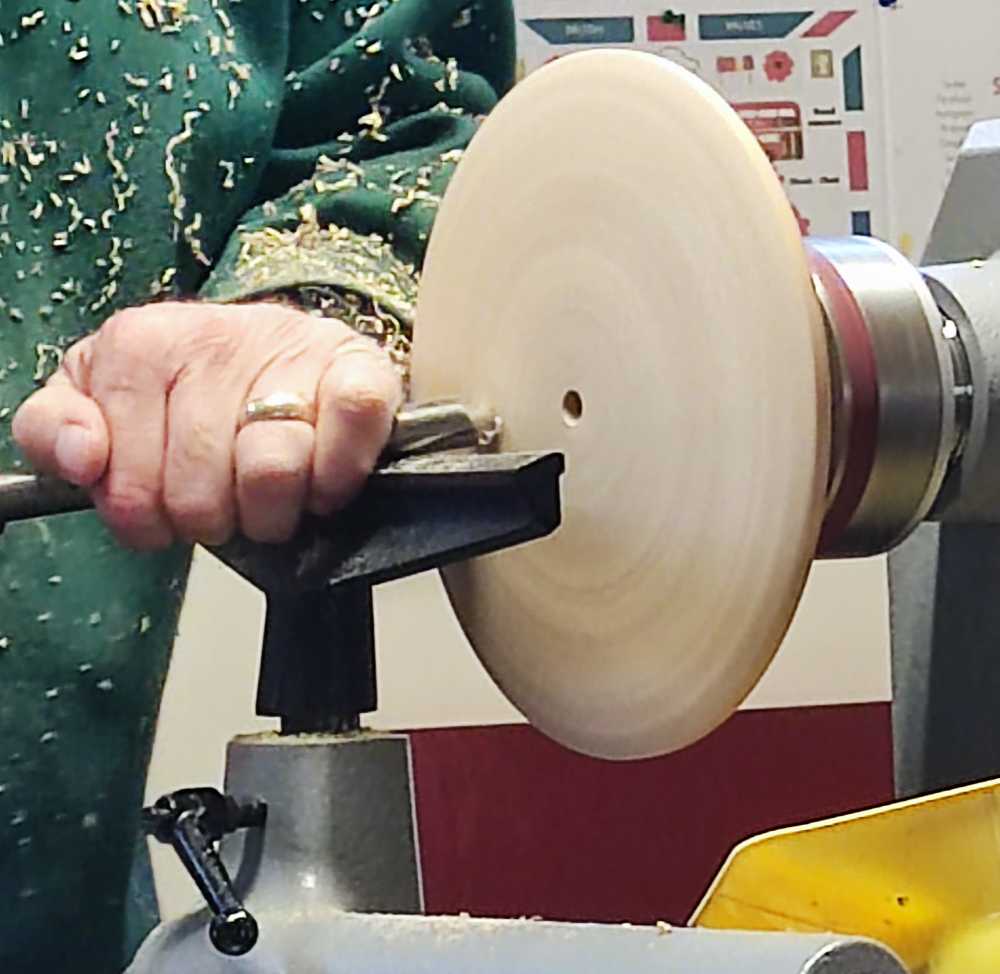
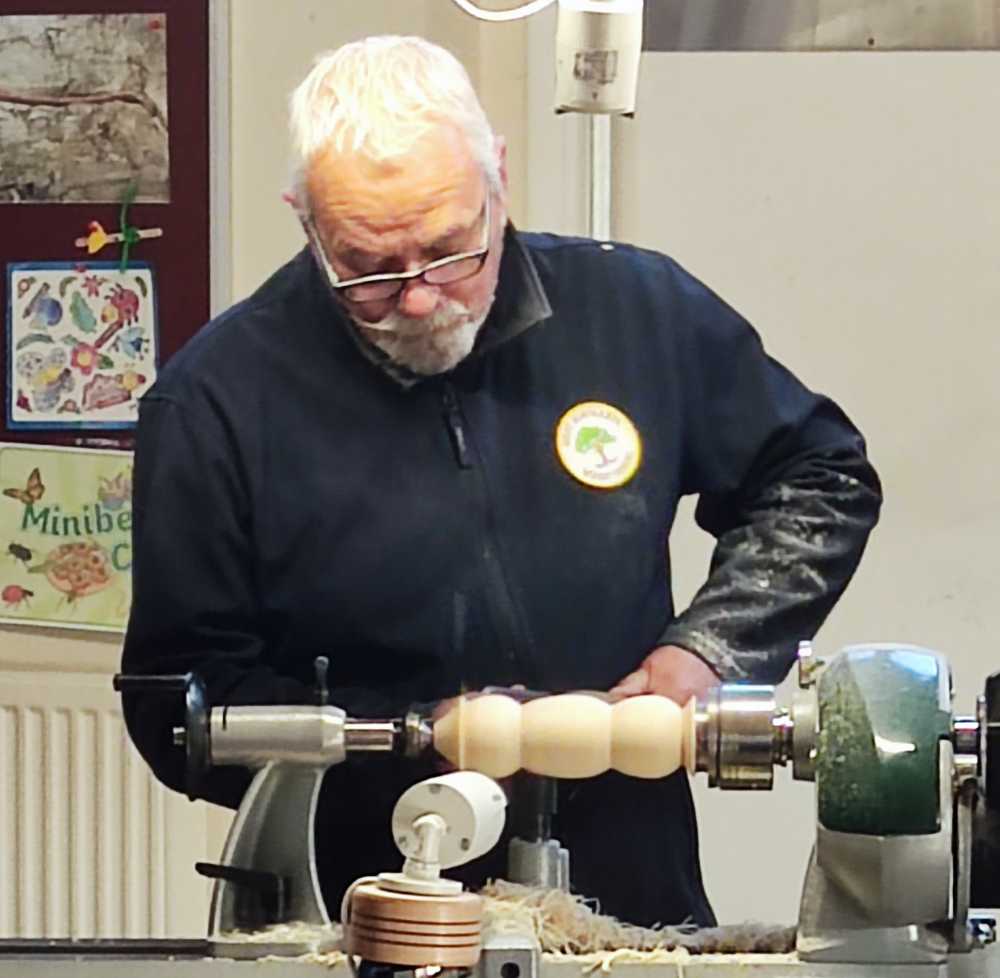
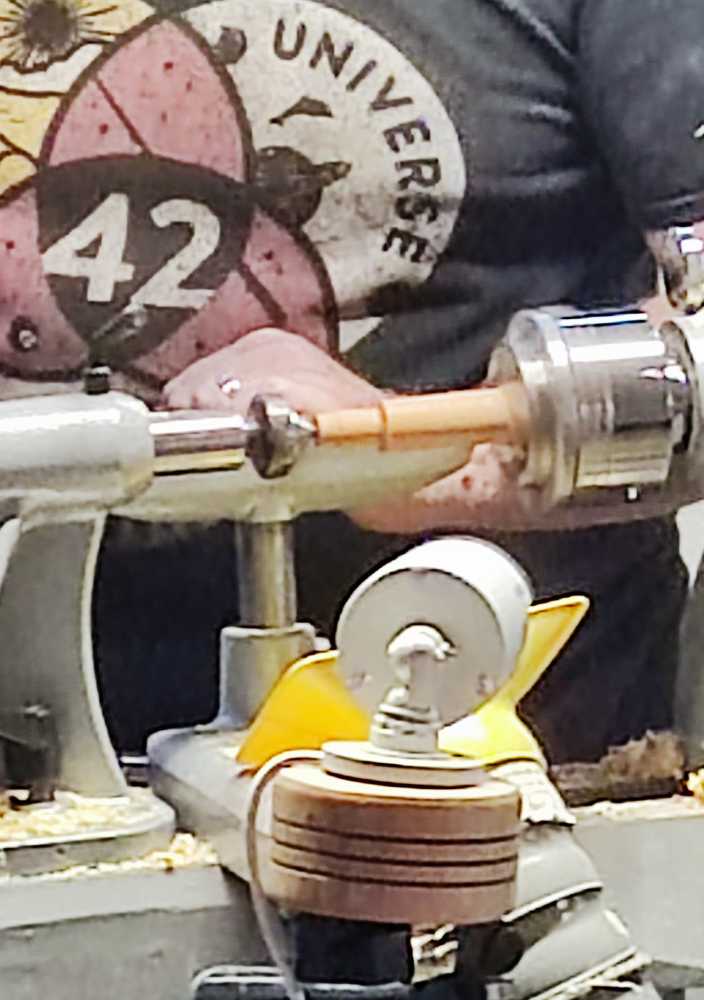
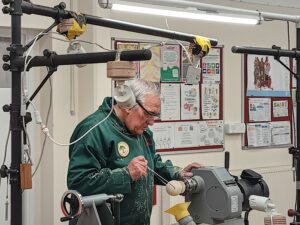
Roger volunteered to go first and initially mounted the blank between a friction pad in the chuck and a live centre, but this slipped a bit, so he quickly switched to using a steb drive in the chuck.


He started by reducing the area in way of the stem and foot with a spindle roughing gouge, then added a chucking tenon and mounted the wood in the chuck.


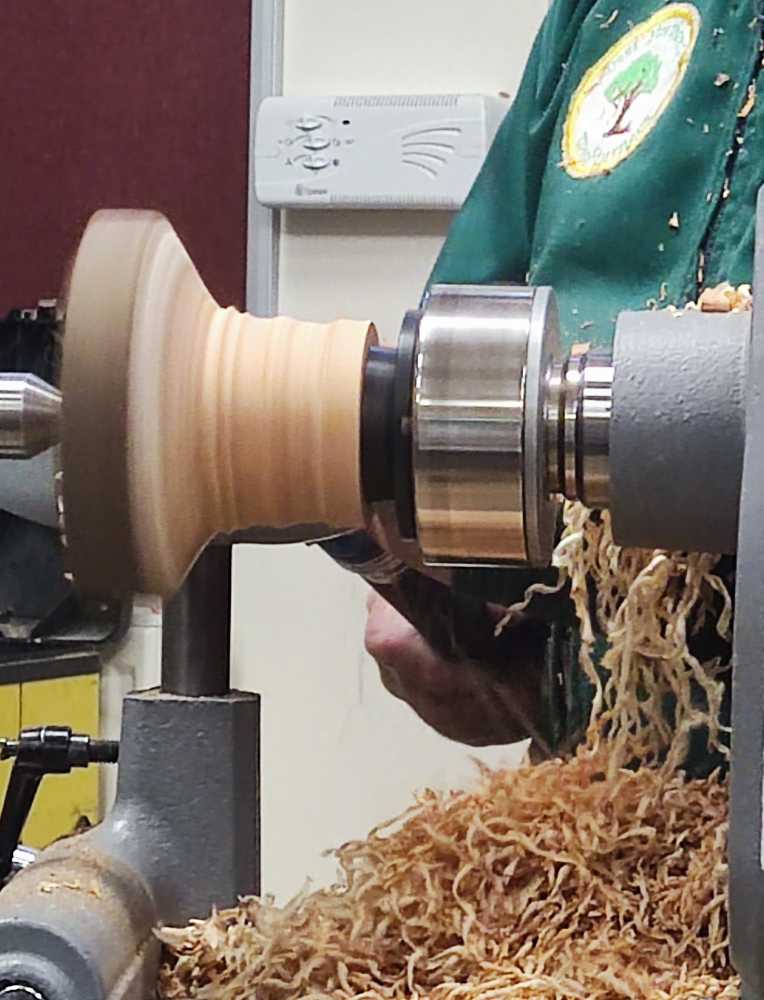
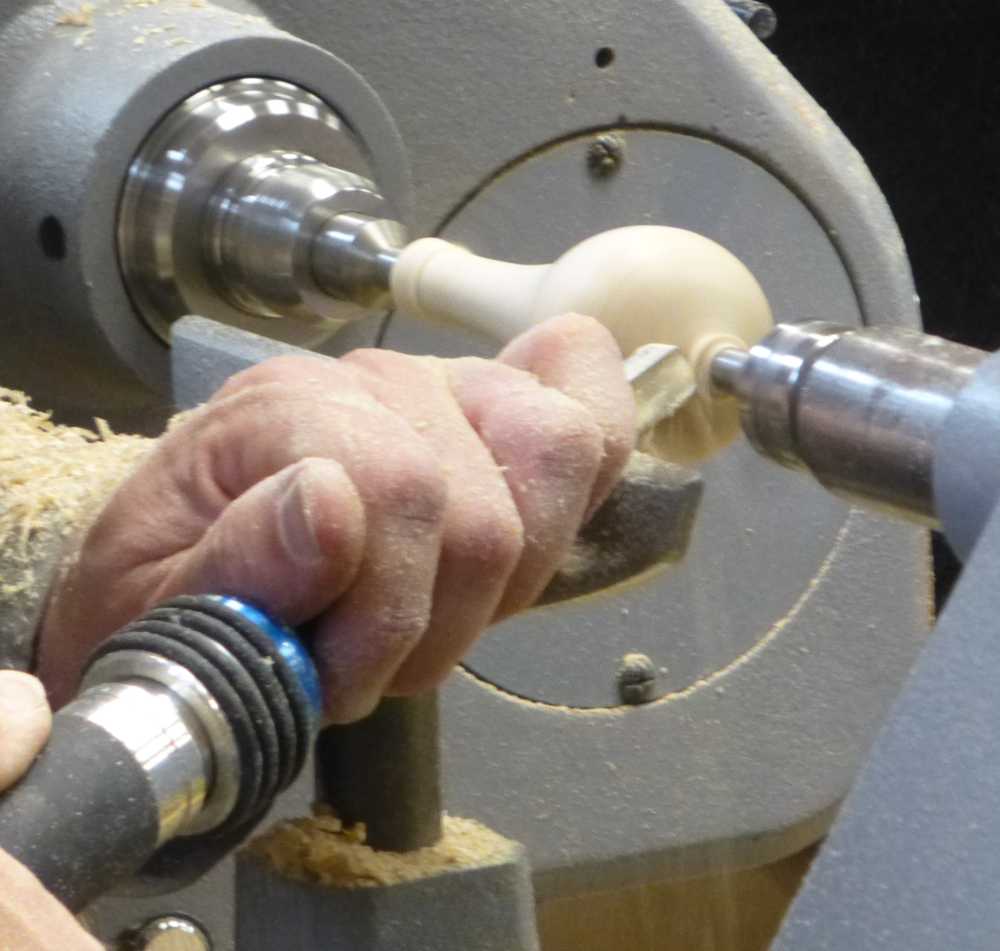
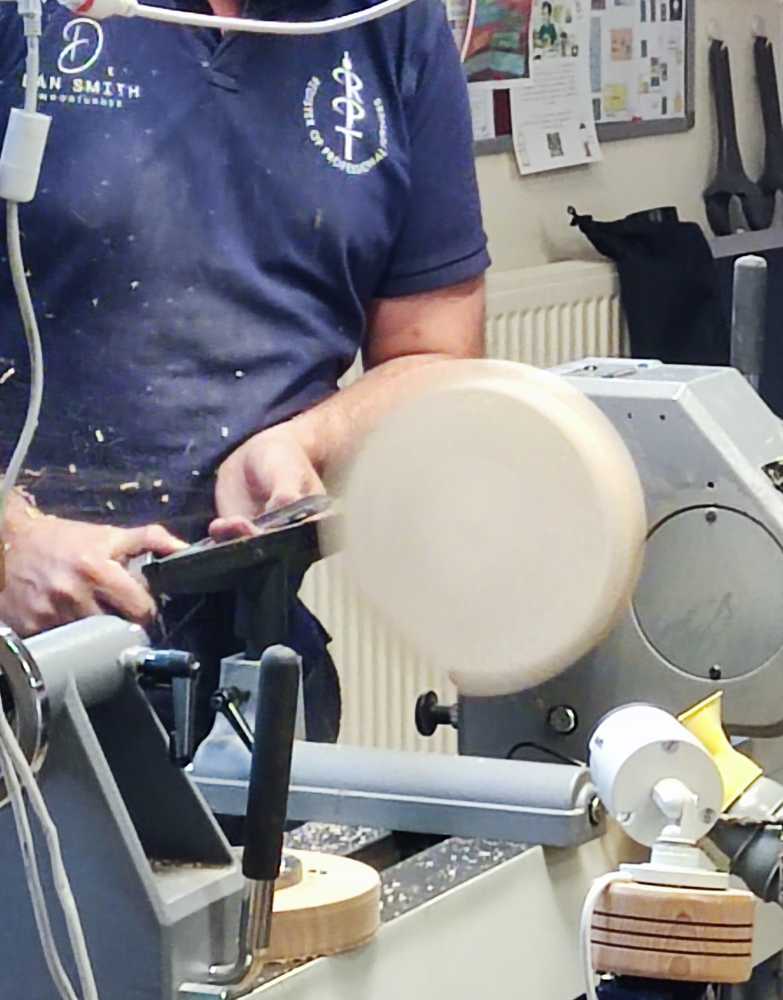
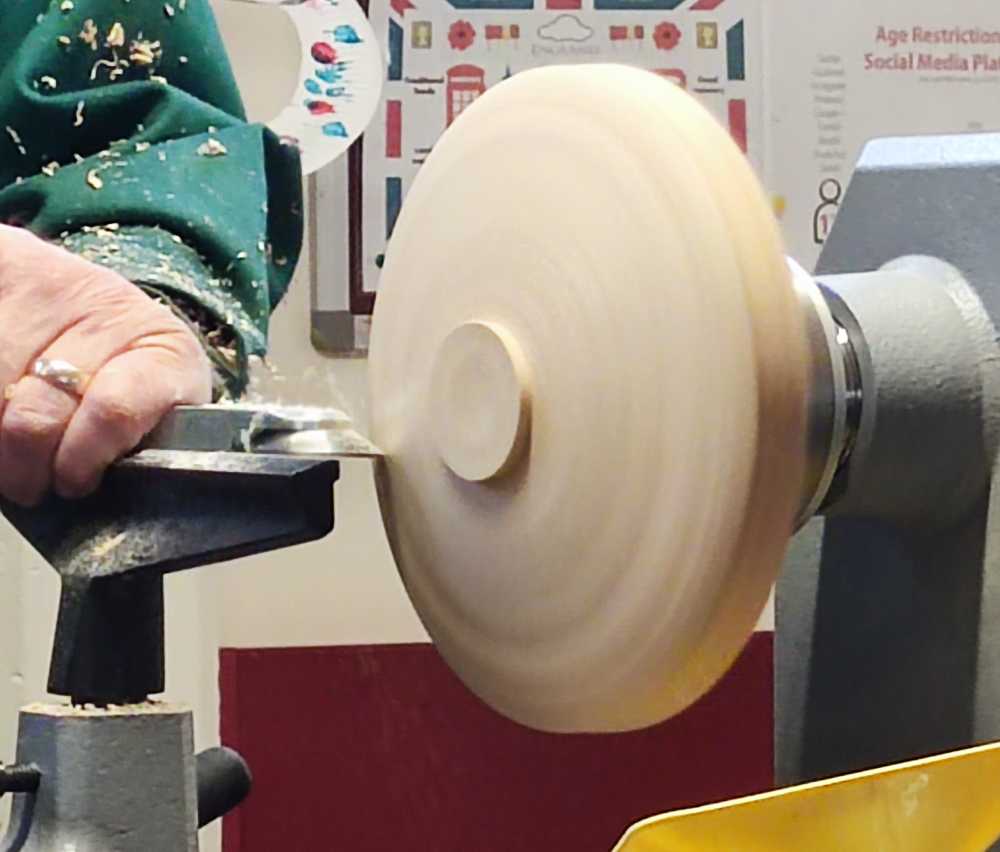
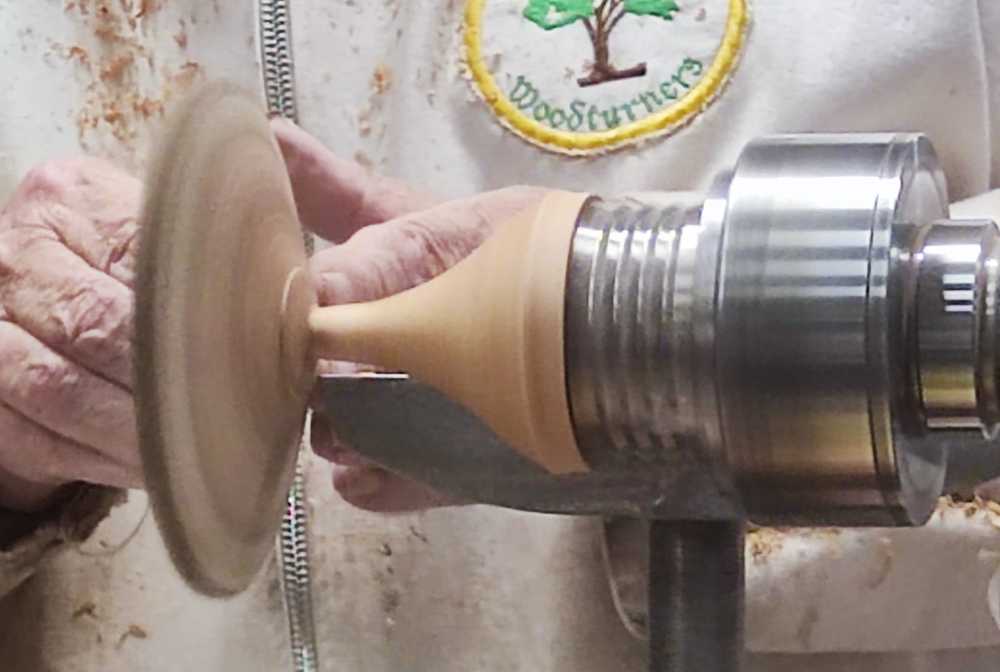
Using a continental spindle gouge and with the tailstock brought up for support he further reduced the stem area and then started dishing the tazza.


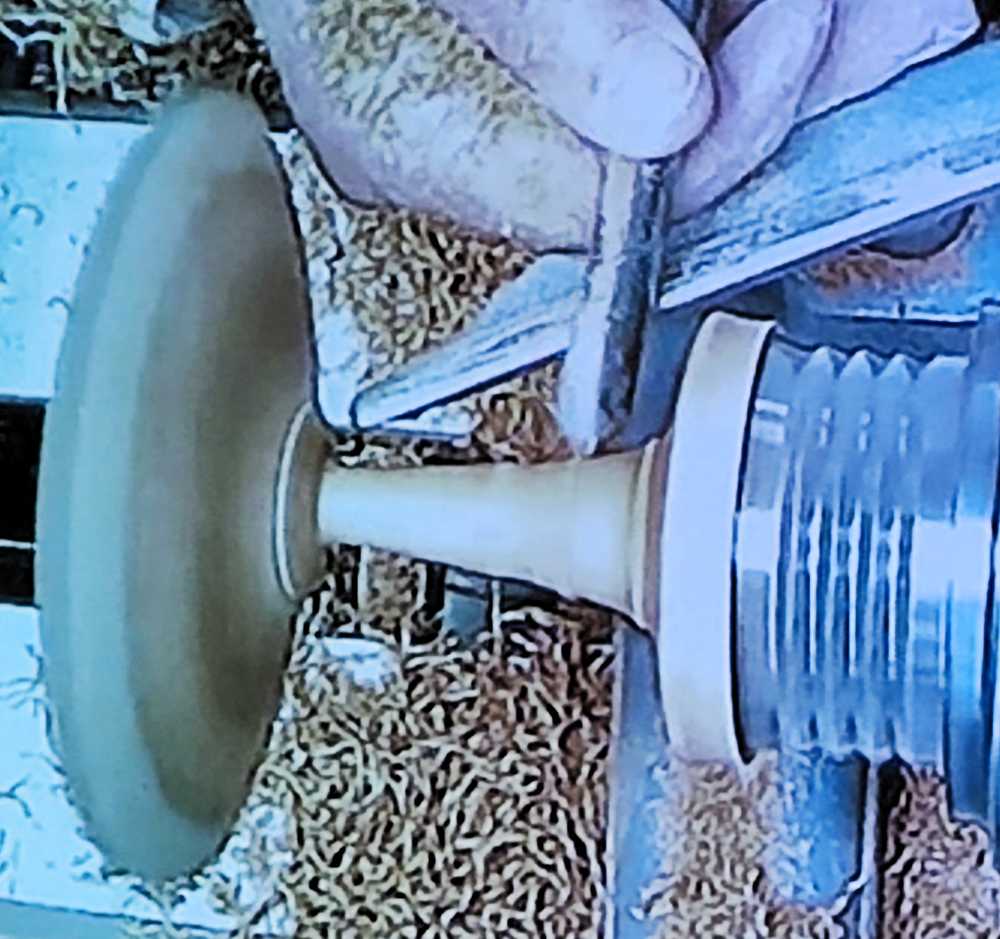
Carrying on, Roger continued the hollowing, and also worked the back (underside) of the tazza, lessening the wall thickness. Whilst thinning the stem down, he was particularly careful as a crack was propagating from the pith as he removed material.


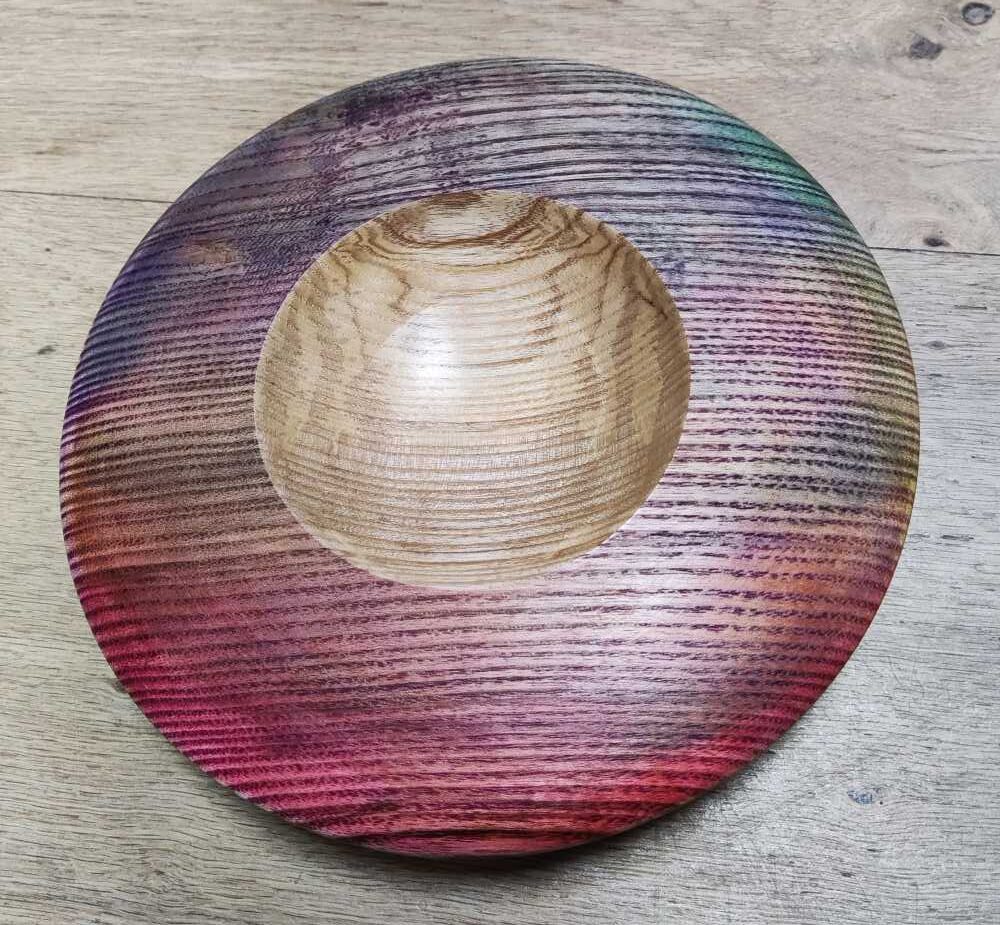
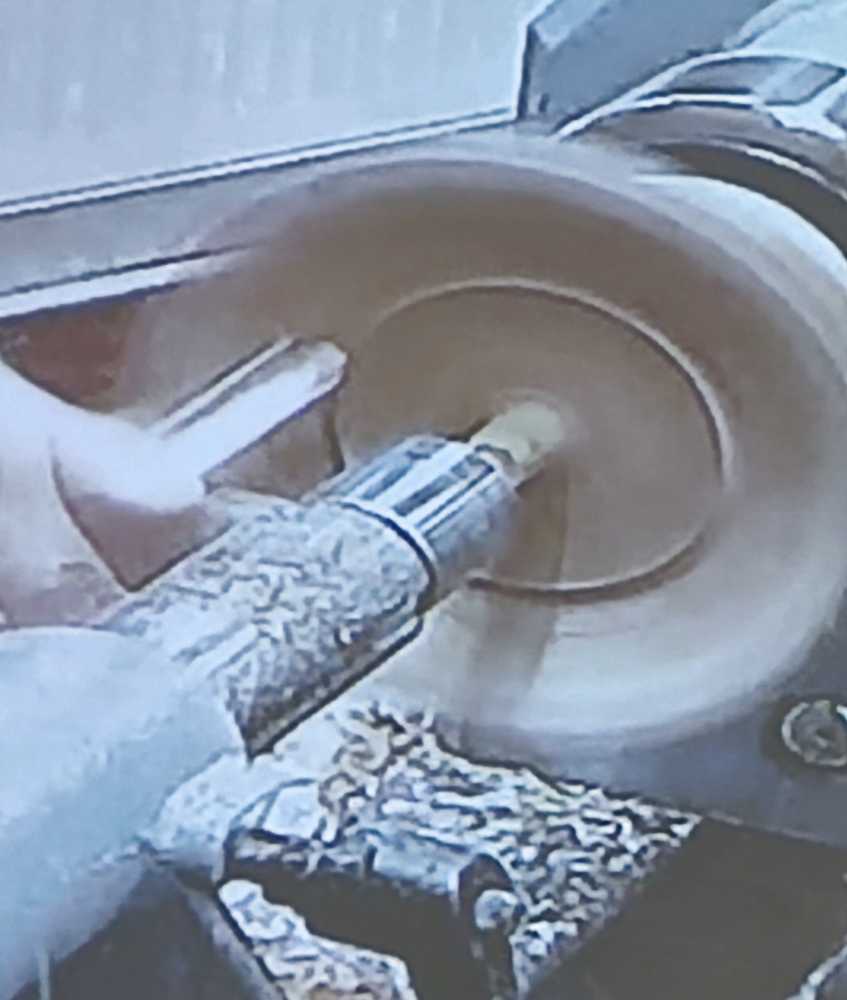
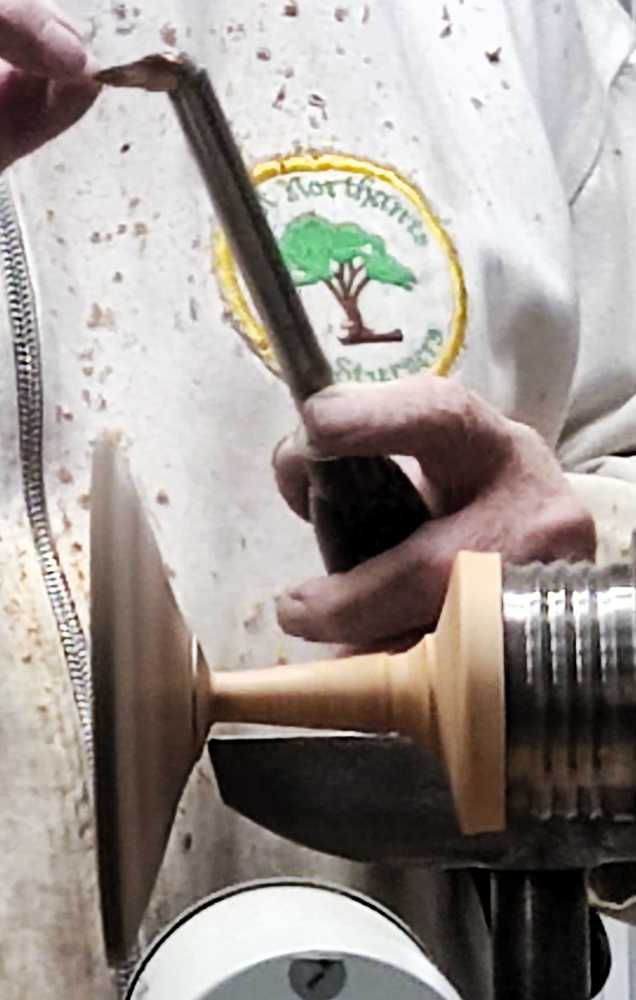
Once he’d gone as far as he dared, Roger did a few finishing cuts on the foot to form a nice ogee shape. Next was to pull back the tailstock and remove the stub in the centre of the tazza before sanding through the grits overall, applying sanding sealer and wax and parting off.

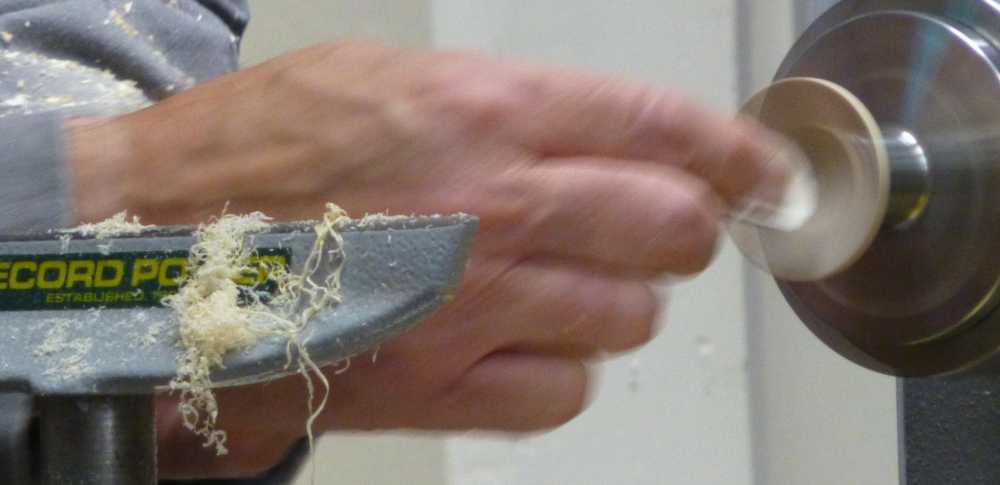
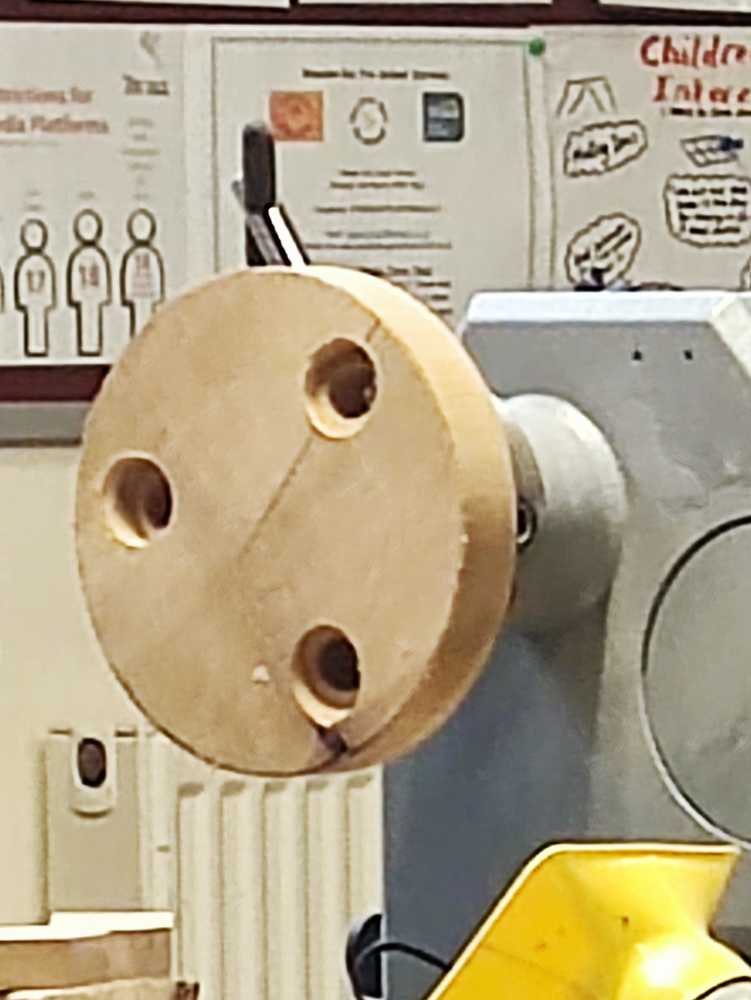
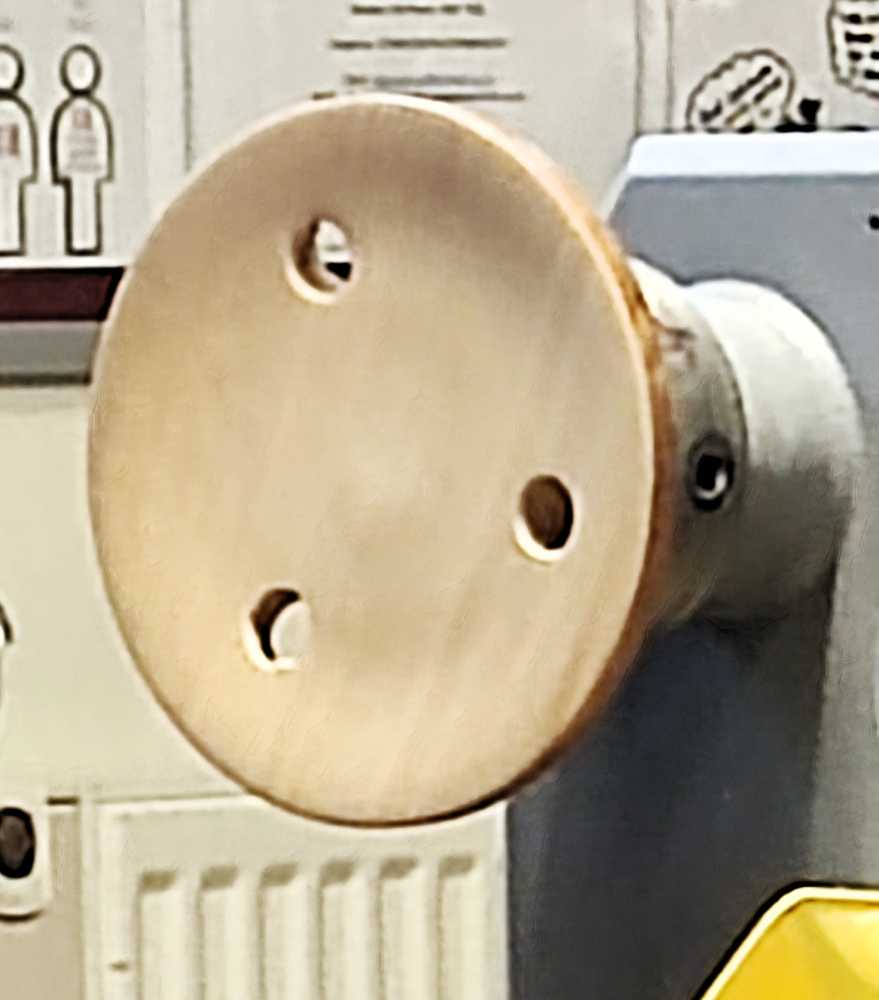
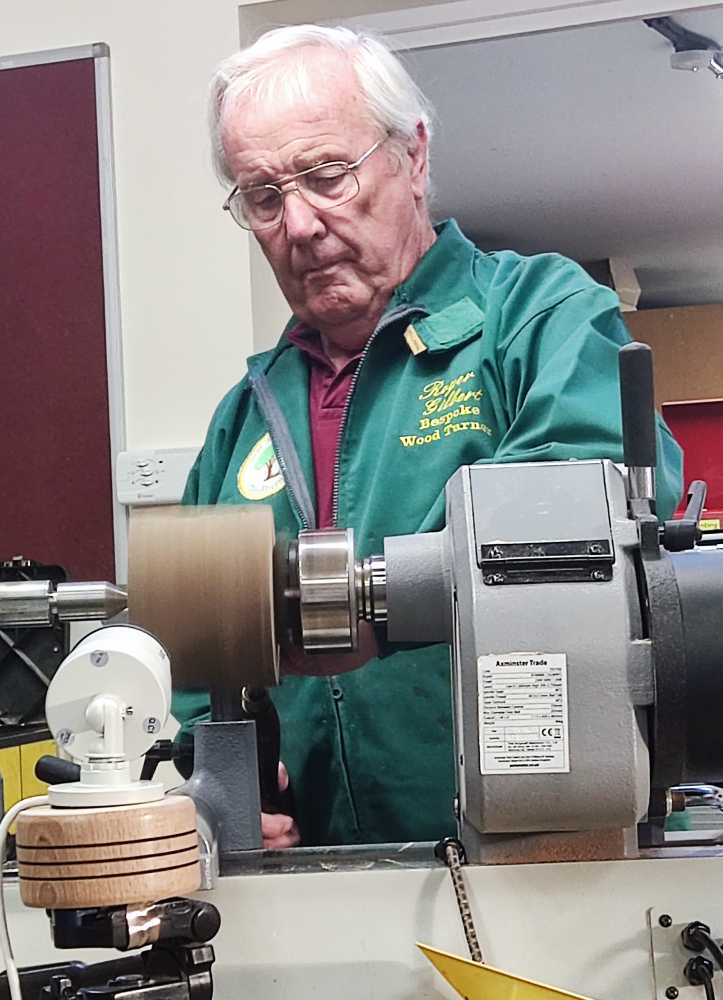
The final operation was to mount a sanding arbor in the chuck and clean up the underside of the foot.

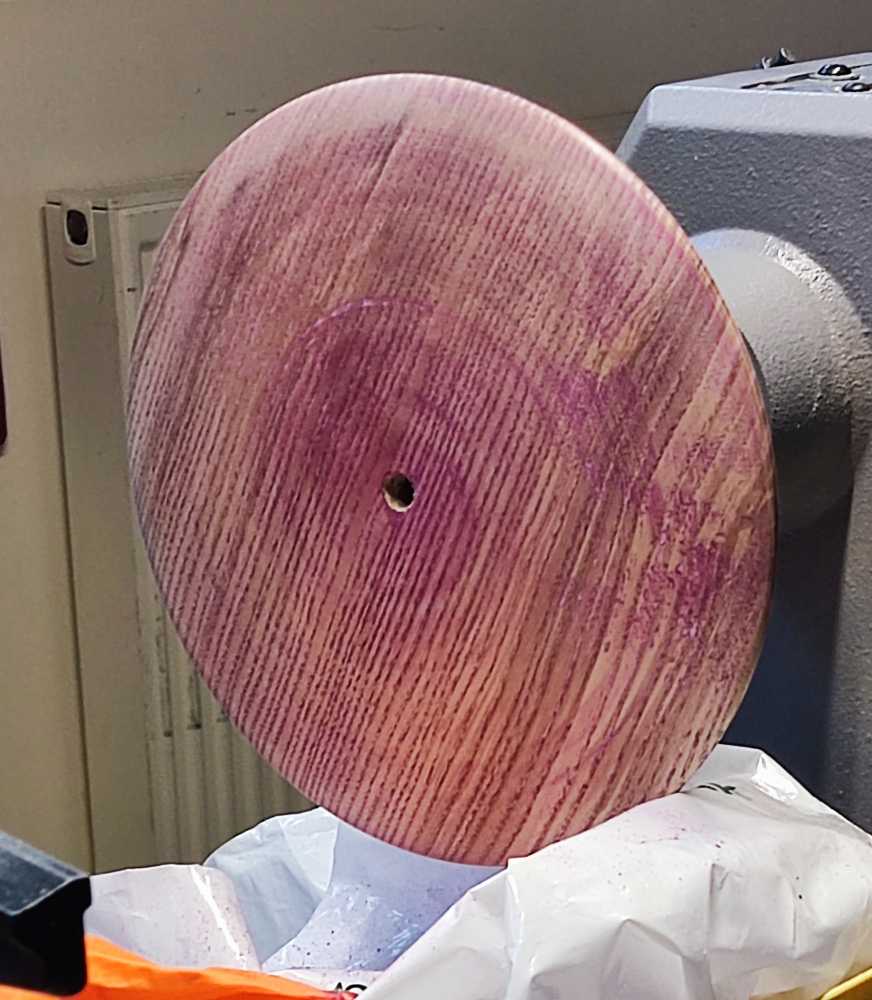
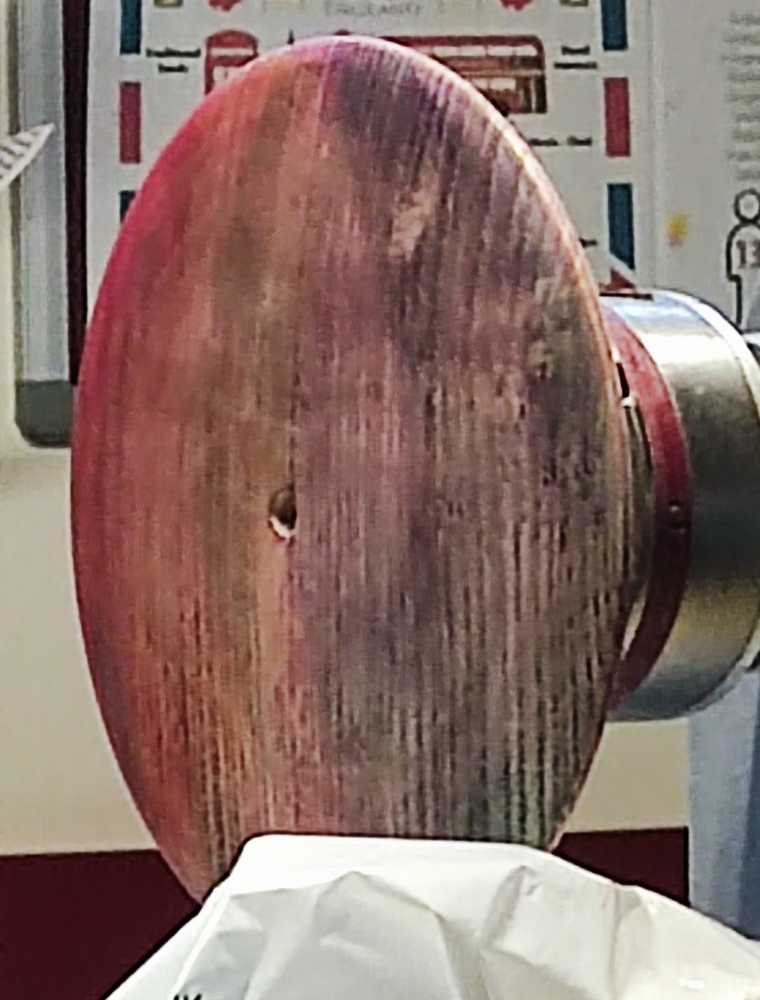
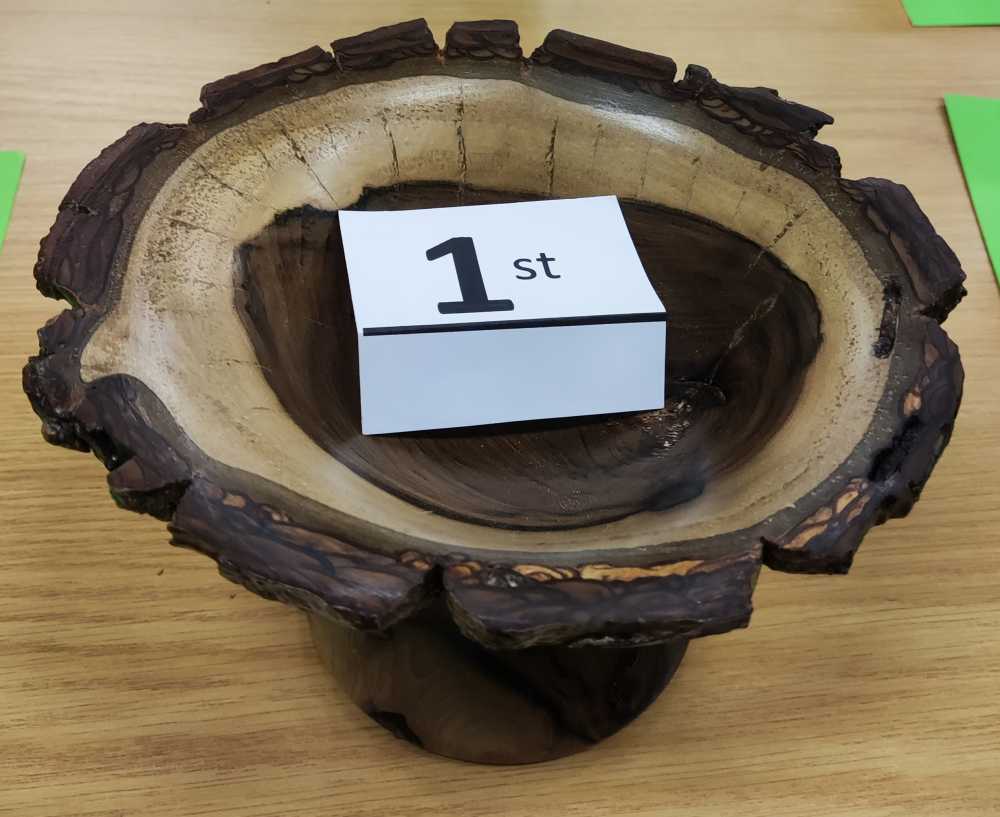
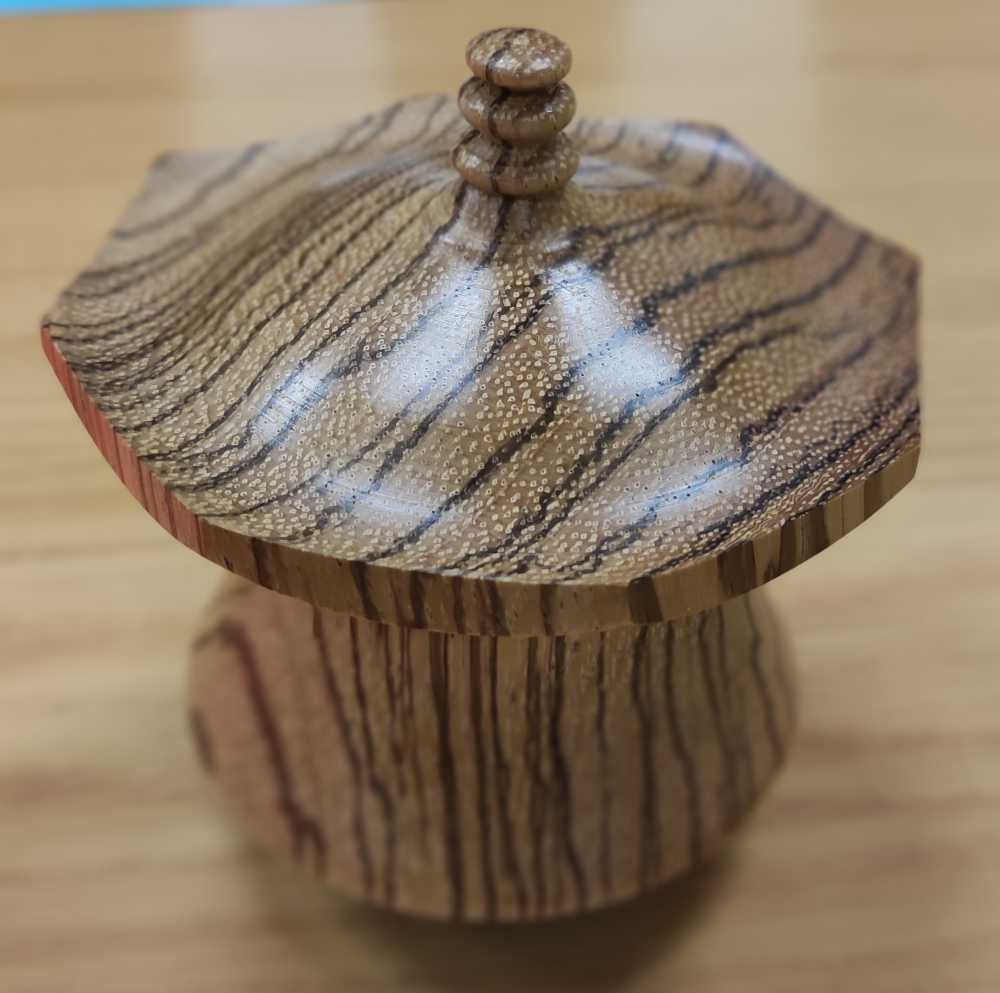
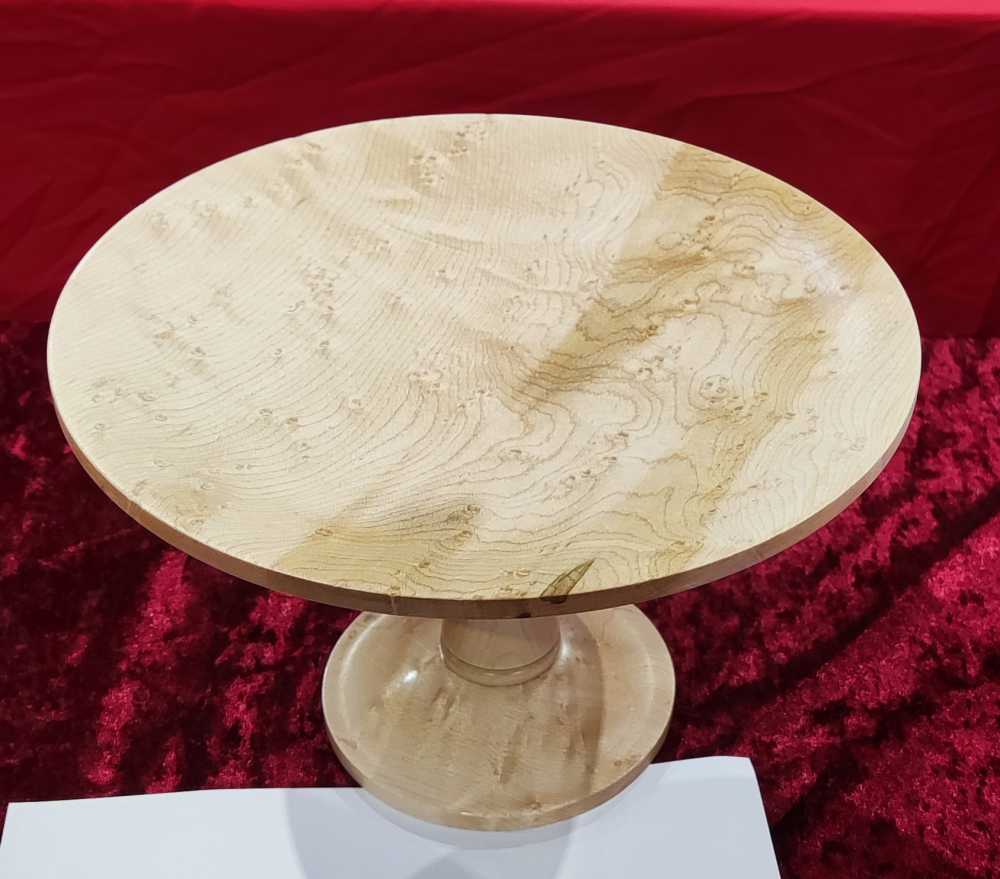
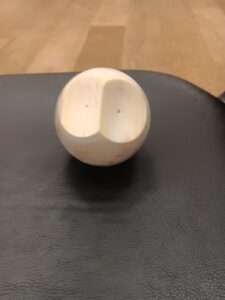
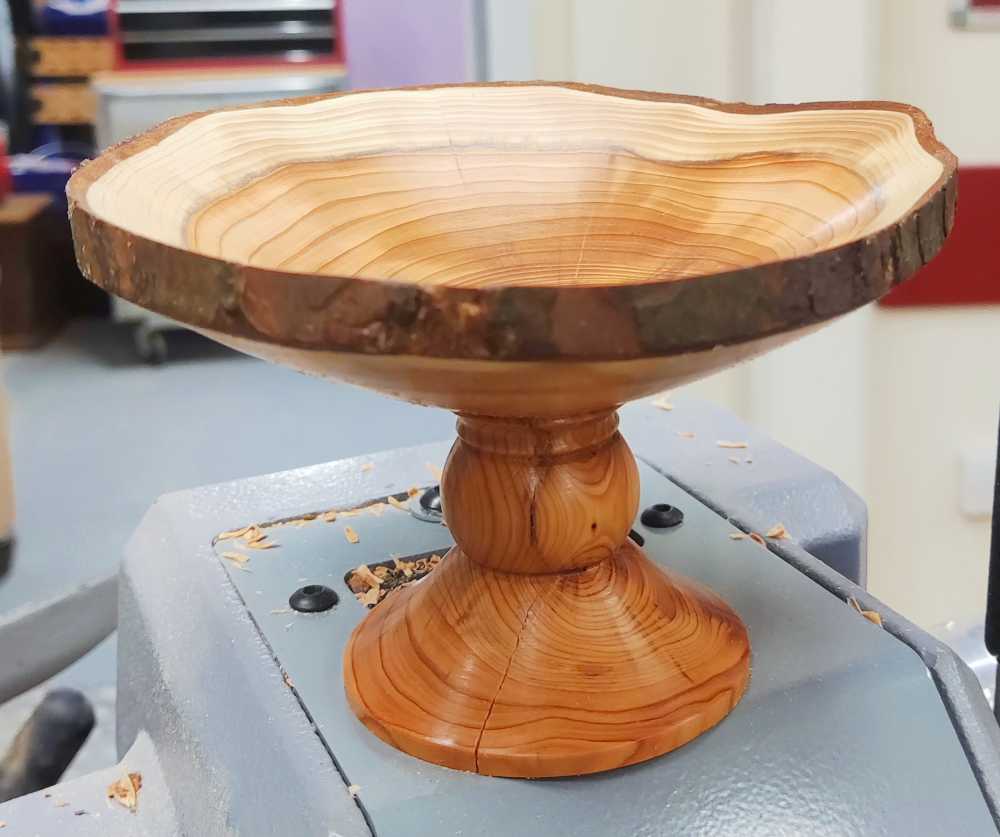
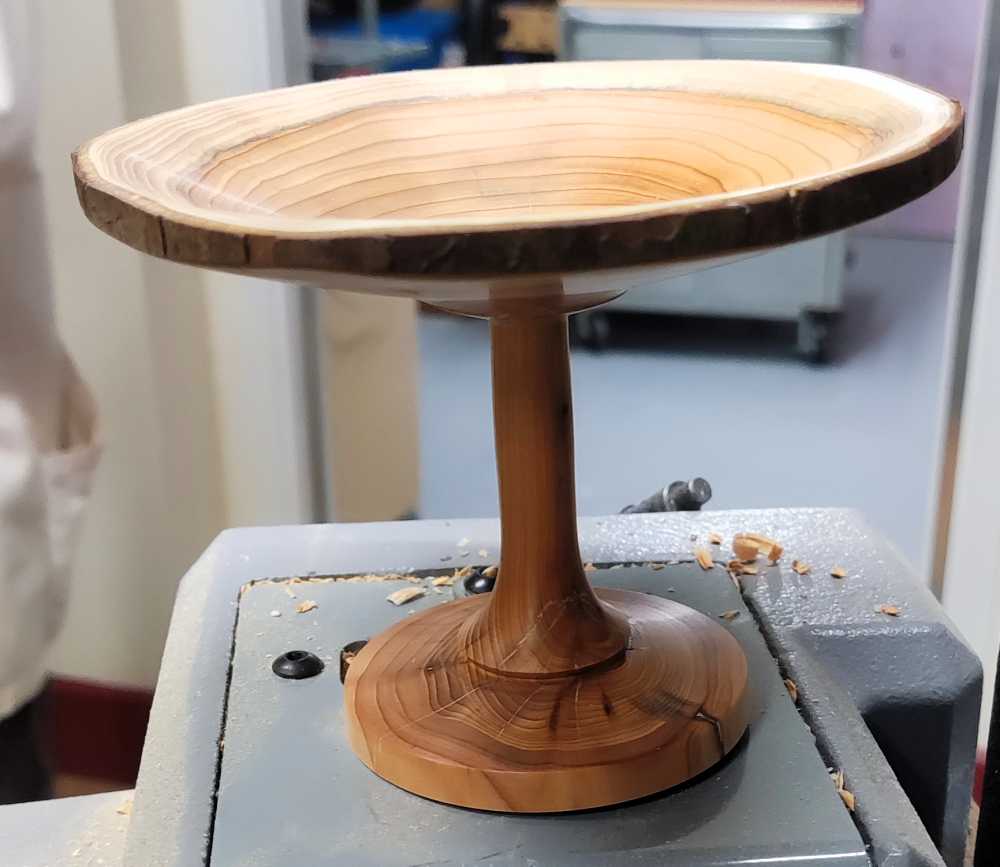
Overall, a nice little tazza and I think the picture shows the extent of the cracks that Roger had to contend with!

Gerald

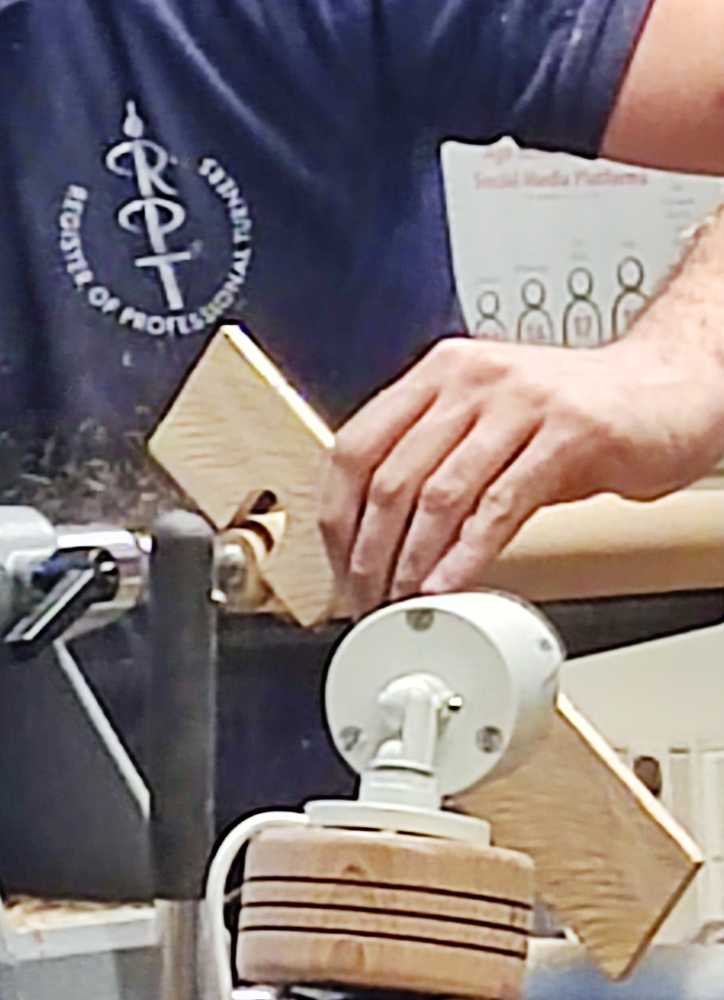
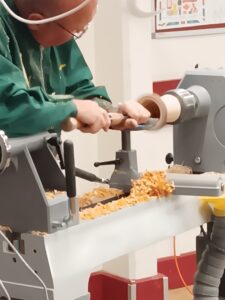
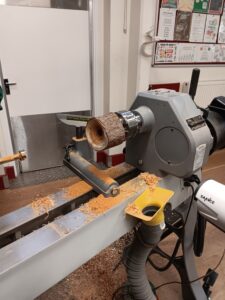
Like Roger, Gerald started with the blank between centres (steb drive + live ring centre) but pointed out that he likes to use a bowl gouge for much of the time, due to its greater strength and less chattering when working with a larger overhang.


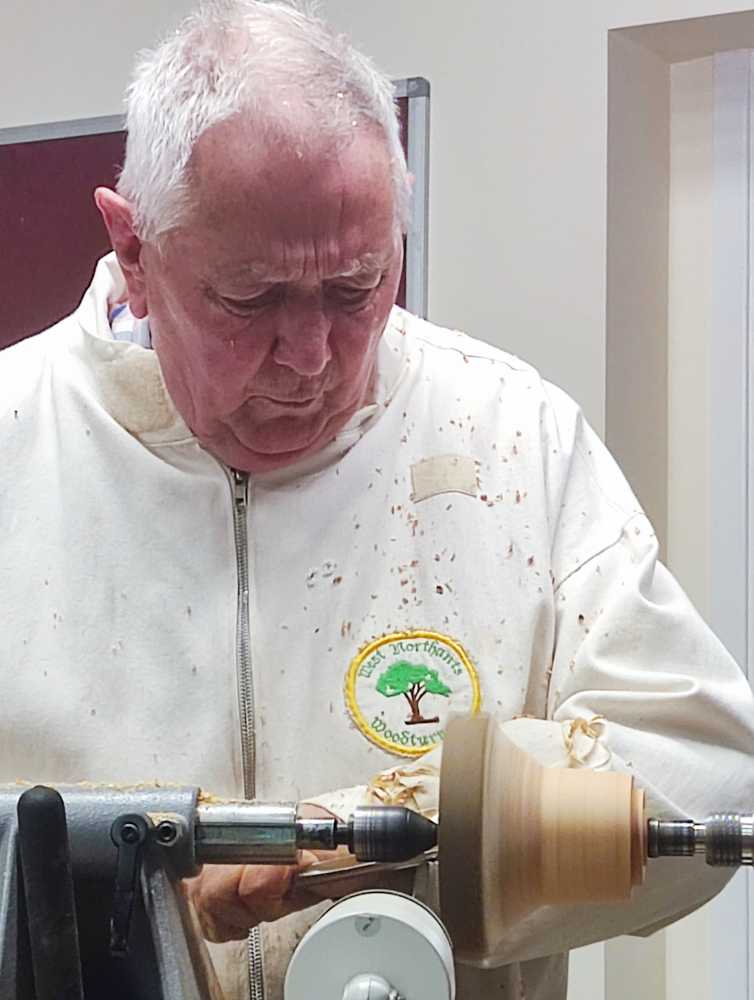
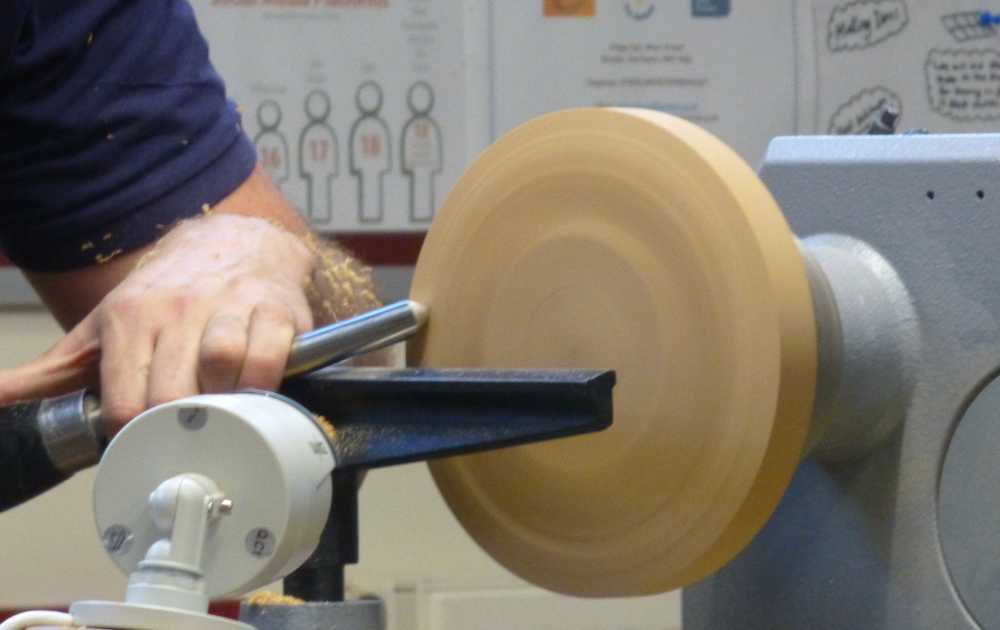
He reduced the area in way of the stem and foot and did an initial scooping out of the bowl before adding a chucking tenon and mounting the wood in the chuck.


Working gradually, Gerald worked on the underside and continued some hollowing, interspersed with reducing the stem diameter. Aiming for a nice thin bowl, he noted that the wood was moving as stresses were relieved.

He finished off carefully with some light shear cuts.

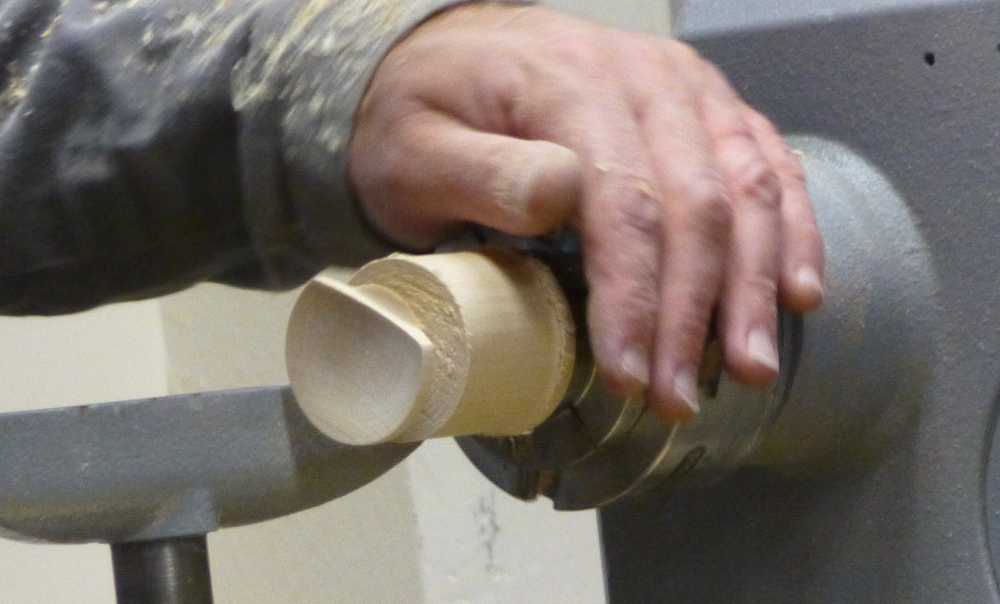
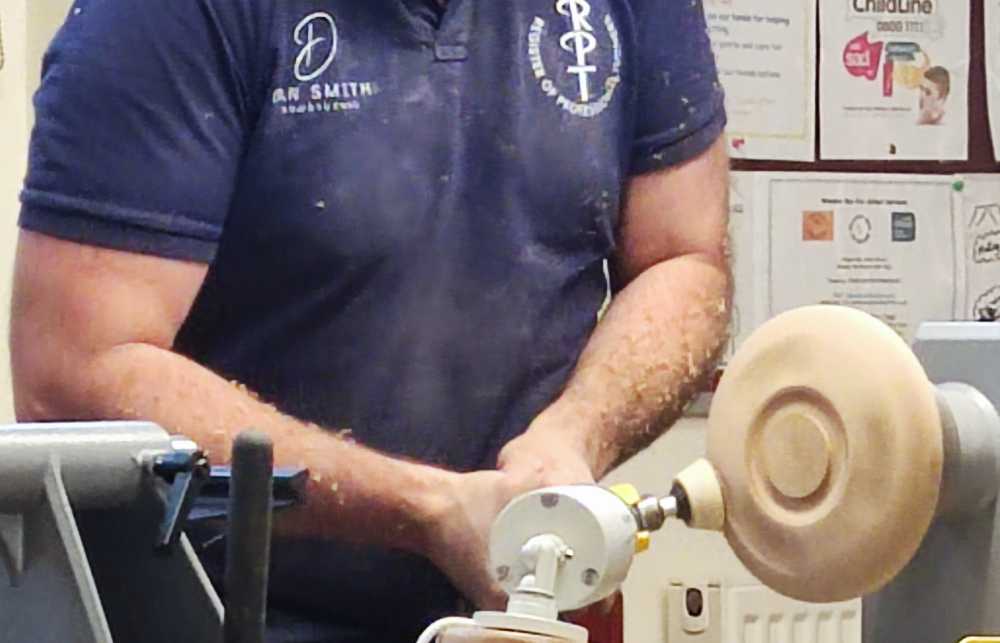
Sanding the bowl, Gerald reduced the lathe speed to avoid heat checking (there are enough cracks already!) and supported it with one hand.


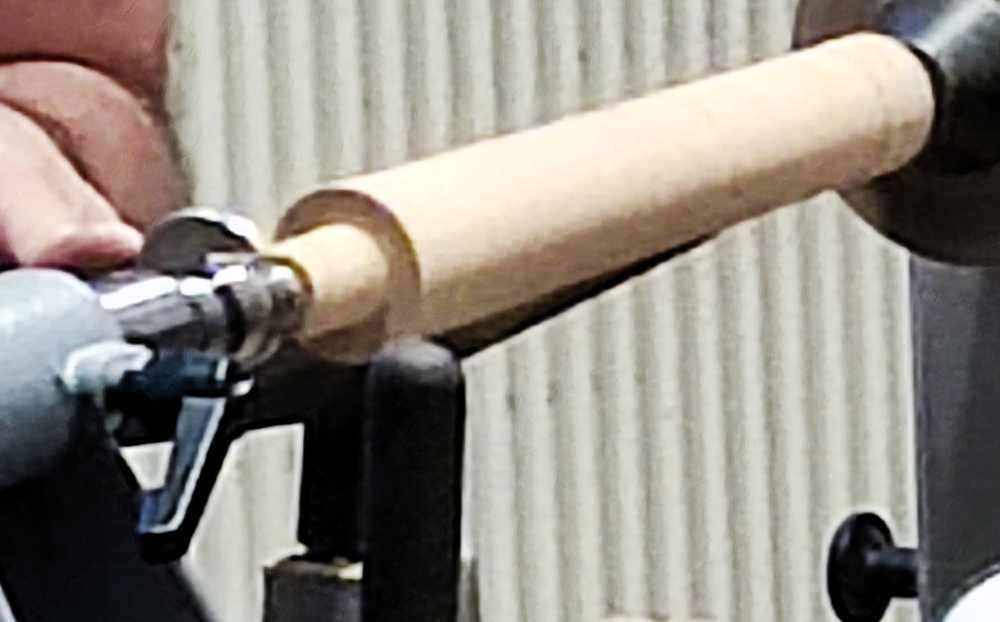
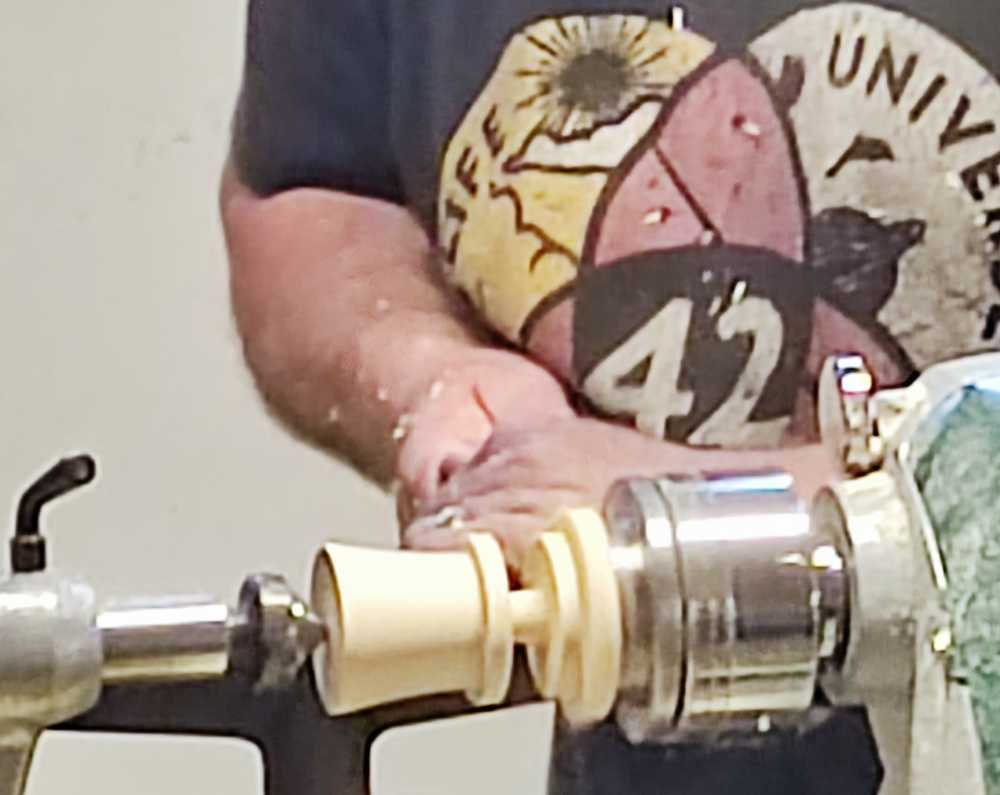
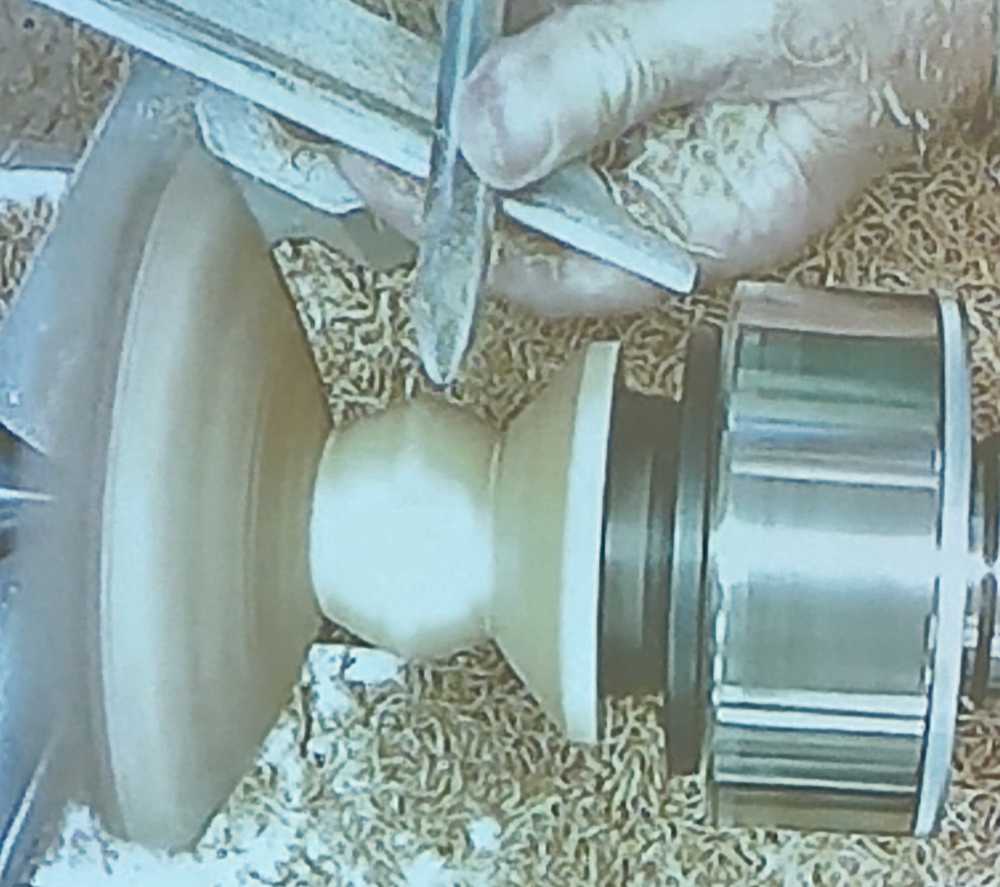
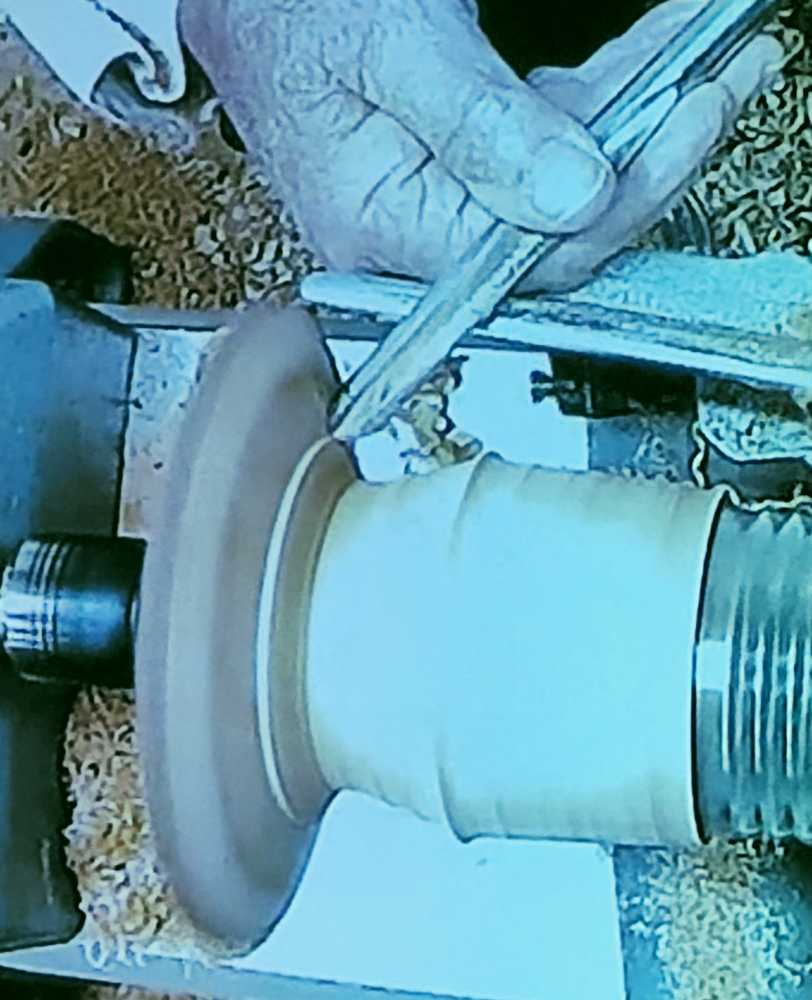
Once this was done, he moved back to the stem and carefully continued refining its shape and reducing its diameter especially towards the lower end.

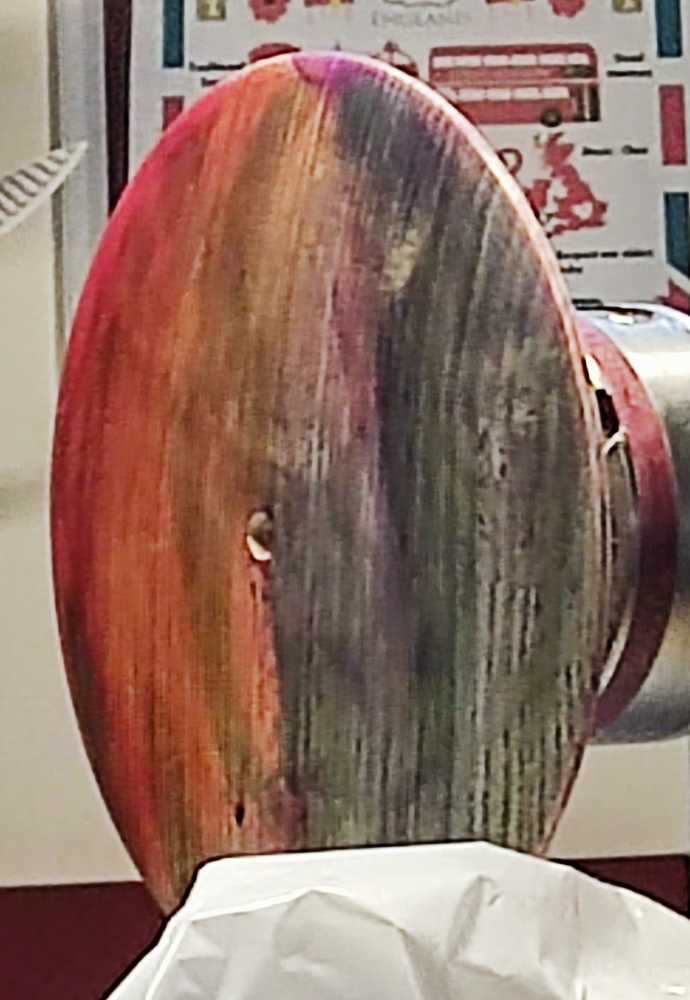
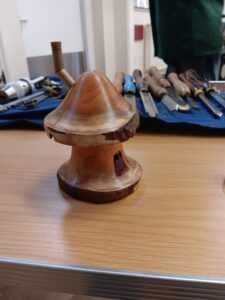
Disaster! A chunk came off the stem from one of the cracks leaving him with a “design opportunity” as he put it.

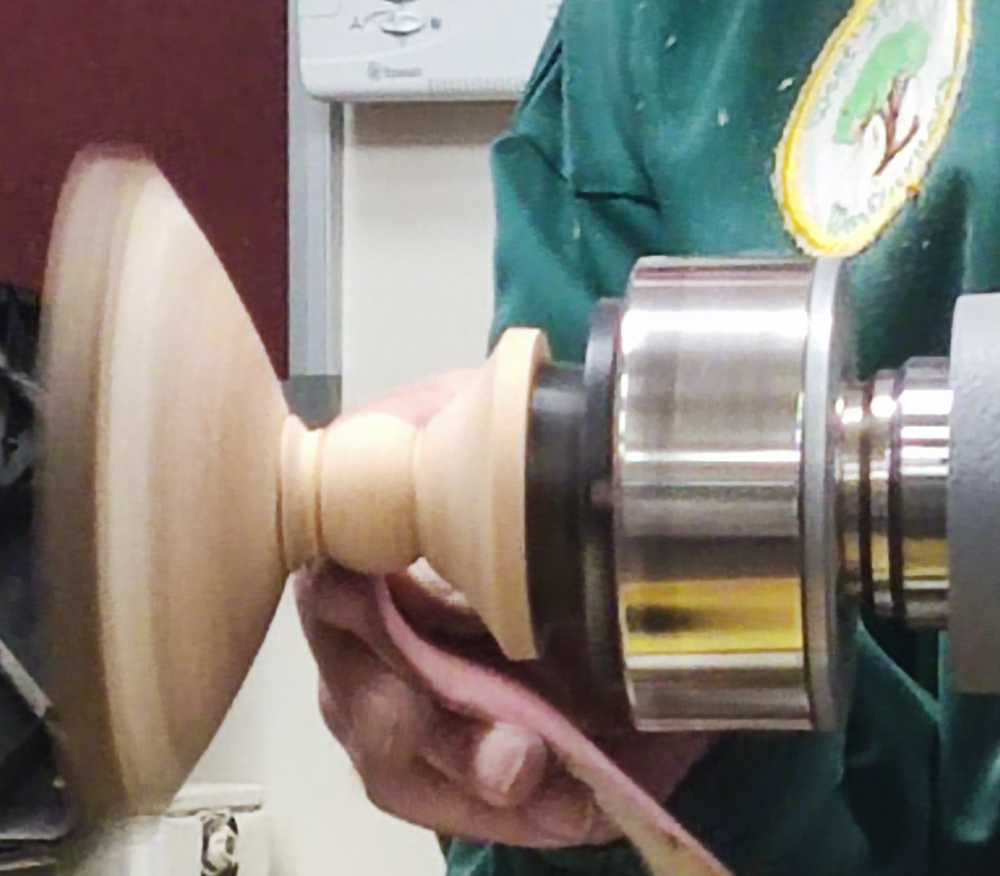
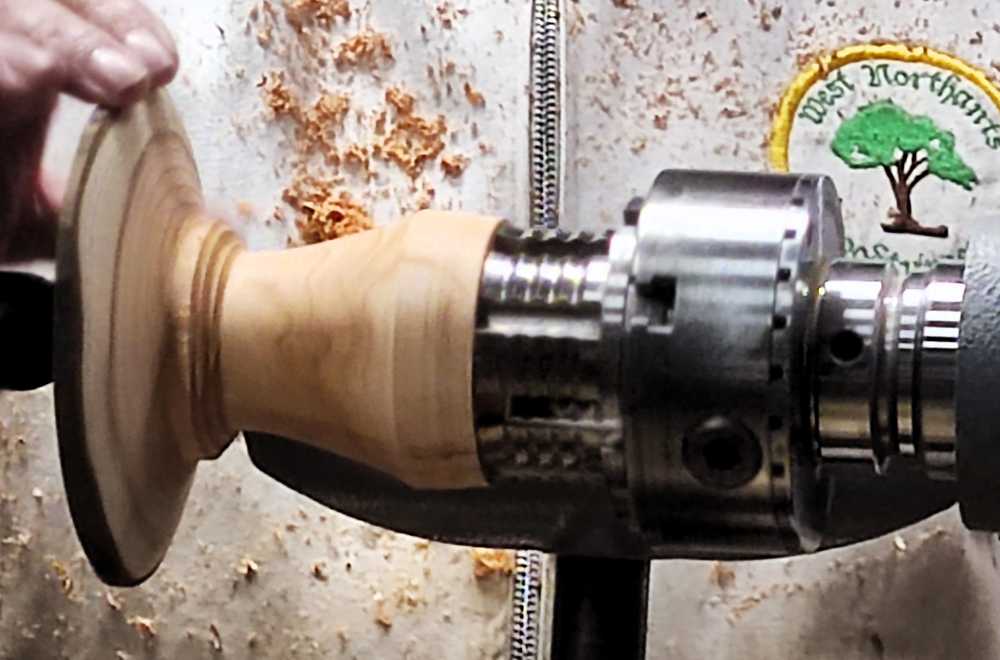
With fewer options now, he recovered well, and narrowed the stem down to remove the area of damage, but kept the shape simple.

This held everything together and he was able to safely sand overall and then improve the shape of the foot before applying sanding sealer and giving it a very light rub over with a grey “scouring pad”.


The final operation was to part it off.

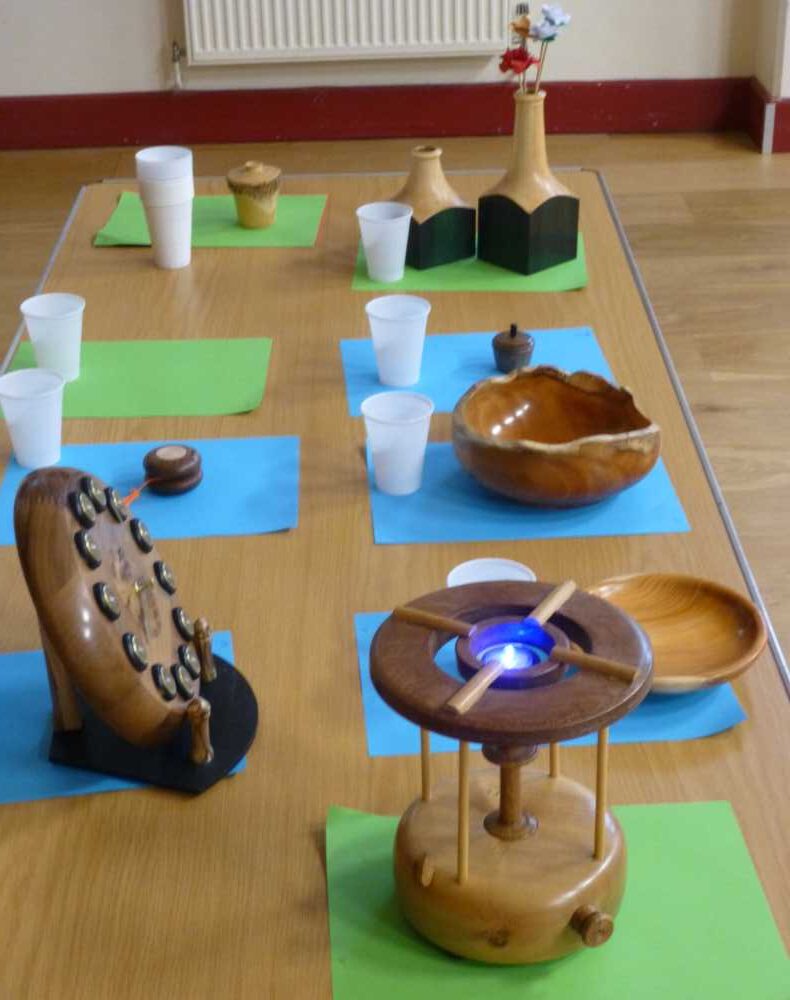
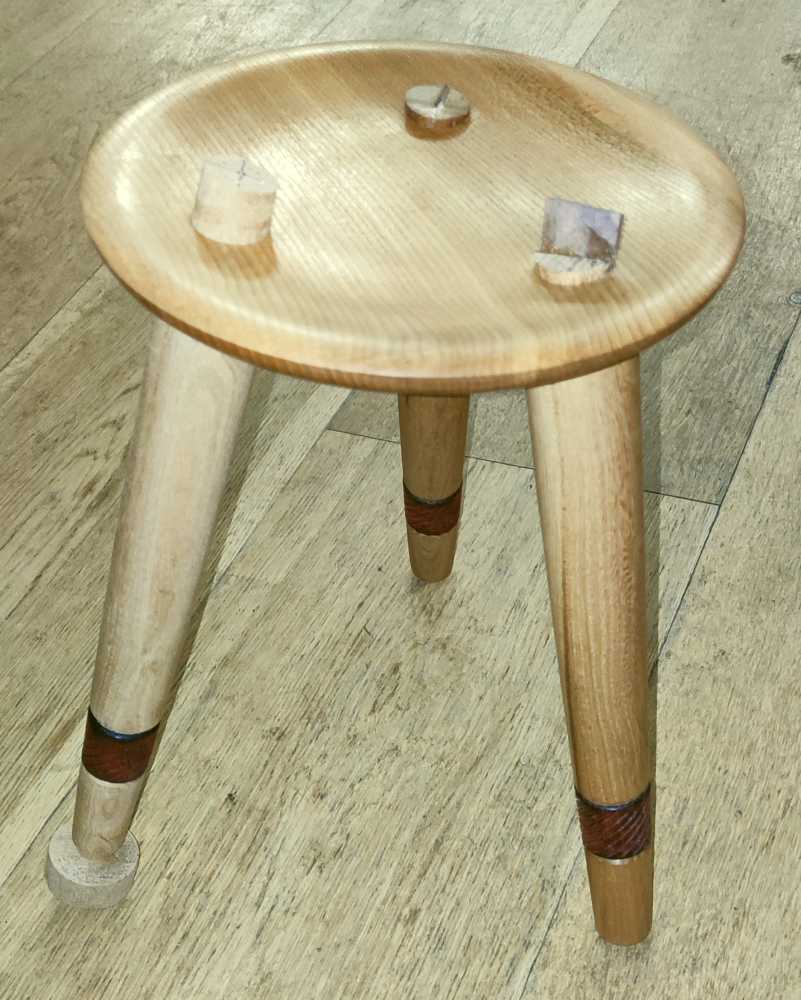
This was a particularly interesting evening as two very good turners dealt with the same challenge in slightly different ways but also had to deal with the vagaries of the particular piece of wood that they were given.

Club Night – 7th August 2024

This evening, Ian Ethell gave us a demonstration of how to make a little elephant – of which, his house has many variants apparently!

Ian brought along some examples of his work for us to see.

He also handed out very useful dimensioned drawings showing that the elephant was made up of a number of pieces: head and trunk, ears, body, tail, and legs.

As he’ll be mounting a number of smaller pieces between centres, he mostly used a light pull drive in the chuck. The wood used was sycamore and, for much of the time, he used a 3/8” bowl gouge with a 40-40 grind as promoted by Stuart Batty.

Body

Starting with the body, he showed us that the blank was pre-drilled and oblong rather than square in order to get a flat underside for the legs.

Mounted between centres, Ian quickly formed the initial shape by making a long cove at one end and then rounding the corners off the body before turning the body until the underside flat was the desired width.

He next refined the overall shape and took the neck down to the required diameter, blending it into the cove. At this point Ian made a comment that, with the 40-40 grind, it was important not to put too much pressure on the bevel of the gouge. The body was finished off with minor adjustments of dimensions and an overall sanding.

Head

First, a 6mm hole was drilled in the end, and deepened using a 3mm drill in order to suit the light pull drive. With the blank between centres, Ian brought it to round and started forming the trunk with a long cove before shaping the head and trunk and blending them together.

Once sanded, he marked both sides of the head on the centre line for the ear positions and used a forstner bit to drill at an angle to suit the tenons that will be on the ears.

A final sanding, then parted off with a skew.

Ears

These are essentially cupped round discs with tenons turned on the lathe from a blank that had been previously cut to shape with a saw.

With the blank in the chuck, it was turned to the required diameter and the end cupped, then a tenon put on the back of the ear. This procedure ensures that the wood has support behind it whilst hollowing out.

The back of the ear was then curved down to the tenon, sanded (with care to protect fingers!) and parted off.

Tail

A length of small square blank was brought to round and shaped with the bowl gouge, using a shear cut for a good finish beforesanding and parting off.

Legs

The two rear legs are turned on centre but the two front ones are turned slightly offset in order to point them forwards. He used a home-made three-pin marker for marking out the offsets.

Ian turned the blank to diameter then marked out the legs and tenons along its length before forming the tenons with a parting tool.

The individual legs are made with a slight taper towards the foot, and the foot chamfered slightly. There is also a small undercut at the tenon/shoulder join in order to ensure a snug fit when inserted into the elephant’s body. Each leg was sanded in turn before parting off, and a chamfer applied to the end of the tenon for easy insertion.

Assembly

Ian sanded (50mm sanding disc in chuck) small flats on the head for the ears to sit against and dry assembled the elephant, although there was no time to add decoration. The picture below shows a completed elephant, with “features” added.


The competition table had a good selection of entries this month.


1st place went to Roger Gilbert for a clock inlaid with the ends of shotgun cartridges, and an elegant stand for the clock.


2nd place was for a primus stove by Dave Simms.


Joint 3rd places were for a yo-yo by Jerry Coles

and a pair of bud vases by Viv Harvey.

Club Night – 17th July 2024

This evening, Viv Harvey had a couple of very different treats in store for us, namely some collet type chucks and a pasta cutter rolling pin.

Collet Chucks

Viv uses these chucks to hold small items securely, such as the tiny goblet shown below, without having to buy a wide variety of expensive scroll chuck jaws and then waste time swapping those jaws around. The wooden chucks have the added benefits that they are far less likely to mark the workpiece and there is no chance of metal-to-metal contact when working very close to the chuck. We’ve all been there!

He mounted a relatively soft sapele blank about 150mm x 80mm square between centres and rounded it before putting a chucking tenon on one end. It was then mounted in the chuck, supported with the tailstock.

The collet needs to have a tenon and shoulder so that it can be held in the scroll chuck, and a groove to locate a piece of elastic holding the four quadrants together. The nose of the chuck will be rounded over for safety.

These operations Viv quickly carried out before drilling an 8mm hole right through the wooden chuck and marked it 8mm for future reference.


He then parted and sawed off the chuck and put it to one side.


Next, Viv cleaned up the face of the remaining blank and then repeated the process, but with a 10mm drill. He made two more chucks from this blank, with 12mm and 16mm hole diameters.

Note that it is necessary to start with a small drill for the first chuck and then increase the sizes in order to avoid drilling into the next chuck with an oversize drill.

Rather than waste the stub of the blank, Viv cleaned up the face and drilled it out to take a screw – thus producing a screw chuck.

Returning to the collet chucks, Viv cut them into four quadrants on the bandsaw, remarking that he finds four pieces better than three – and easier to cut.


He immediately marked the quadrants of each chuck 1, 2, 3, 4, to keep them in the correct order, and secured them with butcher’s trussing elastic which lasts very well without degrading like ordinary elastic bands.

….and Viv kindly donated the four chucks to the club for inclusion in our collection of tools!

Pasta Cutter Rolling Pin

A number of designs are possible, depending upon the type of pasta required e.g. plain for sheet pasta; closely beaded for tagliatelle; wider beaded for ribbon pasta. On this occasion, Viv decided to make a rolling pin to cut ribbon pasta.


To make life easier, Viv uses a storyboard for the longitudinal dimensions and templates to set the diameters.


The rolling pin started off as a 250mm x 50mm square blank (beech?) mounted between centres, which was turned to round and a chucking tenon cut in order to mount it in the headstock, with support from the tailstock.

With the help of the story board and templates Viv marked off the handles with a thin parting tool and reduced the blank to the relevant dimensions with a spindle gouge. The rolling pin was sanded and the roller shoulders rounded off before adding v-cuts at the transition between handle and roller – these are aesthetic touches and can be modified to taste.

For the pasta cutting beads, he first marked the middle of the roller and then used the story board to mark the bead positions.


A thin parting tool effectively delineated the beads and the grooves were then widened to suit ribbon pasta, ending up with a depth of about 3mm.


To sand the grooves, Viv used home-made sanding sticks of various grits – sticks coated in PVA glue with sanding grit set into the glue. He finds that this gives consistent depth and sharp sides to the beads.

He tidied up the ends of the roller and shaped the handles for aesthetics and comfort and sanded them lightly. A finish is not usually necessary, but if one is applied, it must, of course, be foodsafe. Viv uses sunflower oil and the surplus wiped off with a cloth.

Finally, he parted and sawed the ends off and pushed upholstery pins into the ends of the handles for a nice touch. The picture at the top shows how they look.

Club Night – 3rd July 2024

Before the demo started, Mick Denton showed us an example of a t-shirt that can be made for club members at very modest cost. Complete with embroidered club logo and with a choice of conventional t-shirt or polo shirt, a show of hands indicated a healthy interest and Mick said he will progress inquiries with the maker before taking orders.

Tonight we had Dan Smith, proprieter of Taylors Mirfield, as our demonstrator, showing us his technique for making a 3-legged stool.

Dan started off with a general background introduction and then mounted the 200mm square sycamore seat pad blank in the chuck, using a faceplate ring with very short screws. He pointed out that, as a Yorkshireman, he was obliged to watch the pennies and that square blanks were cheaper than round ones but watch your knuckles!

He reduced the blank to round, taking care to avoid the corners and initially keeping the speed down so as not to have any breakout or splinters. Once round, Dan used the lathe indexing and the toolrest to mark out the positions of the three legs.

He did not actually drill out the holes, having a previously prepared blank, but he did show us his home-made jig for drilling the holes on a drill press at the correct angle and distance from the rim. Sorry, I forgot to take a picture of it, but it’s essentially a v-block mounted on a wedge to give the required angle. The exact angle will vary from stool to stool but is set to bring the legs out to roughly the same diameter as the seat – this provides stability without having legs sticking out so far that they become a trip hazard.

For each leg, a 35mm hole is drilled partway through the seat from the underside, and then a 22mm hole all the way through.

Dan next scooped out the centre of the disc, taking care not to impinge upon the drilled holes, and made a chucking tenon in the recess. Using a mix of pull cuts and push cuts with the bowl gouge he shaped the underside of the seat cutting the profile around the edges so that the angled 35mm holes were the same depth all the way round.

He used a skew chisel as a scraper to tidy up and then power sanded before finishing off with abrasive wax.

He reversed the seat onto the chucking tenon and then removed the faceplate ring before dishing the seat to shape, ensuring that the screwholes from the faceplate ring were all gone. After sanding, Dan used abrasive wax for the finish – but then admitted that this was unnecessary as the top would need to be tidied up again after the legs were fitted.

For making the legs, Dan uses a story board for the main dimensions (diameters and positions of features) and demonstrated its use on the single leg that he was making for the demo – he had two others with slightly different bands of decoration to illustrate some of the many options.

The leg blank was mounted between centres, turned down to the principal dimensions and tapered between max diameter and the tenon on the top end.

At this point Dan showed us that he takes the tenon down to the final diameter by using an open-ended spanner with the top jaw sharpened to shave away any surplus and the edge removed from the bottom jaw.

The bottom of the leg was sized with the story board and a parting tool before refining the taper along the length of the leg with a beading/parting tool used as a skew chisel. The story board was used to align on the shoulder at the top of the leg and to mark out the area to be decorated.

With the area marked out, Dan used a small spiralling tool held at about 45 degrees to texture the area. After multiple passes he was satisfied with the result and defined the area by v-cuts with a skew chisel.

The whole leg was then lightly sanded, initially rotating and then stationary along the grain. Masking tape was applied either side of the decorated area before spraying it with ebonising lacquer and leaving it to dry.

While the lacquer was drying, Dan mounted the seat in some Cole jaws and removed the chucking tenon on the underside with a bowl gouge (light cuts to avoid dislodging the seat), finishing off with some power sanding. The wax finish will be applied later when he finishes the top of the seat.

With the leg now dry, he re-mounted it between centres and removed any ebonising lacquer overspray and re-cut the v-grooves. Now to highlight the decorated area. Applying a small amount of acrylic paint on a brush and then brushing it out on a paper towel left a very small amount on the brush which Dan proceeded to lightly run over the texturing. This dry brush technique leaves just a a hint of colour to emphasise the texturing.

As time was now running out, Dan explained that he would allow the paint to dry and then spray melamine lacquer over it before parting off the leg. With the legs in place and protruding through the top of the seat, he would mark around the tenons then remove them and cut to length before final fitting.

He would then cut a slot in the top of the leg tenons and secure with walnut wedges. Some minor details – he should have relieved the edge of the shoulder a little to ensure a good fit, and the wedges would have some glue applied, but there is no need to glue the tenons themselves.

Finally, sand smooth and apply a finish to the top of the seat.

Club Night – 19th June 2024

This evening, Bryan Brumfield demonstrated the making of a coloured discus bowl from an ash blank about 215mm diameter x 50mm thick.

With a tenon already on one side of the blank, Bryan mounted it on a screwchuck and marked the middle of the rim before using a bowl gouge to shape the underside.

To remove any turning marks, he experimented with using a Simon Hope negative rake scraper and a rotary friction sander.

Not entirely happy with the results, he then used a Sorby KT200 tipped scraper and finished off with an oil/wax mix and standard abrasives. Next he sprayed the wood with acrylic sanding sealer which was rubbed in with some Yorkshire Grit abrasive wax and then polished with a cloth and wax.

With the underside finished, Bryan reversed the bowl onto the tenon and faced it off before shaping the upper side of the bowl with a bowl gouge, mostly using pull cuts from the centre out to the rim.

After sanding, he applied a purple spirit stain with some paper towel….

….and allowed it to dry before sanding down to leave just a few areas of purple.

This was followed by a little red stain down one side and some yellow over the red and towards the middle. Next was some royal blue splodged over the other colours, but leaving some gaps and some green here and there. These colours were all artistically applied after a bit of umming and aahing!

With the colour applied, he rubbed them all over with a bit of meths on a towel to blend the colours and remove any sharp edges.

After a few minutes, he sprayed it with acrylic sanding sealer and allowed it to dry. For a final finish, Bryan applied finishing oil and wiped off the surplus.

At this point he remarked that he would often take a bit off the edge of the bowl and colour it with a black marker to add definition. The whole thing would then be allowed to dry overnight before rubbing down lightly with webrax and adding a further coat of oil.

For the purposes of the demo, however, he proceeded straight to the next operation, which was to hollow out the bowl with a bowl gouge. He tidied up using the Hope negative rake scraper (more successful used internally) then finished off with sanding, Yorkshire Grit and a gloss wax.

With the demo complete, Bryan pointed out that he would later add more coats of finish on the rim and underside and reverse the bowl into cole jaws or a longworth chuck to remove the mounting tenon.

The grain of the ash was beautifully complemented by the colours applied and the final result was a very attractive little bowl. Thank you Bryan!

Club Night – 5th June 2024

Chris Harkin was our demonstrator for tonight, with Jiminy Cricket his somewhat unusual subject.

Jiminy was made out of three main parts – body, head and hat – plus feet and hands, all joined together as appropriate.

The body was made first, with the blank set up between chuck and tailstock centre and then shaped to make the body segments before burning a line between the segments using a wire. It was sanded all over and finished off with an abrasive wax of Chris’s own making. Finally, it was parted off.

NOTE: the abrasive wax is a mixture of baby oil, beeswax and diatomaceous earth; Chris is still experimenting with exact proportions.

Next, the head. A blank was mounted in the chuck and the diameter trued up with a skew chisel. Chris then used the skew chisel and gouges to shape the head. The tailstock end was left blunt in order to form the nose.

Now for the hat. Mounted in a similar fashion between chuck and tailstock live centre, Chris quickly trued it up then shaped it with a gouge. To finish, he sanded it and then “painted” it with a felt tip pen with the lathe stationary. To reduce variations in colour, he applied wax while the ink was still tacky and then polished it with a paper towel at speed. Parted off and put to one side with the preceding two parts.

The feet and hands were turned as two items made from a cylinder mounted between the chuck and tailstock, parted off and then cut in half with a saw. In readiness for glueing to some welding wire, holes were drilled in appropriate positions – different for hands and feet.

To assemble Jiminy, Chris sanded flats on top of the body and on the bottom of the head, with another flat offset on on the top of the head for the hat. These were then drilled to accept dowels.

Two further holes were drilled in the hat brim to take the antennas which he made by curling the ends of some welding wire with pliers. Chris pointed out that the sharp ends of the cut wire need to be covered with a bead and turned inwards.

He then dowelled and glued the body head and hat together.

Taking some more welding wire, he bent the arms and legs to anatomically correct (????) shapes for an upright stance (he could have decided upon another stance e.g. prone), drilled holes to accept the arms and legs and glued them into position before also glueing the hands and feet on.

Chris drilled nose, sanded it flat and glued a bead on, with other beads being glued on for the eyes.

All was now complete other than for him to make a walking stick out of dowelling, with a coloured knob on top. To hold it securely, he filed a groove in Jiminy’s hand and glued it into position.

Now Jiminy looks ready to embark upon his adventures!

The competition table had a variety of items this month.

1st place was a natural edge bowl by Bob Green.

2nd place went to a set of miniature lidded vases by Viv Harvey.

3rd place was tied between a lidded box by Gerald Hubbard and a clock by Gerry Coles.

Club Night – 15th May 2024

The evening started with Roger Gilbert and Mick Denton thanking all of those people involved in making the WoodWorks show such a success. This reflects on the club as a whole in the quality of work exhibited on both days.  Thank you all for your input.

The demonstration for the night was by Ian George, a long term member who has demonstrated before. His offering was a smoking mushroom with a tealight inside.

This is made up from 2 cones made from a Yew branch and having a live edge element to give additional interest.

The project involved reverse chucking both elements so it was interesting to see this in action.

The 2 elements had been prepared before hand so that the blanks each had a chucking tenon in place. The base section was then mounted and the inside rough turned to get the general shape and a chucking mortice created on the inside. 

This gave Ian the opportunity to get the shape of the piece and could then reverse the blank and turn the outside.

The piece was then reverse chucked again and the thickness tweaked until Ian felt it was right.

The top was then mounted on the chuck and using the same processes turned to final size.

The last piece to make was the chimney which was effectively a small cylinder which was then cut roughly in half at an angle then glued back together to make the offset. The top was drilled to take this and it was glued to place.

The last part was to add decoration in the form of windows and a door.

The panes were effectively created by drilling holes and then opening them up with a Dremel. The Dremel was then used to carve out the window and door frames. The tea light was placed inside the base so that the light showed through the windows and door panes. A lighted spill was put inside the top so that smoke would rise through the chimney.


Daventry Woodworks – 10th and 11th May 2024

As usual our club had a stand at Daventry Woodworks, the annual show that is put on by Tudor Rose Woodturners. The stand was put up on the Thursday night and a good assortment of turnings put out on Friday morning before the show opened: all expertly curated by Roger and his team.

Throughout the show, the stand was attended by club members, to answer any questions, also hoping to entice new members to join up. A lot of interest was shown in the wide variety of items on the stand, produced by many different members.

I’ve slipped in a picture of Gerald’s bowl of fruit here, simply because I loved it!

The display was refreshed with some different items for the second day of the show – it is simply not possible to lay everything out nicely in one go and it adds interest for those who come by on both days.

Once the show was underway, the various competitions also started at the allotted times with the good news rolling in as Roger was deservedly awarded 1st place in the baby’s rattle competition – and with time to spare.

This was followed by 2nd place for the display stand and 3rd place for Gerald’s tazza, noteable for the lovely crisp lines on a beautiful piece of wood.

At the end of the show, this all added up to 1st prize in the Overall Show Competition, a tremendous result and reward for all the hard work put in by the club’s turners and all those others who helped set everything up and provided items to put on the stand.

Our carousel was unfortunately not placed in the awards but it did receive a lot of compliments from attendees, especially for the way that it stood out for its visual impact.

Likewise, Viv’s square bowl (‘B’ in the picture) did not receive an award but was nevertheless attractive and well finished; I’d certainly be happy for it to sit on my sideboard at home!

No placing either, in Best of Show where the standard of entries was extremely high and the competition fierce!

Almost as important as the turning was an opportunity to meet so many like-minded folk and chat with old friends, many not seen since the last show. Did I mention the demonstrators and stalls selling lots of nice gizmos and timber, all contributing to a thoroughly enjoyable two days.

Thanks to everyone in the club who helped and contributed to our success at this show; it is so nice to end the day on a high!

Finally, a big thank you to Tudor Rose for putting on the show, always such a great occasion that brings turners together from all over the Midlands.

Club Night – 1st May 2024

The Annual General Meeting was held today, so the evening was mainly about club business.

The minutes of last years AGM were read and accepted.

The club Officers delivered their reports, mostly along the lines of “steady as she goes” with the club ticking over nicely.

The Treasurer noted that the club’s finances were healthy but that more members would improve this further. He also thanked Tony Malin’s family for a donation from his estate. The accounts were accepted.

The meetings programme is largely complete, although we are always on the lookout for new demonstrators and some different formats are being introduced to add some variety.

There were some discussions with a number of suggestions for adding items to the club’s tool inventory and for ways of recruiting further members.

It was agreed that the members-only WhatsApp group would be better publicised within the club and used more widely as a communication tool.

All current club Officers were re-elected for the year.

There was also time for a couple of other activities.

Mick Denton gave a brief report on the recent visit to the Proops Brothers shop in Leicestershire on 11th April. There was a good turnout and was adjudged a success with our members given a very interesting tour of the operation and plastics factory where a wide range of items are produced. They were well looked after, with tea and biscuits provided, and many departed with lighter wallets and heavier bags.

A repeat may be on the cards for next year if there’s sufficient interest.

Daventry Woodworks was also discussed with members asked to provide items for display on the club stand, and to help with setting up before the show, and to man the stand throughout both days.

The competition table held a varied selection of work for what is the first competition of the new club year.

1st place was a lidded bowl by Dave Simms.

2nd place was a table lamp by Chris Harkin.

3rd place went to a platter by Duncan Anderson.

Club Night – 17th April 2024

The evenings demonstrator was Geoff Warr, a long term club member, who has done quite a few previous demo’s.

The first discussion point was to show how he makes sanding arbours from hard foam kneeling pads and old driver bits. 

The foam discs are cut from the pads using a hole saw with the teeth ground off and the edge sharpened. This is a useful tip for a quick and easy project.

The main demo was to make an owl ornament which was effectively a decorated ball on a stand.

The first task was to mount a spindle blank between centres and turn to round. A tenon was formed at one end and this then mounted in a chuck. The diameter of the blank was measured and then marked out on the blank so that it was equally spaced about the centre line. The ball was then turned out except for the where the tenon was. This was sanded to a finish and the stub reduced as far as he dared go before parting off with a saw.

The ball was then mounted between a wooden block in the chuck and a wooden insert for the revolving centre. The wooden centres were dimpled to take the circumference of the ball.

The ball was turned to round, removing the tenon and was sanded to a finish.

The next part of the process was to mount the ball into a donut clamp which is a jig that Geoff made to hold the ball safely when turning the eye sockets.

With some judicious measurements and lining up within the jig 2 dimples were turned to slightly overlap each other. Each was sanded to a finish before moving to the next.

The eyes were proprietary teddy bear eyes bought off the internet. The beak was made from a small square section of teak cut to form a 4 sided pyramid which was glued in place once a flat section had been sanded onto the ball.

The base was not demonstrated because of time but the process was a simple spindle turning with a dimple created in the top to take the ball.

A great night and a project that will give us something to test our skills.