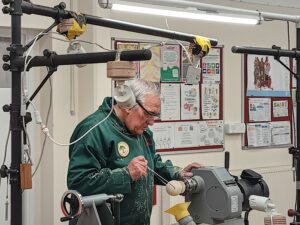
The evenings demonstrator was Geoff Warr, a long term club member, who has done quite a few previous demo’s.
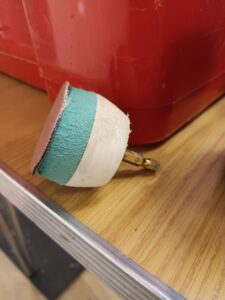
The first discussion point was to show how he makes sanding arbours from hard foam kneeling pads and old driver bits.
The foam discs are cut from the pads using a hole saw with the teeth ground off and the edge sharpened. This is a useful tip for a quick and easy project.
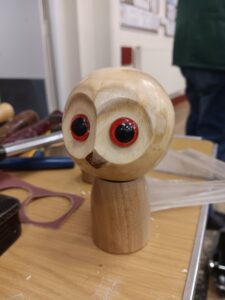
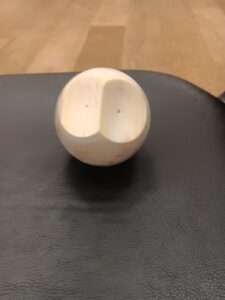
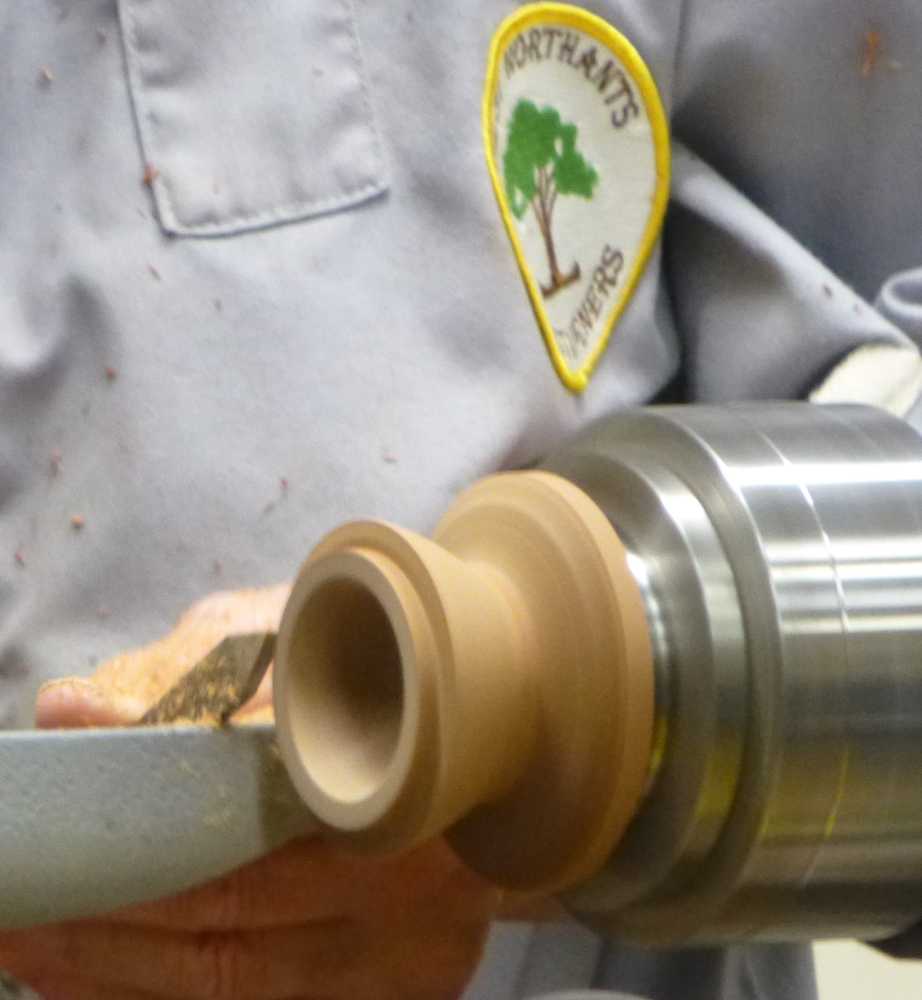
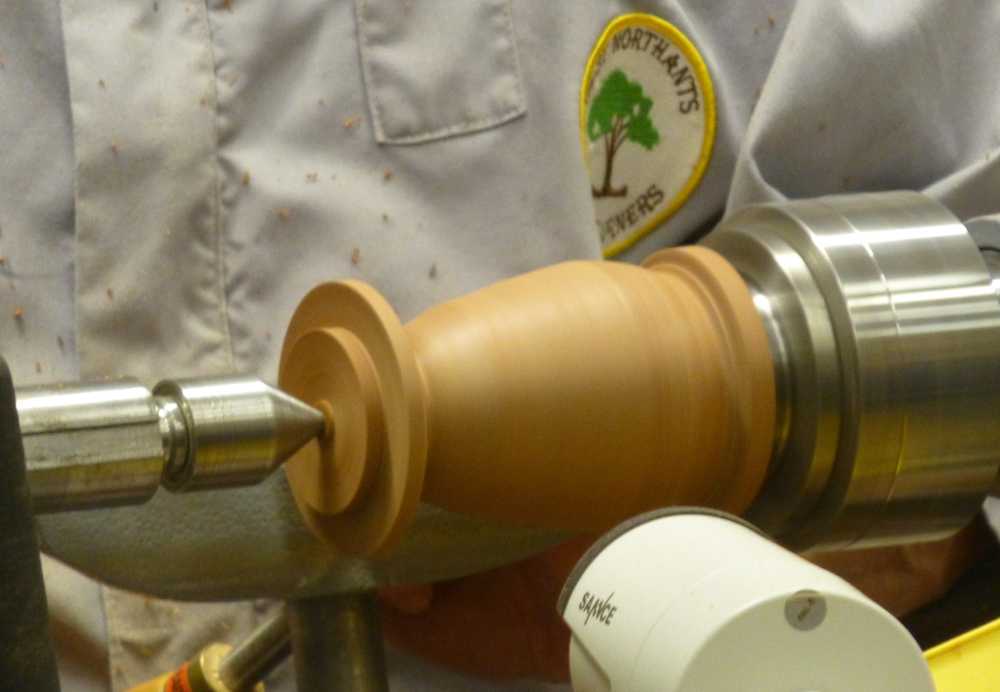
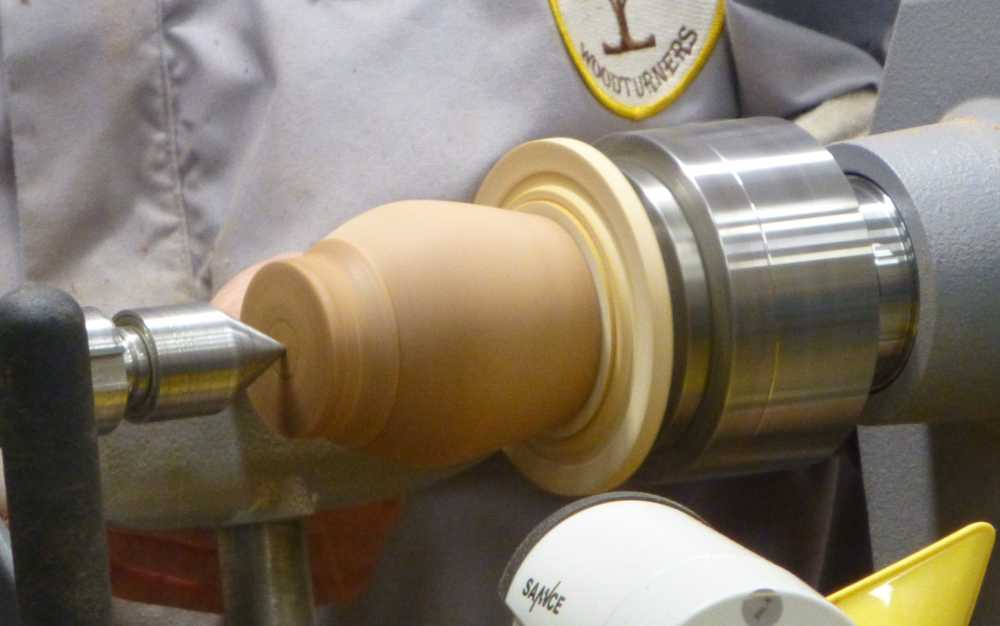
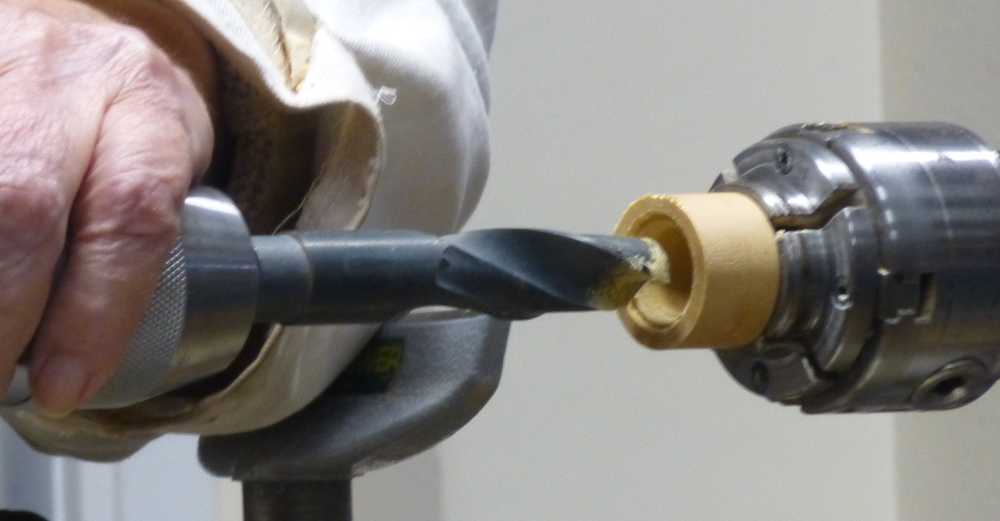
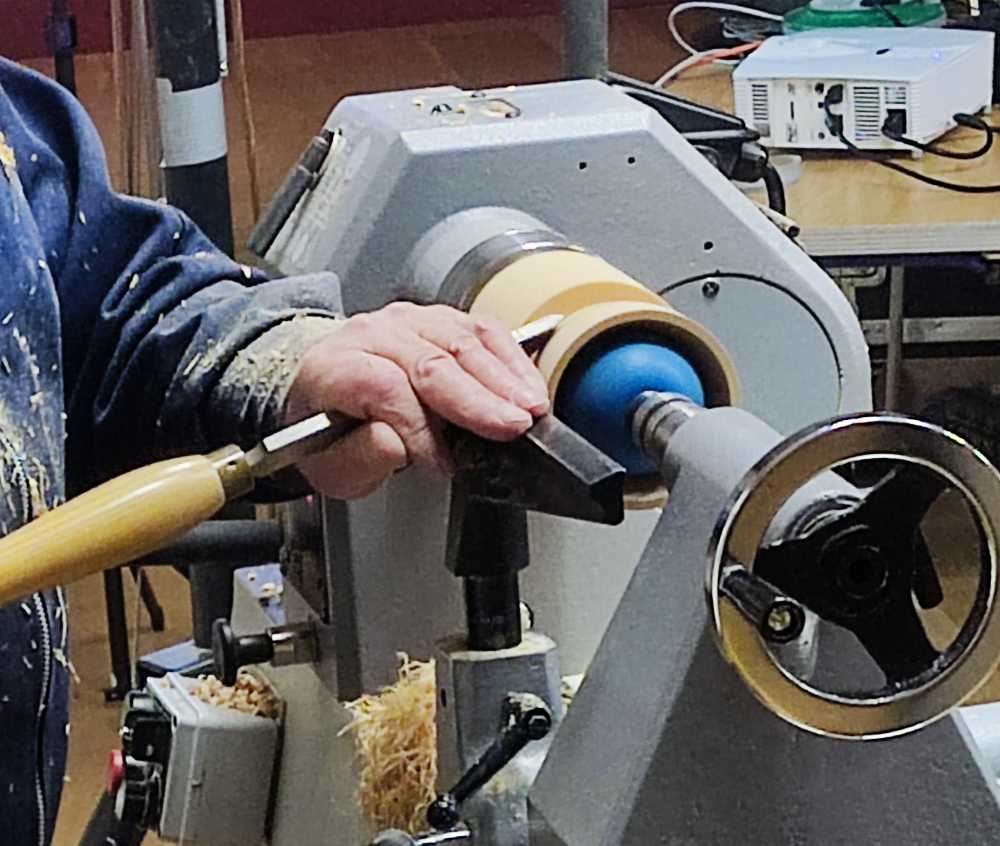
The main demo was to make an owl ornament which was effectively a decorated ball on a stand.
The first task was to mount a spindle blank between centres and turn to round. A tenon was formed at one end and this then mounted in a chuck. The diameter of the blank was measured and then marked out on the blank so that it was equally spaced about the centre line. The ball was then turned out except for the where the tenon was. This was sanded to a finish and the stub reduced as far as he dared go before parting off with a saw.
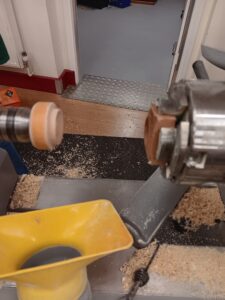
The ball was then mounted between a wooden block in the chuck and a wooden insert for the revolving centre. The wooden centres were dimpled to take the circumference of the ball.
The ball was turned to round, removing the tenon and was sanded to a finish.
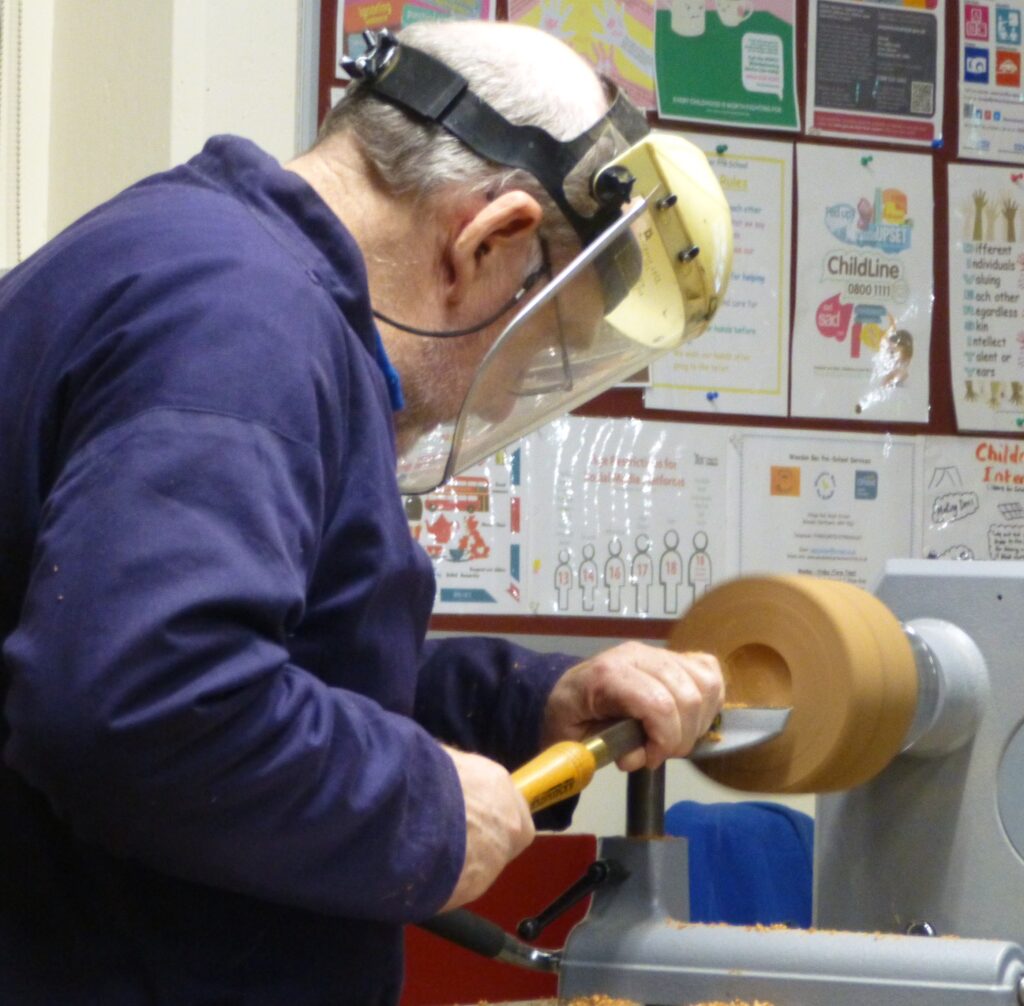
The next part of the process was to mount the ball into a donut clamp which is a jig that Geoff made to hold the ball safely when turning the eye sockets.
With some judicious measurements and lining up within the jig 2 dimples were turned to slightly overlap each other. Each was sanded to a finish before moving to the next.
The eyes were proprietary teddy bear eyes bought off the internet. The beak was made from a small square section of teak cut to form a 4 sided pyramid which was glued in place once a flat section had been sanded onto the ball.
The base was not demonstrated because of time but the process was a simple spindle turning with a dimple created in the top to take the ball.
A great night and a project that will give us something to test our skills.
The club visit to the Proops Brothers shop in Leicestershire on 11th April will include a factory tour. Details are on the website home page. Those going should make their own way to 24 Saddington Road, Fleckney, Leics LE8 8AW to arrive by 1230, and we’ll all meet up there.
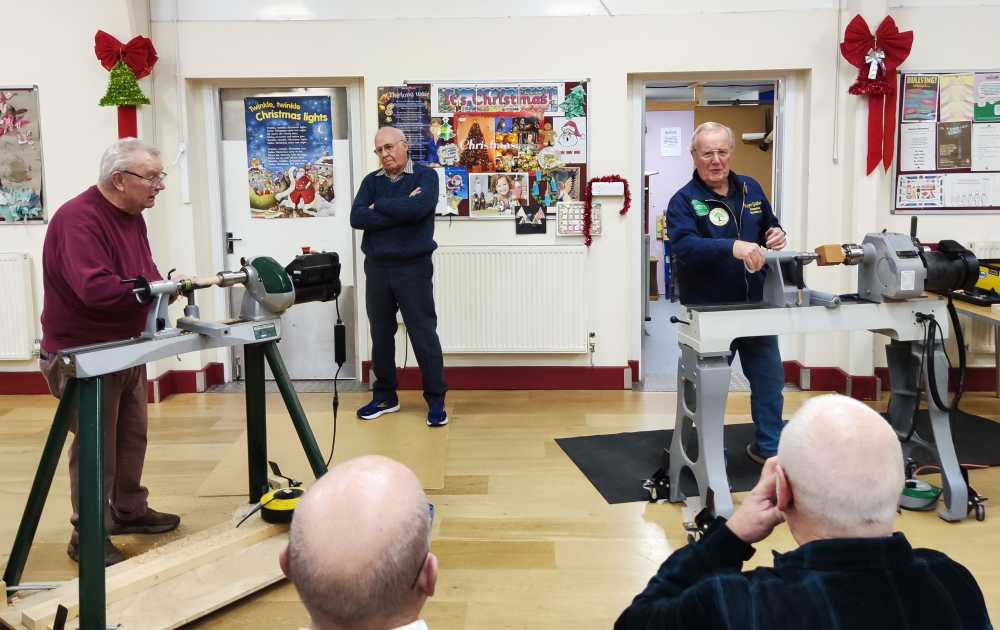
Today’s meeting was Hands-On with two lathes set up for members to use; one principally used for Gerald to demonstrate thread cutting and attempt to teach a particularly inept club member (me!) how to thread cut. Gerald kindly provided a piece of boxwood for the exercise and progress was made, but lots more practice is needed.
Help was available on bandsawing and tool sharpening for those that wanted it.
As well as close inspection of what was happening at the lathes, there was plenty of time for socialising – and drinking tea and coffee!
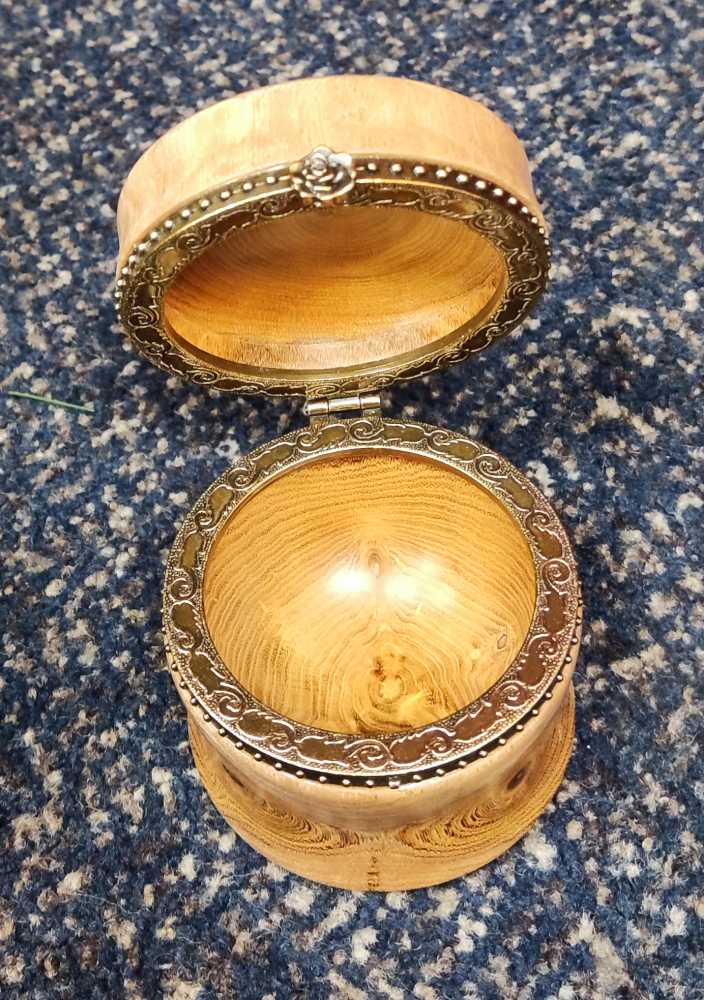
A threaded pink ivory box being made by Roy on the Record lathe generated a lot of interest.
He didn’t quite complete the project but the beautiful wood took a good finish and we all hope to see the finished product in the future.
Gerald was meanwhile progressing a threaded box, in the process showing how he uses the Bill Jones arm rest to support the threading tool. He made it look very easy but there’s definitely a knack to this.
Gerald didn’t complete the box he was working on, as he spent a lot of time explaining and demonstrating the techniques, but we could see the finished product as he brought along a lovely little example of the same type that he had previously made.
Not much bigger than 25mm in diameter, it is slightly unusual in that the thread is directly into the body opening, rather than on a tenon at the top of the body. This avoids the risk of running up against a shoulder whilst cutting the thread and, in my opinion, looks good. Another tip from Gerald – he uses a bull nose (rounded) drill to initially hollow out the box in order to avoid leaving a “nib” at the bottom which is awkward to remove in such a small box when using gouges or scrapers.
By the way, the pictures don’t do it justice; it looked far better in the hand without the artefacts caused by the reflection of the camera flash.
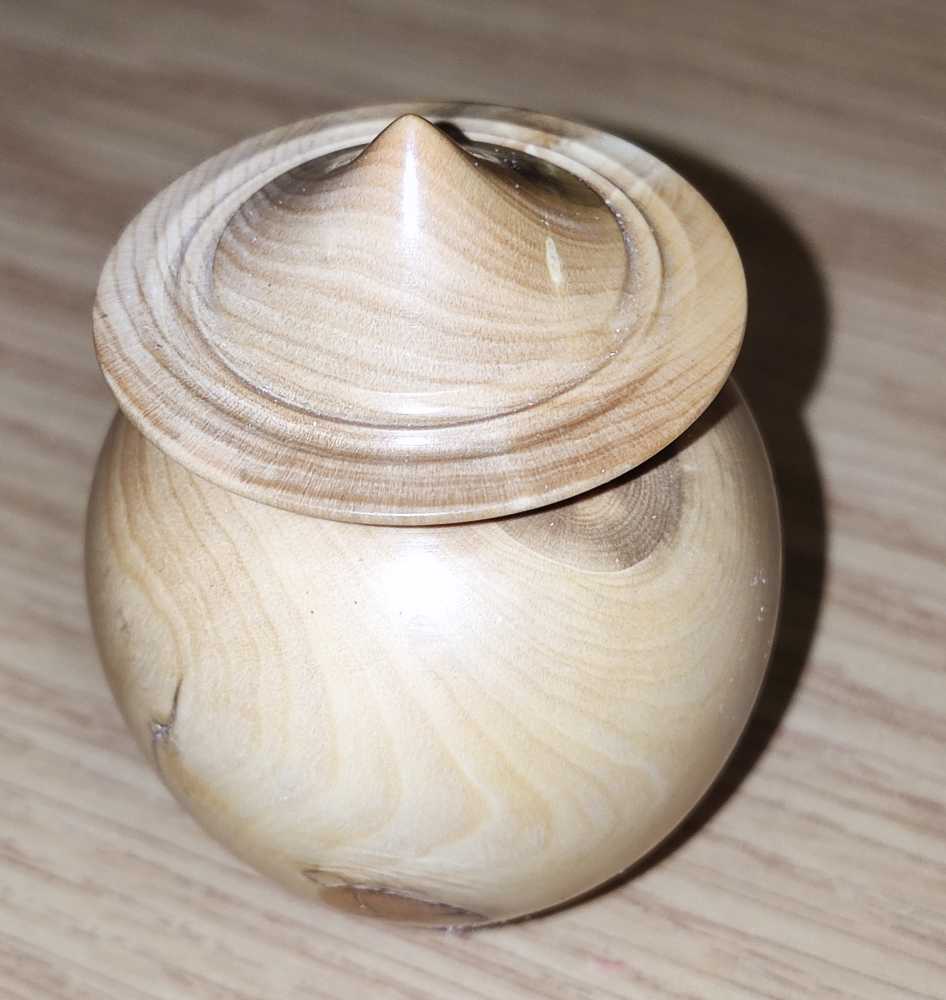
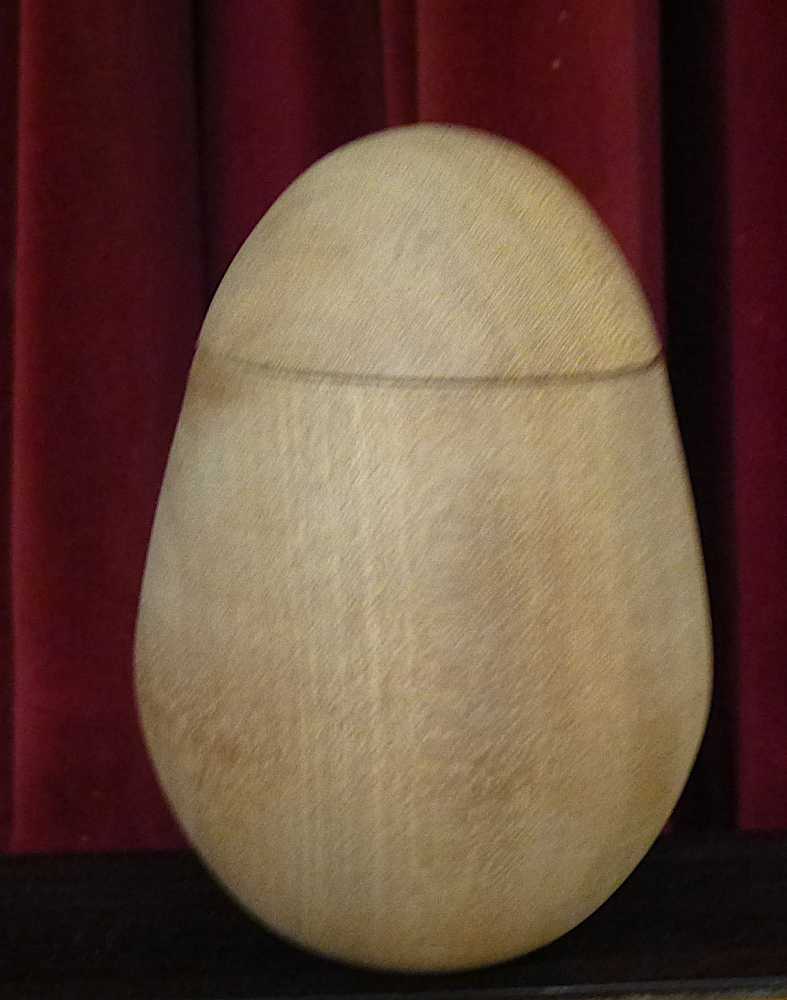
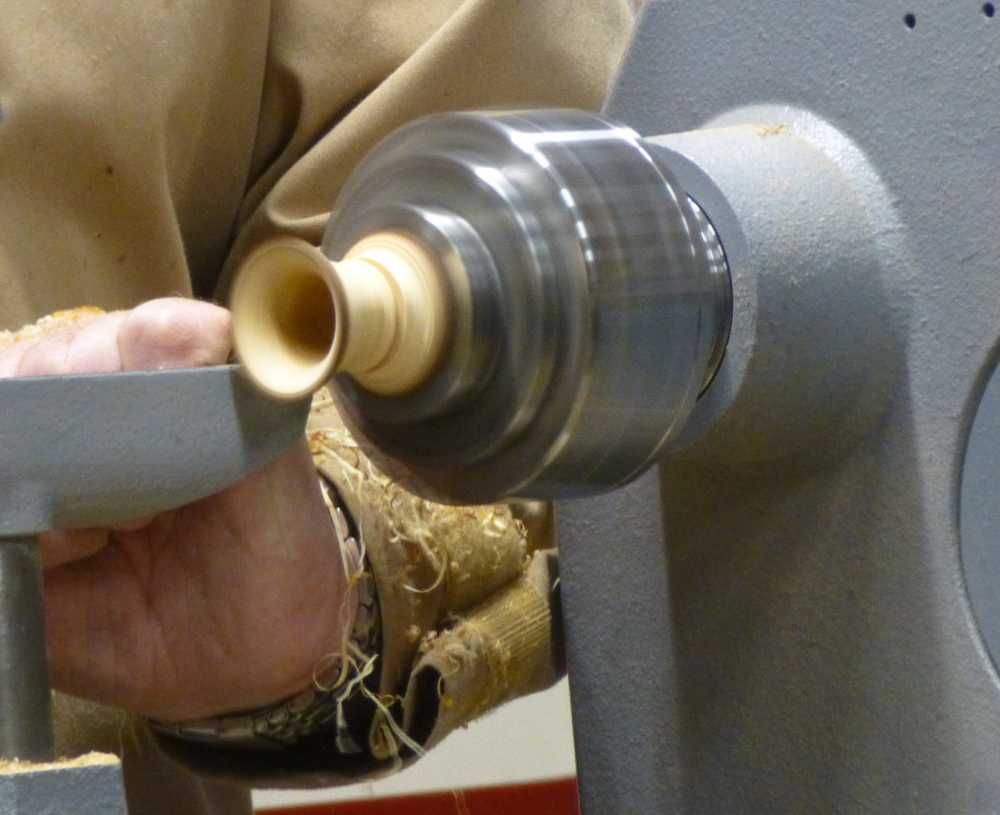
This evening, Ken Garratt demonstrated making an egg-shaped box. For this, he used a sapele blank about 65mm diameter x 125mm length.
To start off, he mounted the blank between centres and put a chucking tenon on each end, after which he mounted it in the chuck.
Next, Ken marked the top and bottom of the box and the widest point of the body, this being one third of the overall length from the base.
He then made a groove to mark the lid and proceeded to shape the egg, before parting off the lid.
With the body still held in the chuck, Ken hollowed it out with a spindle gouge and refined it with a scraper. A mortice was formed in the body with the top edge slightly undercut to ensure a clean fit with the tenon.
Sanding was carried out with the abrasives on a stick for safety, and taking care to avoid the mortice.
It was then dismounted from the chuck – but not before marking its position in the jaws so that it could be accurately re-mounted later on.
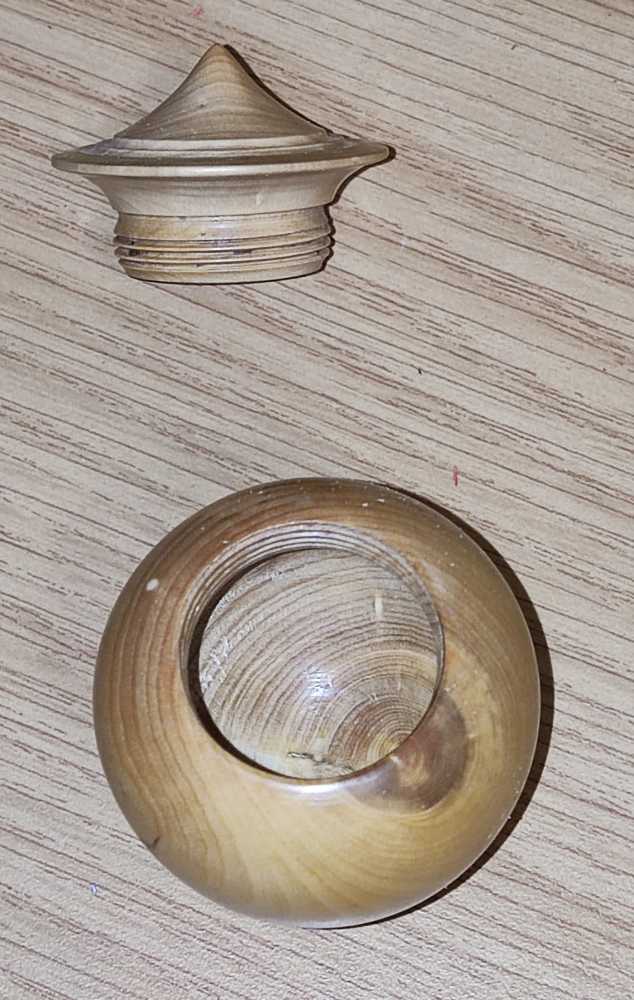
With the body out of the way, Ken mounted the lid in the chuck and hollowed it in a similar fashion to the body. Once this was done he made a tenon to fit the body mortice, bringing up the body repeatedly between very fine cuts in order to get the right fit. A very slight taper on the tenon can help this process, with a friction line on the taper establishing an accurate diameter to work to.
As there is no knob or other shape to grasp on the lid, the tenon must not be too tight or it will be very difficult to remove the lid. At this juncture, however, Ken left it just a bit tight and assembled the two pieces before refining the external profile of the two pieces together on the lathe.
The box was sanded overall and the lid removed and Ken then made a shallow “shadow line” to act as guide to the lid position when opening the box. With the lid replaced on the box, he carried out final refinement of the shape and then parted the lid from its tenon at the tailstock end before tidying up the nub with a light touch of the gouge and some sanding. The lid was now finished and Ken put it to one side.
Ken now removed the box body and mounted a disc of wood in the chuck which he fashioned into a jam chuck to fit into the mortice.
With the tailstock brought up for support, he reduced the chucking tenon to a minimum and then shaped the bottom of the box, leaving some flats so that the box will stand up.
Finally, the box was parted off, the nub removed, the base sanded and the mortice checked for any marks left by the jam chuck.
Ken’s usual finish is Treatex hardwax oil, applied by bush and any surplus wiped off after about 15 minutes; this will give a pleasing satin finish. If left overnight, it can be buffed the following day for a shine. On this occasion he wiped it off a bit quicker than he would normally do and the box was left with a low satin finish.
Apologies to Ken – I forgot to align the grain of the lid and box before taking the picture. They did indeed line up seamlessly!
Mick Denton confirmed that the club visit to the Proops Brothers shop in Leicestershire is now on for 11th April, and it will include a factory tour. Details are on the website home page, but Mick will give an update at the next meeting on Wednesday 20th March. Proops sell a wide variety of hobbyist and craft items, and visits in the past made for a good day out. Best to go equipped with a list of must-haves!
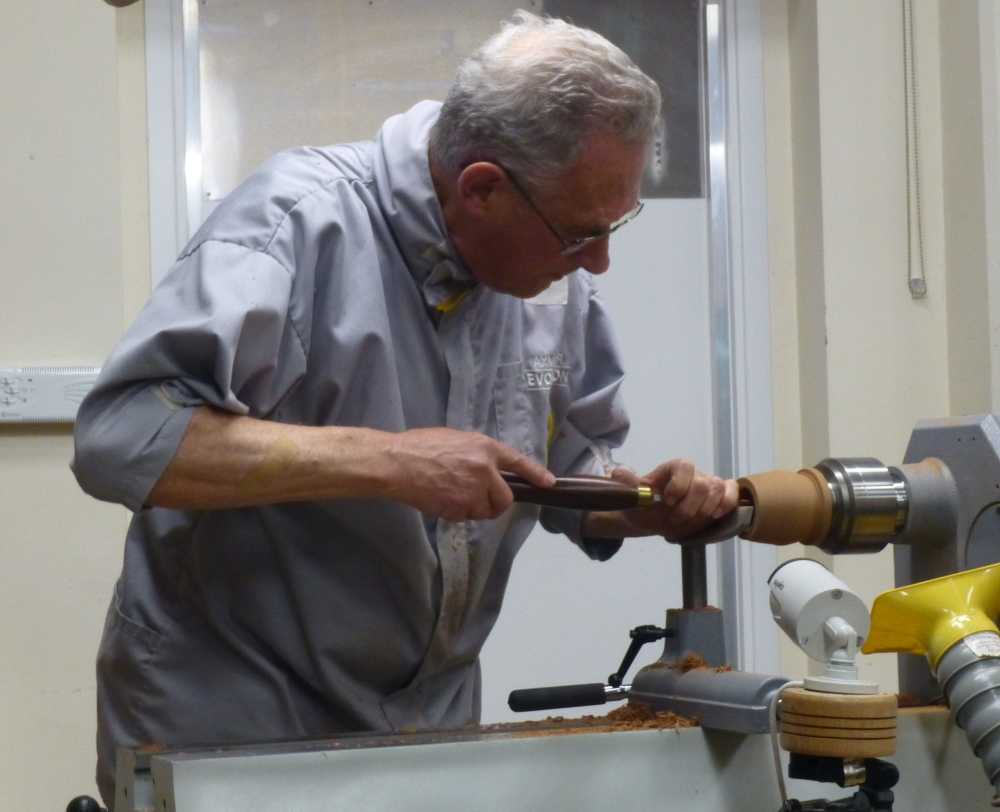
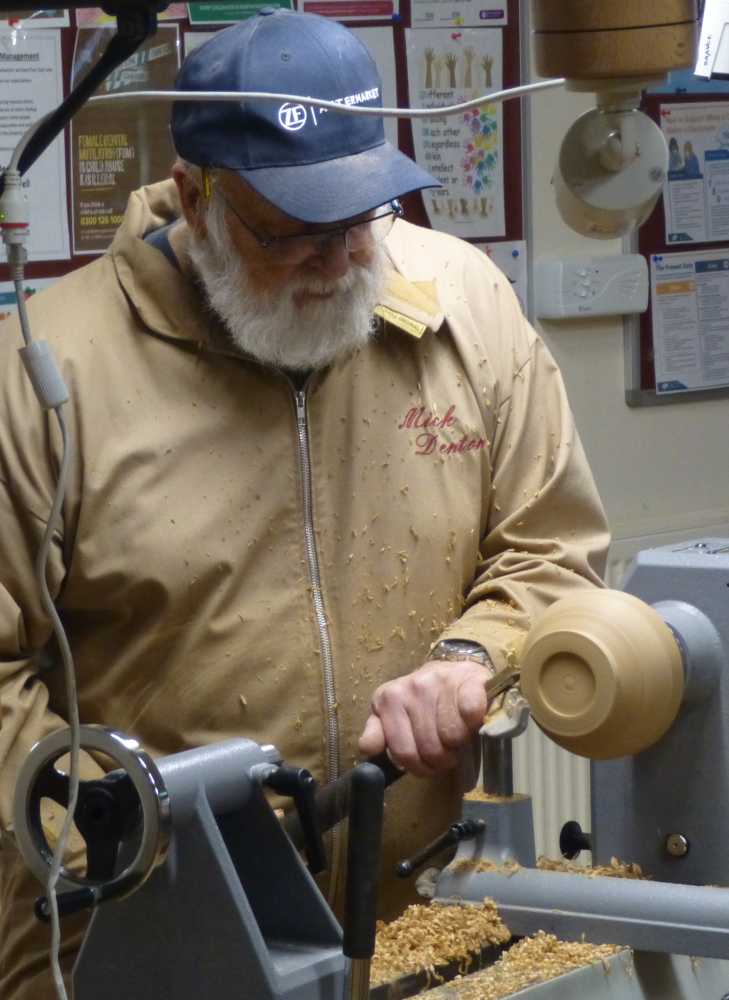
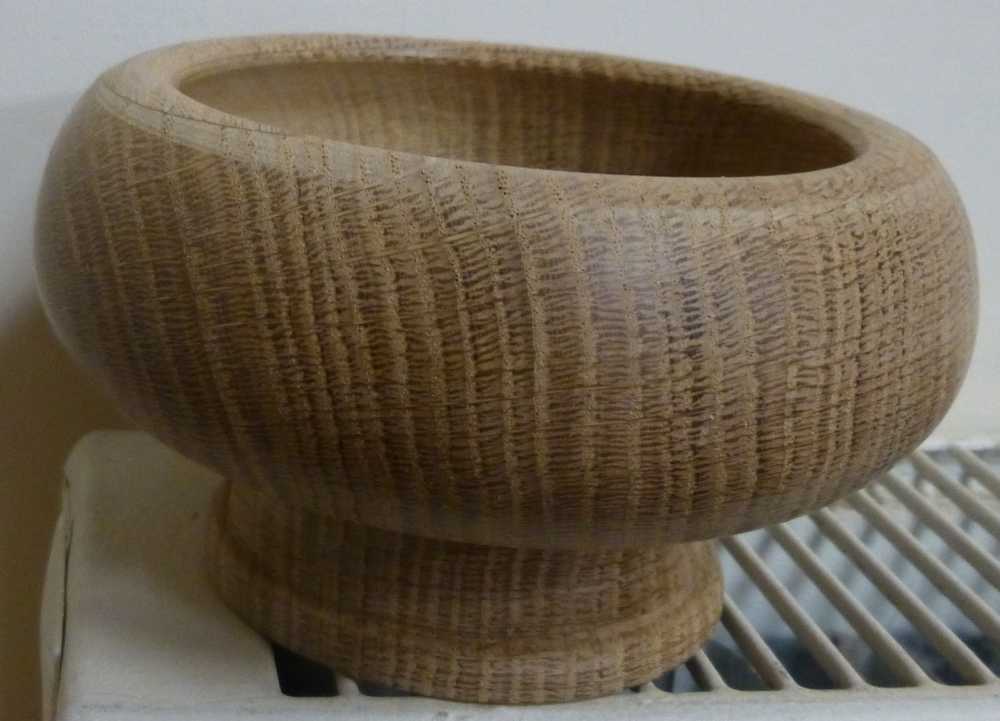
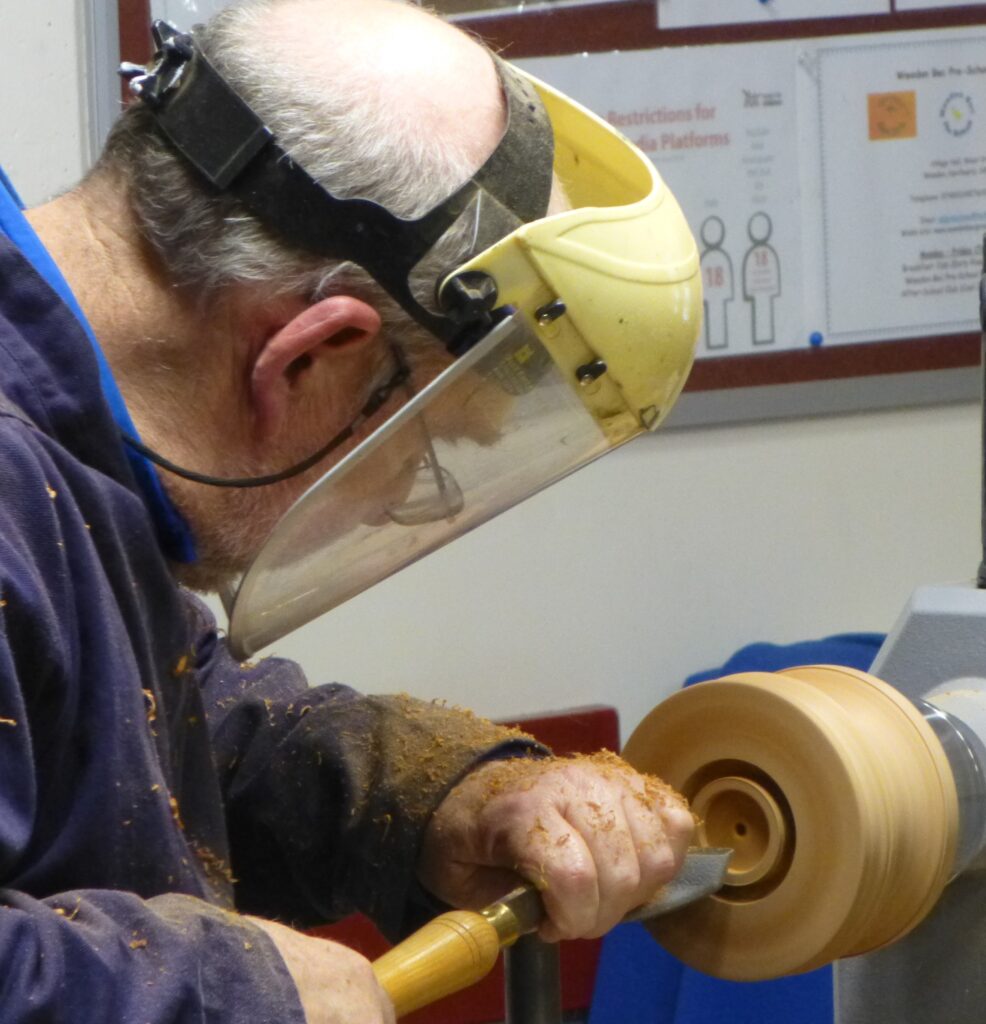
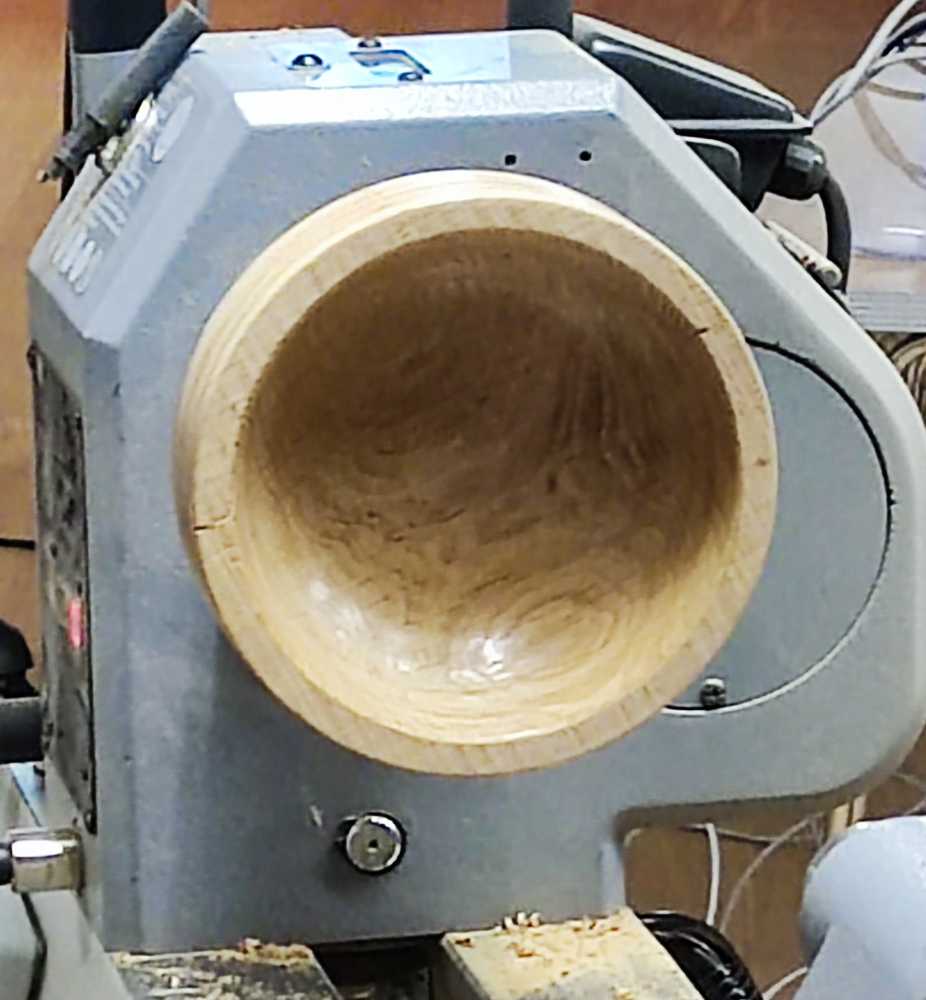
Mick was our demonstrator for tonight and promised us an oak bowl with a raised foot, made out of another piece of his especially horrible dry oak (a piece of which made Adrian’s life harder at a previous demo).
Approx 150mm diameter x 70mm thick, the blank was mounted on a screw chuck and a chucking recess turned.
It was then reversed onto the chuck and he turned another chucking recess. Mick explained that two chucking recesses are not strictly needed, but it’s something he usually does as it adds flexibility to the turning process and provides an option to reverse top and bottom of the bowl if required for some reason.
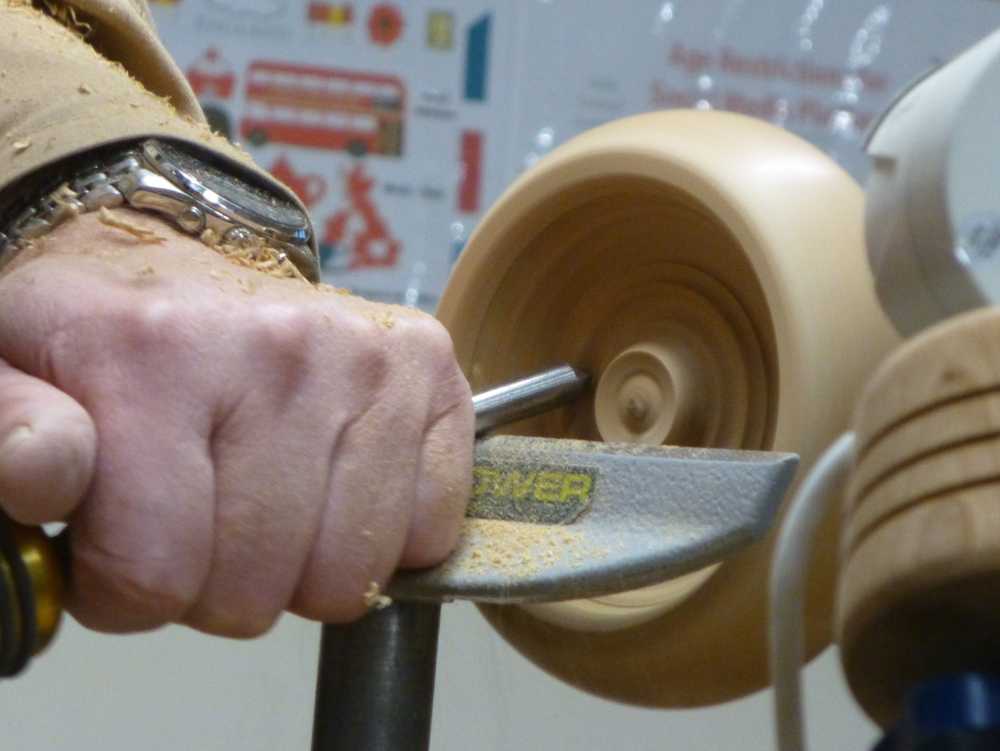
Now he trued up the circumference before reversing the blank once again and starting to shape the underside of the bowl. Here, the wood showed its true nature and quickly blunted his bowl gouge so Mick gave it a quick tickle on the grinder and resumed work.
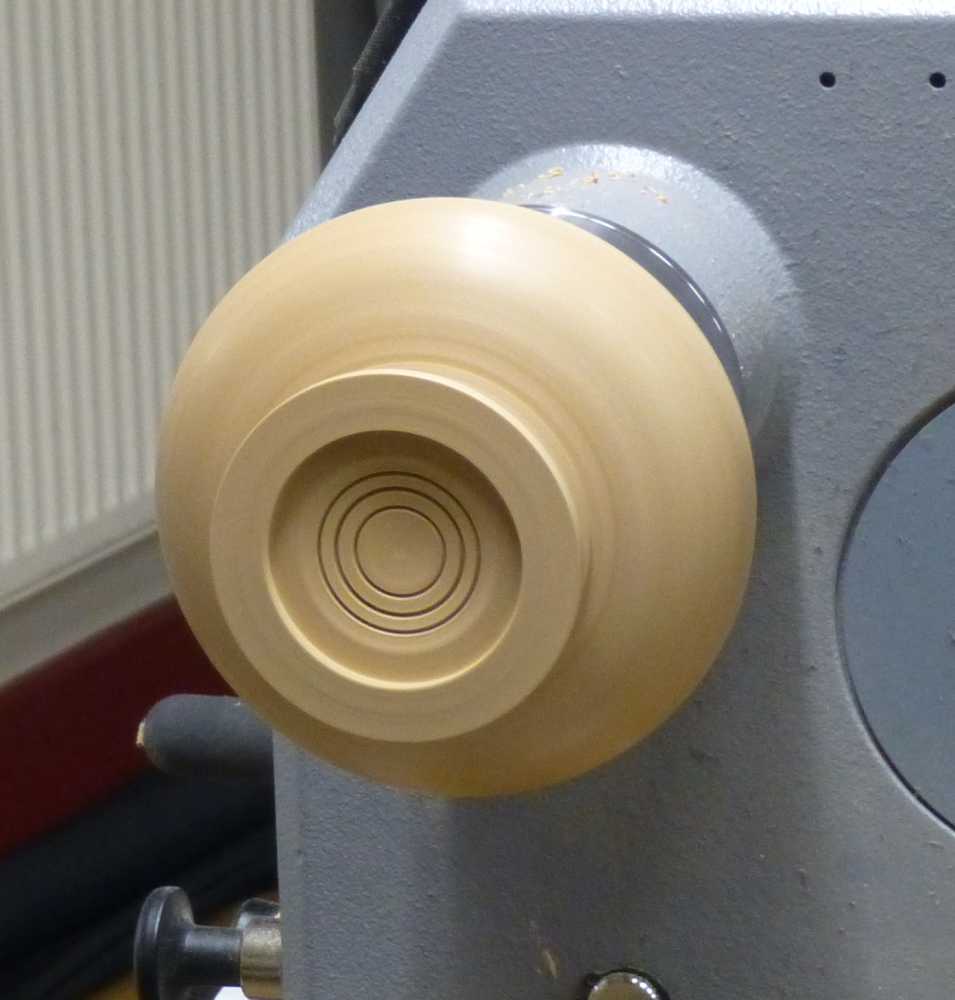
With a sharp tool, he quickly achieved the desired bowl and foot shape, finishing off with light shear cuts for a good finish. A point tool, with all three sides of differing length for different uses, was used to add some detail lines to the underside of the foot.
Final sanding was carried out with the lathe running in reverse, using very light pressure to avoid scoring the wood.
Reversed once again, hollowing out began, with Mick switching to a gouge with a steeper bevel angle for the bottom of the bowl.
In order to undercut the rim, Mick used a small round carbide-tipped tool which allowed him the access he required, and then a final thinning inside the bowl with the bowl gouge. After a quick sanding the bowl was done, although Mick may thin the walls a bit more at home with a smaller bowl gouge. He will also apply sanding sealer in his workshop at home (volatile – can’t be used in the village hall), rub it down and apply hard wax oil.
A tiny natural edge vase was next on the agenda, as Mick had a little time left. He mounted a small piece of yew in the chuck and hollowed it out with a bowl gouge, rounding the top edge internally with the point tool before returning to the bowl gouge to shape the outside of the vase, taking care to leave a natural edge at the top. The shape at the foot was refined using the point tool.
To complete, the vase was sanded with the lathe running in reverse and stick wax applied. The wax was polished with a paper towel, taking care not to apply too much pressure or the wax will drag and come off onto the towel. Finally the vase was parted off and the underside of the foot sanded.
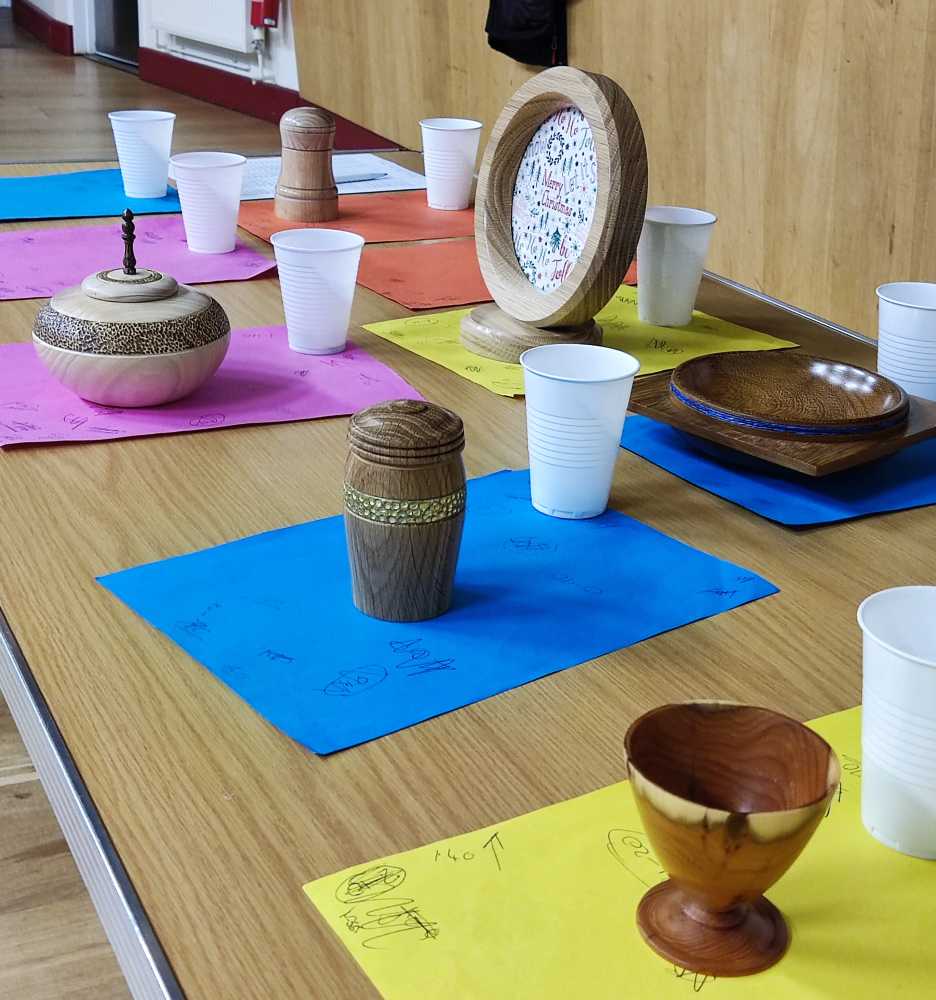
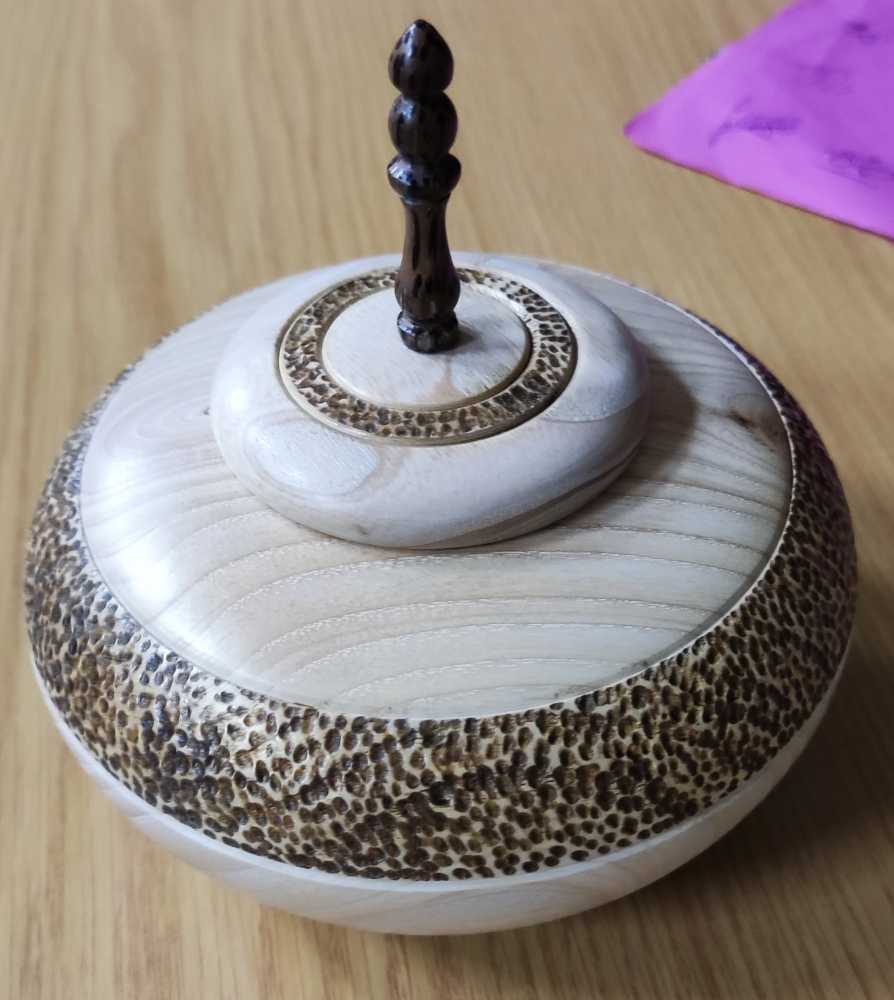
The competition table had a variety of items this month.
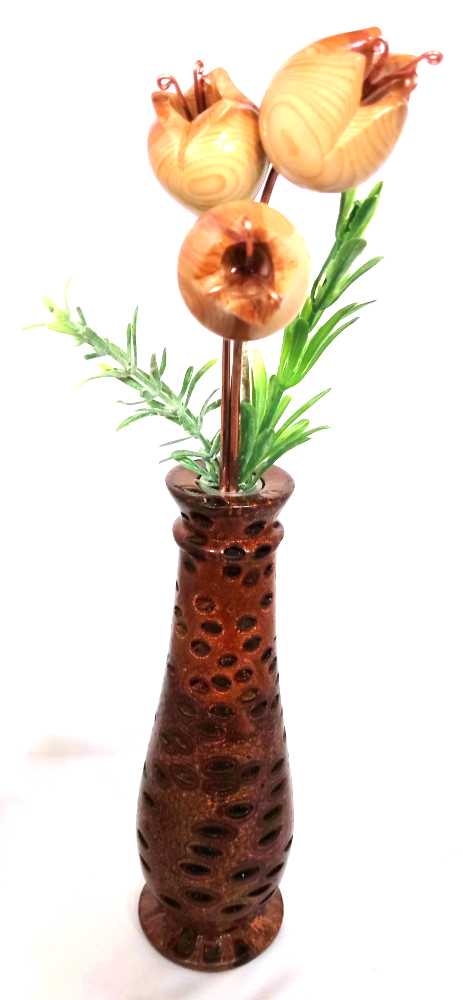
1st place was a banksia seed pod vase with turned and carved flowers by Chris Harkin.
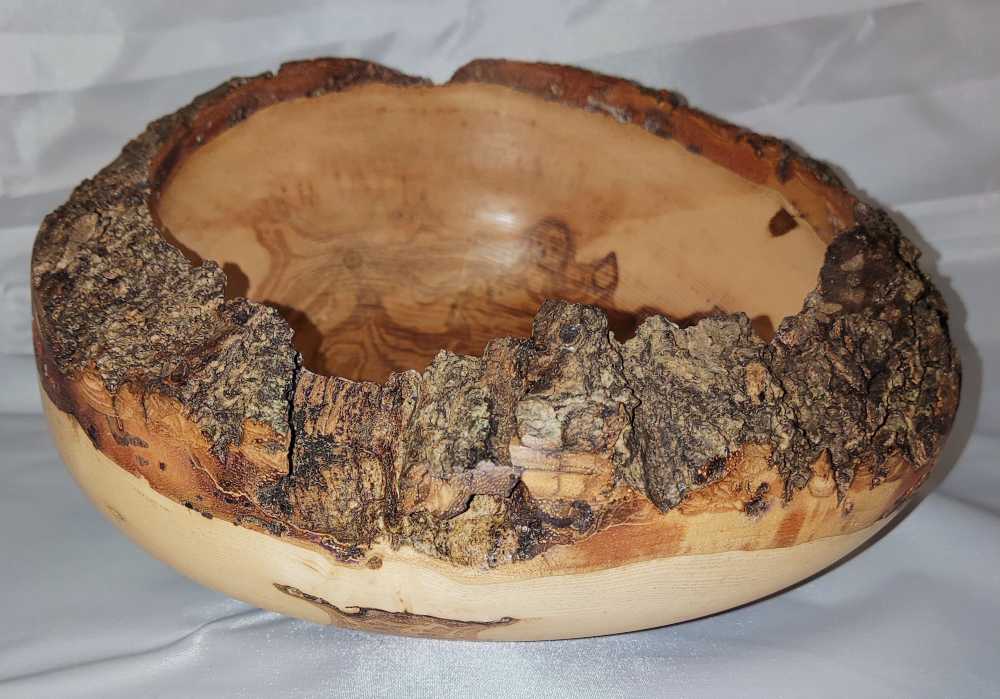
2nd place was a canted natural edge bowl by Roger Gilbert.
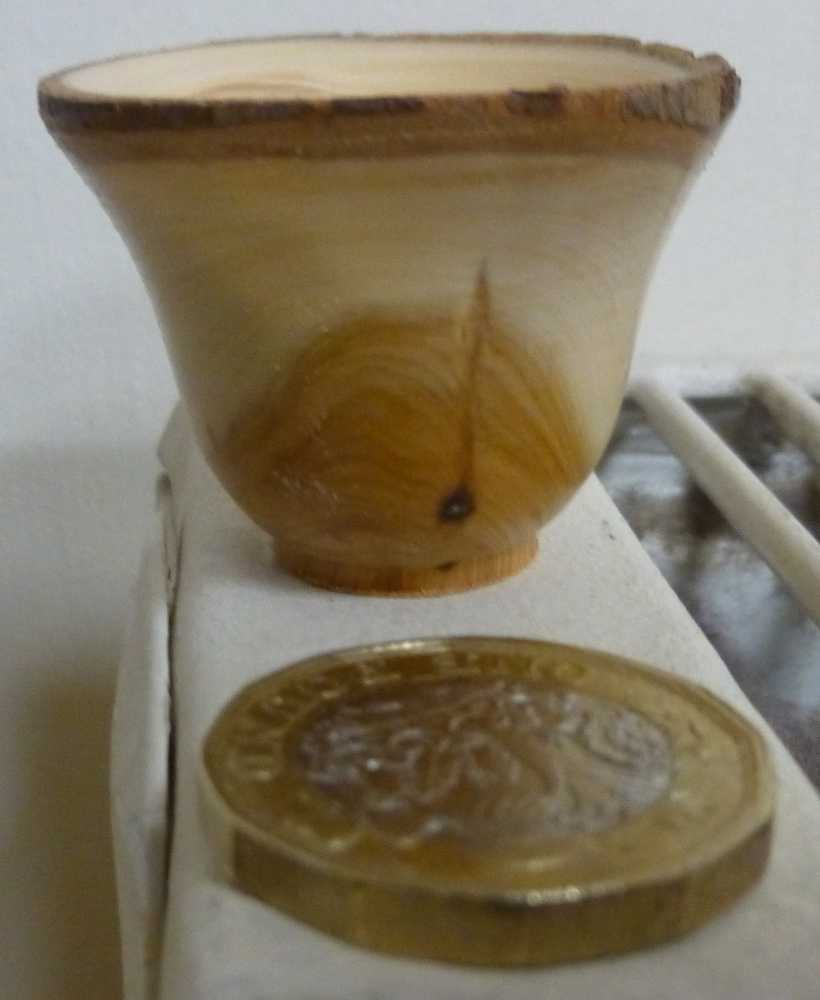
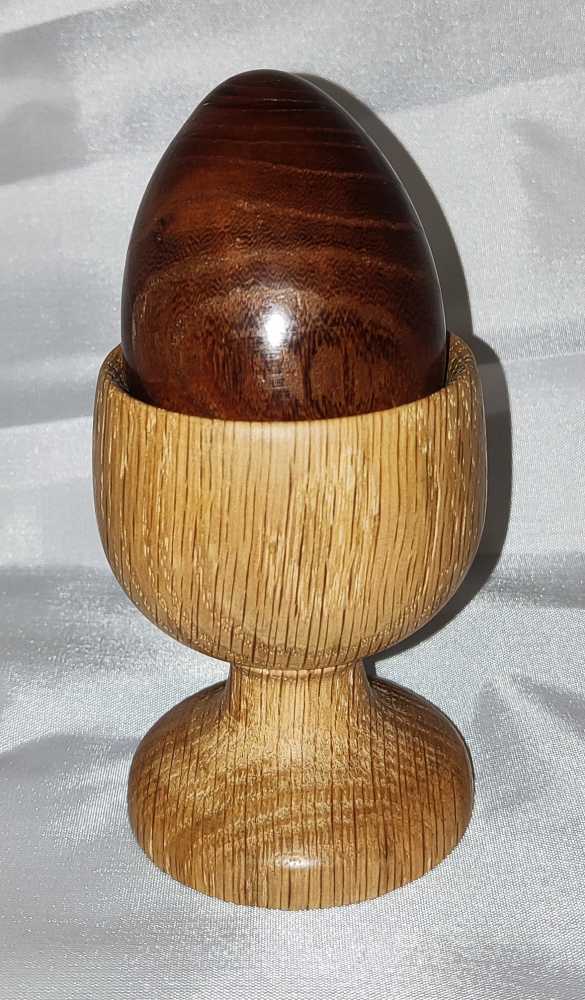
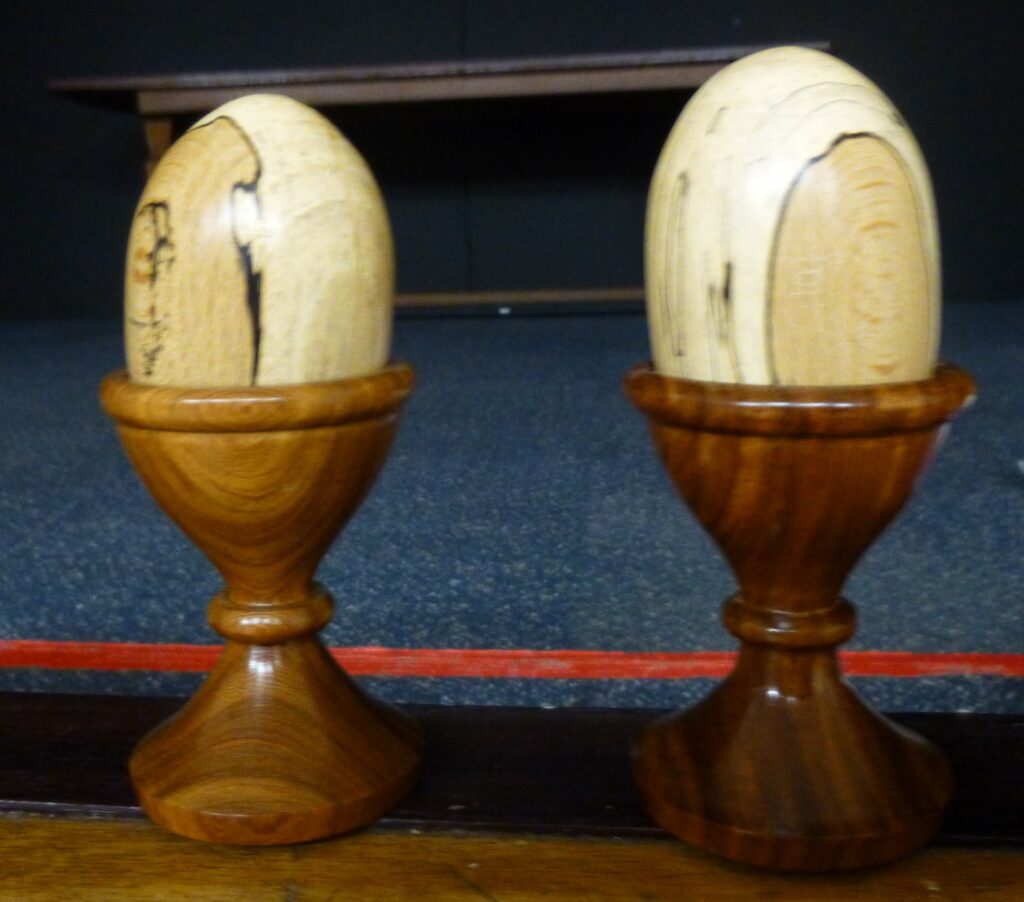
3rd place went to an eggcup and egg by Colin Humphries.
Gerald Hubbard was our demonstrator this evening, starting off with a brief introduction during which he passed around some books by the sadly departed masters of threadcutting, John Berkeley and Bill Jones. Bill was known as the last of the ivory turners and Mick Denton showed us pictures of some superb chess pieces produced by him. This certainly whet our appetite for what was to follow!
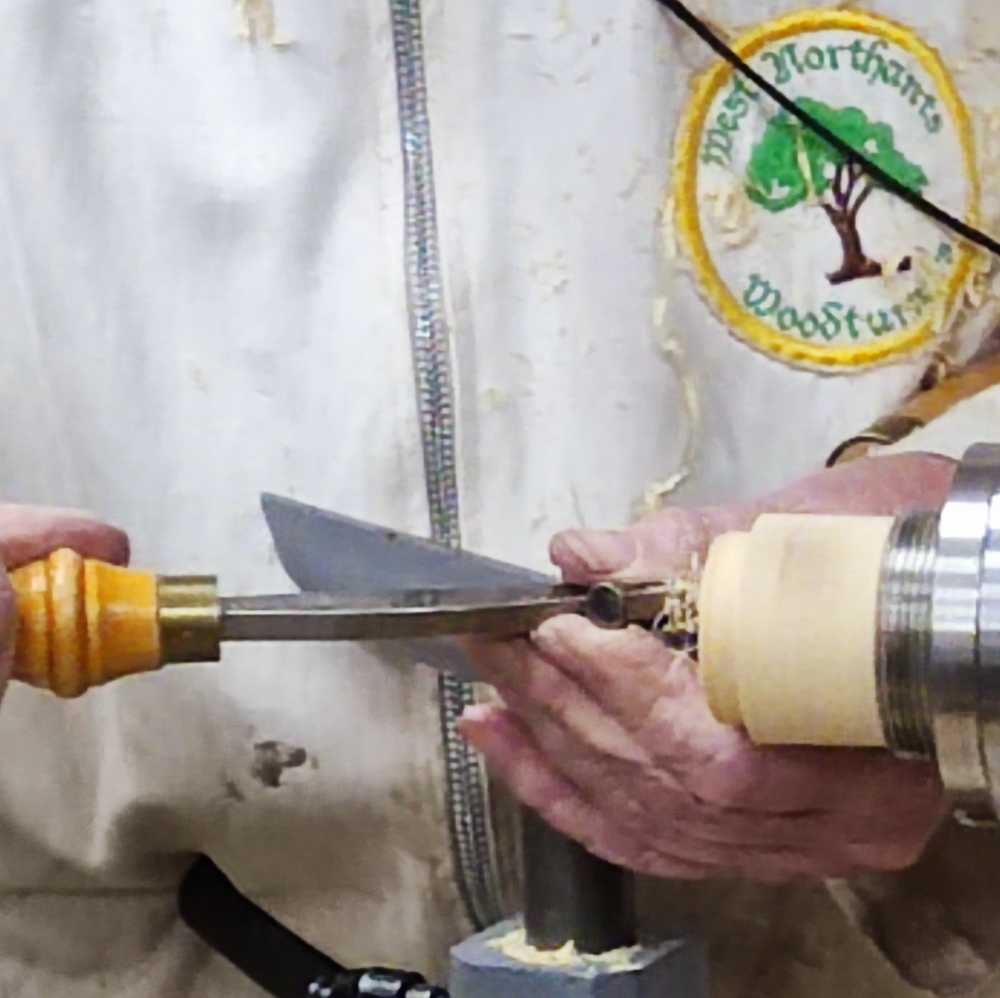
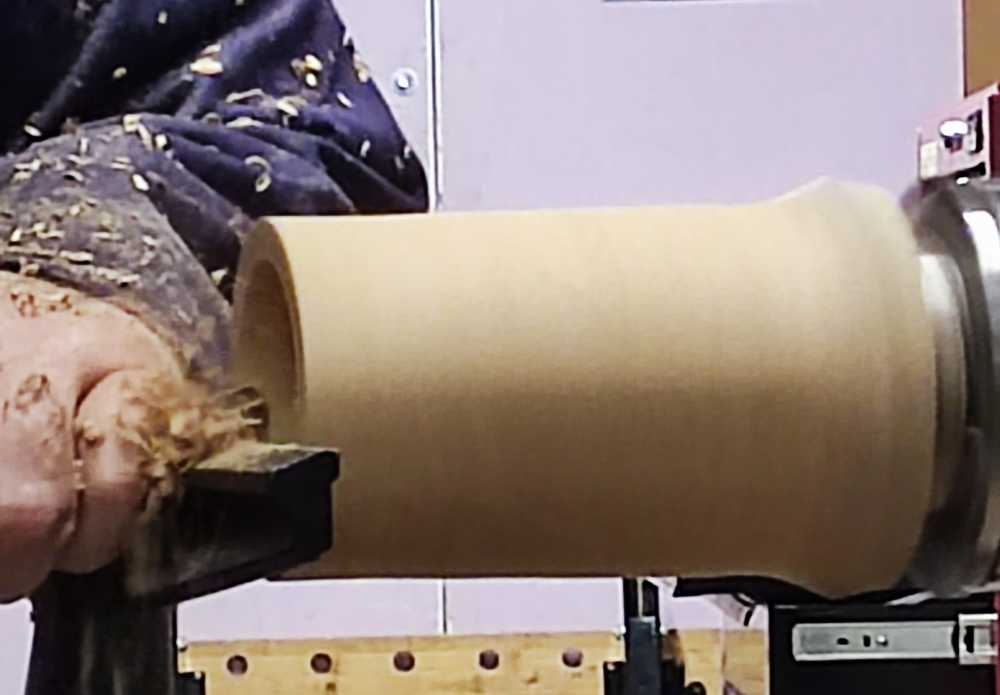
Back in the present, Gerald explained that he would be making a small box to hold five £1 coins, demonstrating thread cutting (aka thread chasing) to screw together the top and bottom halves. In total, three threads would need to be cut, two for the box itself, and one for a screw chuck to hold the top whilst shaping the outside. To start, he used a small blank of boxwood about 30mm square x 100mm long, held securely in a chuck and centred with a revolving steb centre.
Base – male thread. He reduced it to a cylinder and then bored out the end with a 7/8” Forstner bit, to a depth that allowed 15mm for the five coins.
7/8” is just a bit too small for the coins so he increased the diameter with a scraper supported by a thread cutter support tool (commonly called a Bill Jones arm rest) resting on the tool rest.
Once this was done, Gerald chamfered the outside edge of the blank and made a small undercut a few mm back from the edge – this is to act as a relief at the end of the thread and to stop the tool from running on.
With a 16tpi cutter, he placed the arm rest and started the outside thread using only about three threads on the cutter. Once the thread was established, he started using more threads on subsequent passes. Gerald then shifted to a very light grip with just a few fingers on the end of the tool handle as he found that this produced a parallel thread rather than slightly tapered as tends to happen with a fuller grip. Lathe speed depends upon many factors (type of wood, size of workpiece etc) but Gerald usually has it running at around 300rpm for thread cutting.
To ensure a clean thread profile, he cleaned the threads with a waxed toothbrush before making the final pass with the threading tool and parting it off.
Lid – female thread. Another piece of boxwood was mounted in the chuck and hollowed out using a drill bit ground with a rounded profile and then the hole widened with a scraper before cutting a female thread to suit the male thread of the bottom part of the box.
Gerald repeatedly tried the fit until he was happy with it; a little Cut ‘n Polish wax may help with this. Once he was satisfied with the thread and the inside of the lid, it was parted off.
Screw chuck – male thread. A male thread was cut in order to make a screw chuck mount for the lid to allow for the external shaping. It doesn’t need to be a perfect lid but it does need to hold securely.
With the lid mounted, Gerald set about the shaping of it, but made a mistake from which he was unable to recover so, unfortunately, this very interesting demo came to an end. By now however, we had all learned something of the techniques, tools and materials required for thread cutting, which was the main purpose of the demo, so there was little lost from that point of view. Fortunately, Gerald had brought along a similar box to pass around, so we could see the more complete article, with a textured lid.
In order to fill in the remaining time, Gerald discussed the use of other materials for this type of work. He pointed out that threads cut well on polyester and resin blanks although the streamers of static-charged material were a bit of a nuisance. Resin can be prone to chipping, but warming it up in water reduces this.
He also showed us a Go-No Go gauge which had ends of different diameters for quick sizing of spigots from which to cut threads. The gauge was made of plastic casein, a product derived from milk and very widely used in the past. It is commonly used as an ivory alternative as it has a grain similar to that of ivory.
Finally, he passed around a thread cutting box for larger threads, typically 0.5” to 1.5”, very handy on occasion, and sometimes used in association with metal-working taps.
All in all this was a very interesting demo, with a good number of tips and tricks passed on to us. Thank you Gerald!
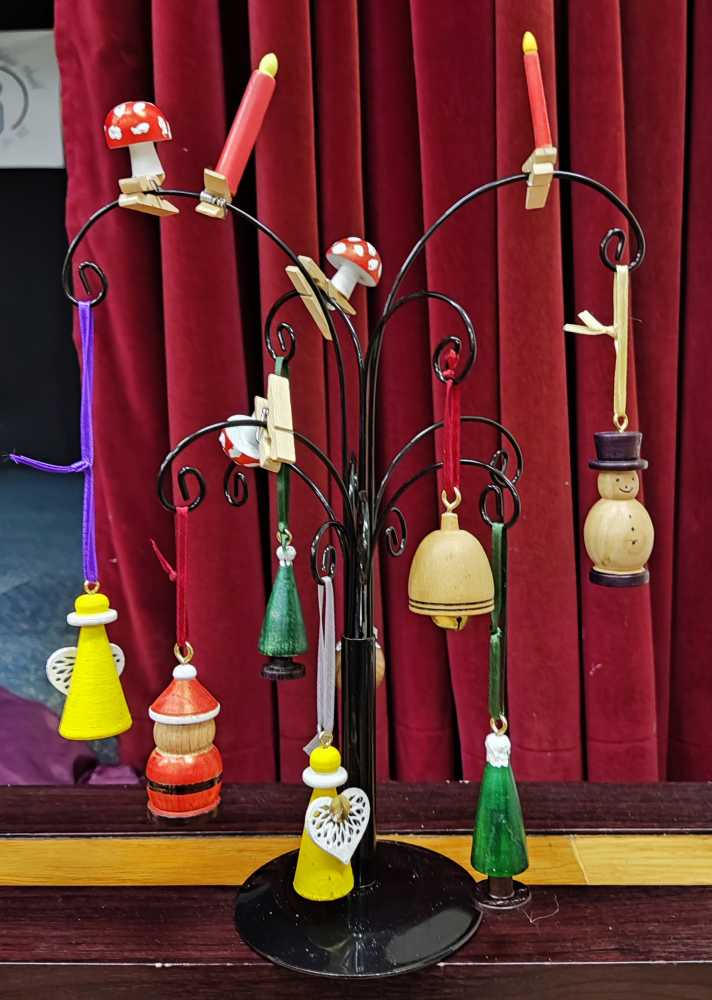
Before this evening’s demonstration started there was a brief discussion regarding progress of the carousel challenge, and Geoff and Chris subsequently spent much of the evening in a huddle over the prototype.
Mick Denton asked if there was any interest in a club visit to the Proops Brothers shop in Leicestershire. A number of people said yes, but it was apparent that more would be required to make it a worthwhile for Proops to make special arrangements for us. As some will already know, Proops sell a wide variety of hobbyist and craft items, and visits in the past made for a good day out, complete with a tour around the shop and facilities. www.proopsbrothers.com
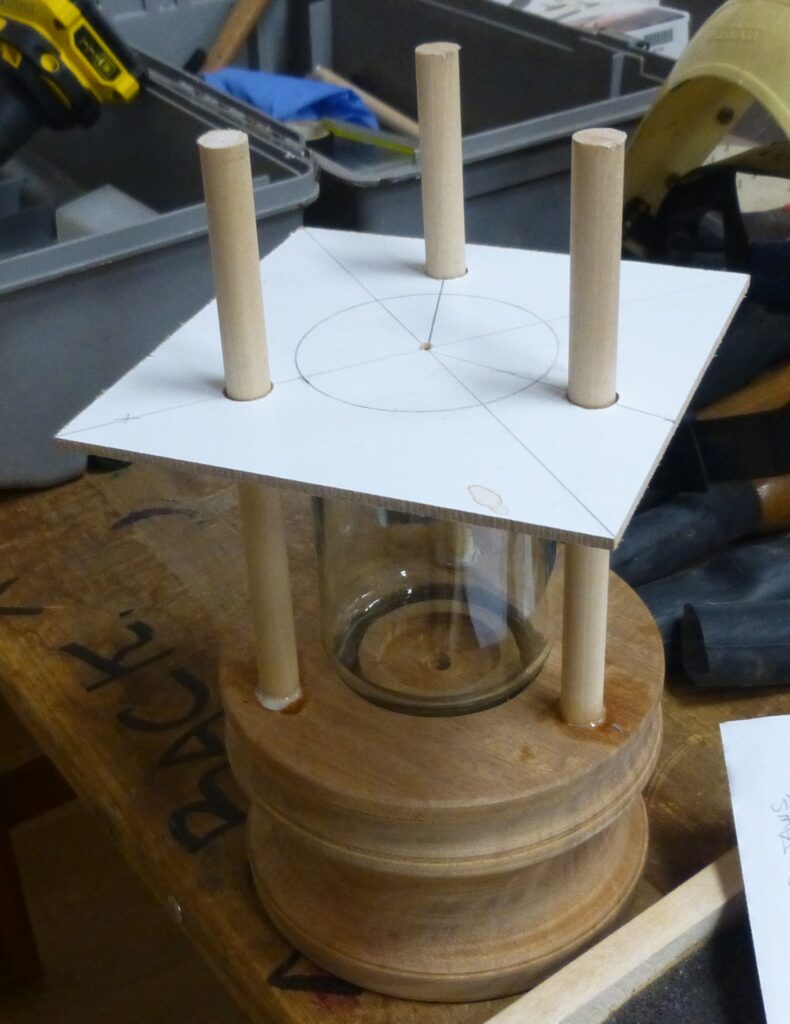
Our demonstrator tonight was Adrian Finch who kept us guessing as to what he was making until well on with the process. He used two pieces of an unknown hardwood, themselves glued together from smaller pieces. Both pieces were approx 150mm diameter x 75mm thick.
The first piece was mounted on a screw chuck, the end trued up and a tenon recess cut into it.
Adrian reversed it onto the chuck, centred a template onto it and used this to mark out three holes for drilling with a forstner bit. Once drilled, he noted the depth on the circumference of the blank.
Next, he shaped the outside before making a recess to suit an LED tealight and a groove to suit the top of a jamjar. It was now becoming clear that Adrian was making a tealight lamp with this piece forming the base.
With the blank removed from the lathe he glued three uprights into the drilled holes, aligning them carefully with the template, and set the assembly aside while the glue set – and we had a break for refreshments!
The second piece was mounted on a screw chuck, the end trued up and then a tenon recess cut into it before being reversed onto the chuck and faced off.
Once again, the template was offered up and the holes marked out on this, the top, as for the base.
Adrian then drilled a deep hole with a large forstner bit and widened it to accept the bottom of the jamjar. Why so deep? It is to allow sufficient headroom for the jamjar to be lifted up to allow removal and replacement of the tealight when the battery runs out.
The top was then formed into a flanged dome, resembling the top of a lighthouse. With time running out, Adrian explained that the top would be dry-fitted to the three uprights and the height adjusted to allow for replacement of the tealight and the uprights cut to length before the whole assembly was glued together.
Although this was a stand-alone project, it could also be adapted to form the top part of a lighthouse with any number of variations in shape and finished design – a good inspiration for future projects.
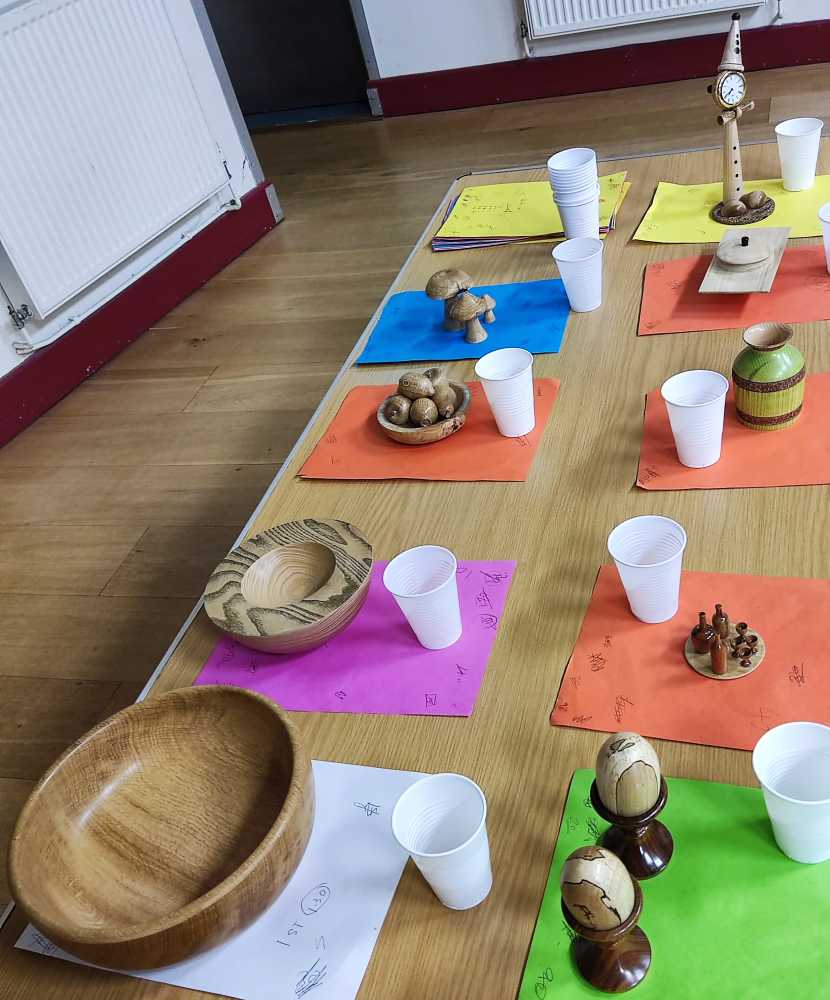
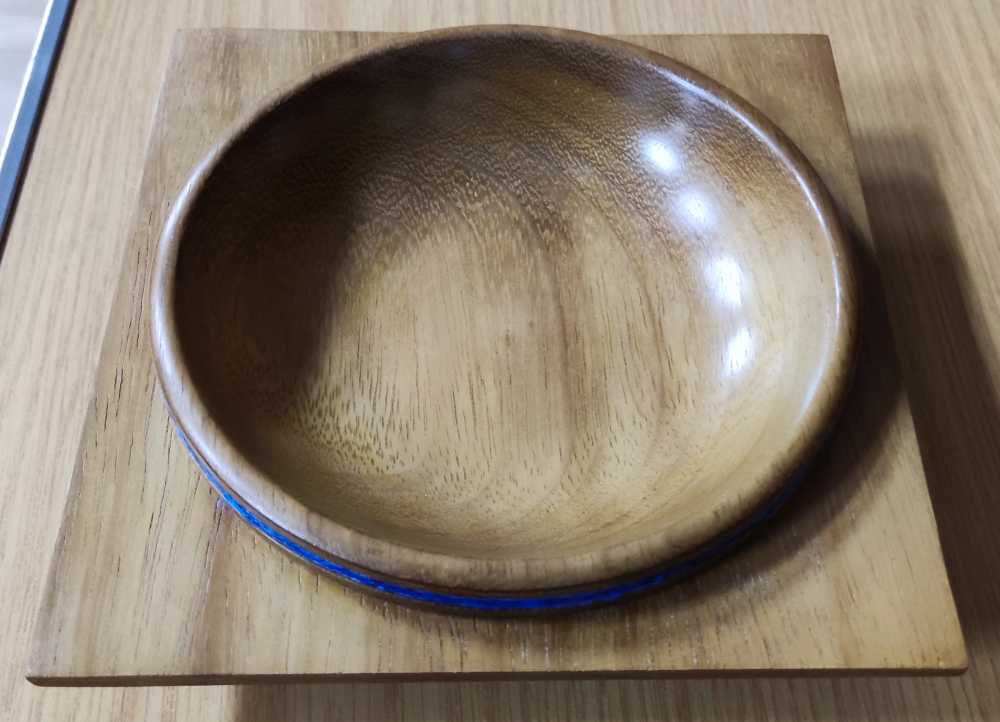
The competition table had a good selection of items this month – some of them “edible”!
1st place was a pair of eggs in eggcups by Roger Gilbert.
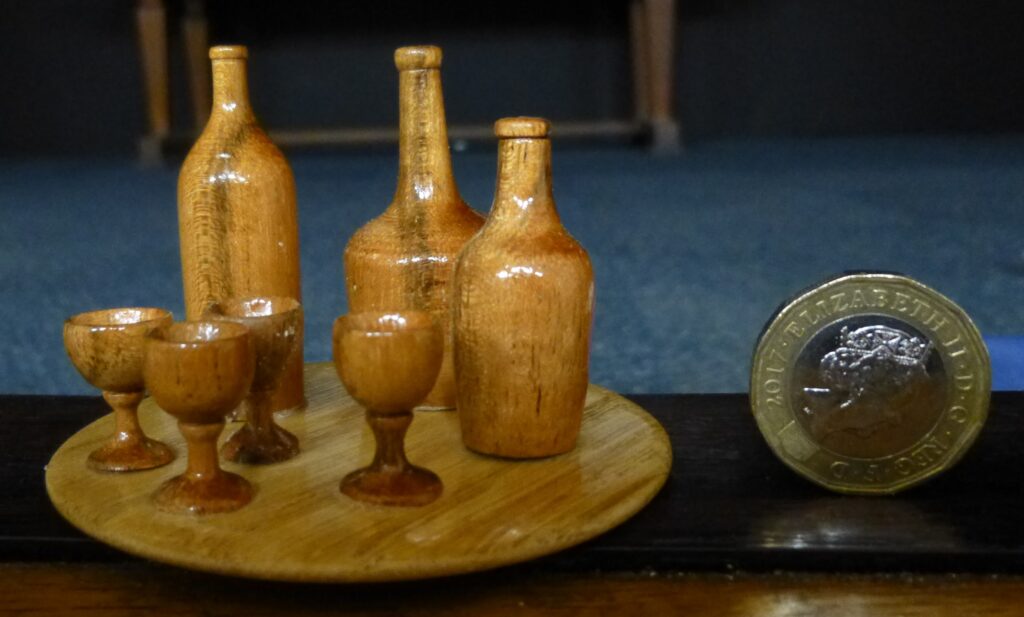
2nd place was a miniature set of drinks and goblets by Chris Harkin.
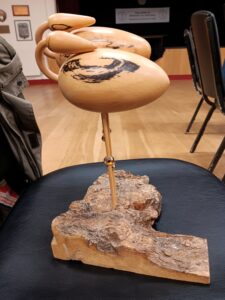
The demonstrator for the evening was Dave Simms who introduced his theme as simple forms.
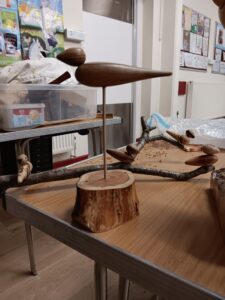
The first project he undertook was to turn between centres 2 teardrop shaped forms one about one third the size of the other . these were to create a bird using the larger of the 2 pieces for the body and the smaller the head. A small hole was drilled in both to take a dowel to connect them together. Dave showed a branch that he had adorned with 4 or 5 birds. He also showed us a slightly larger form of a single bird mounted on 1 leg (wader style) on a plinth.
The next project was similar but much larger in scale. This time after roughing out between centres he mounted the place in a chuck. This allowed him to turn the larger teardrop forms.
This bird was mounted differently in that he created a neck from a wooden curtain ring cut in half. Both head and neck were drilled to accept the neck and 2 holes drilled on the underside of the body for legs. The finished item mounted as a pair of birds looked very effective.
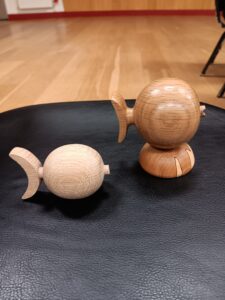
The final project was a slight deviation from the bird theme to a fish which involved a similar process but the tail was actually formed as a shallow cup and then the sides cut away on the bandsaw to create the lobes of the tail. Again this was very effective. The little stub left from parting off was cut slightly on the saw to form a mouth.
This all gave many of us ideas for “quick and simple” projects that will appeal to many.
Our first meeting of the new year was saved by Chairman Roger stepping in to do a demonstration after Geoff had to cancel. Despite the short notice, Roger came well equipped with a selection of wood and tools.
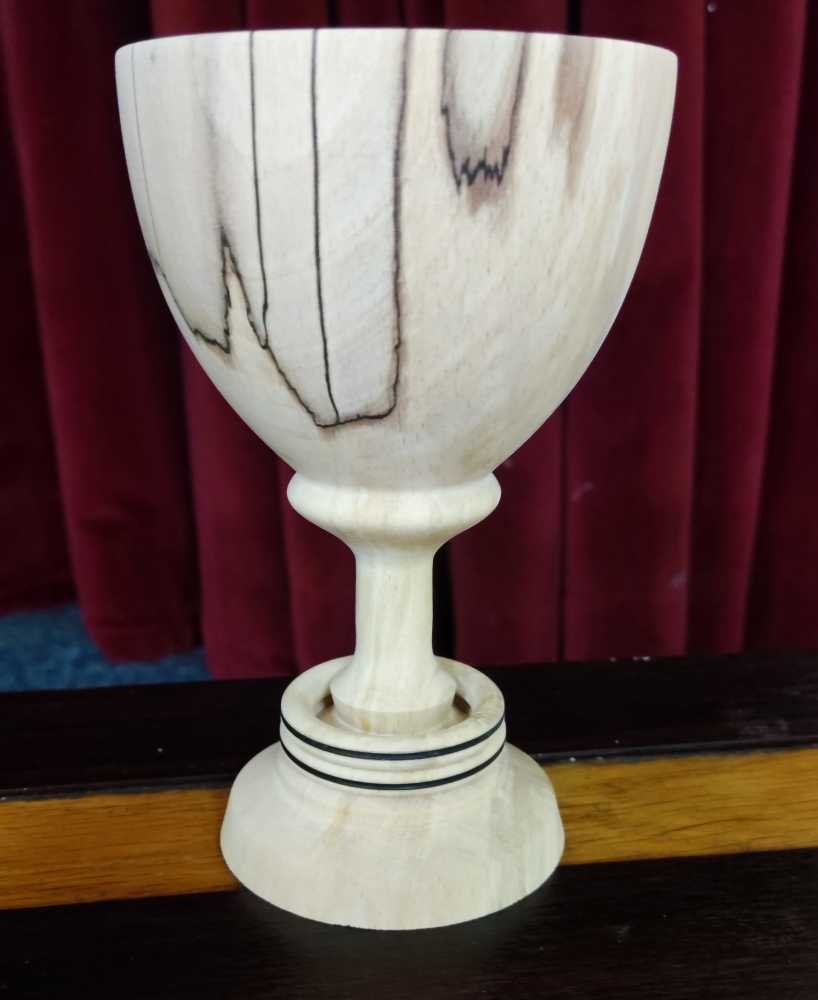
Roger laid out his blanks and asked for suggestions as to what to make, eventually settling upon a long-stemmed goblet made from a piece of nicely spalted beech.
The goblet blank was about 250mm long x 100mm square and posed the first problem, as Roger didn’t have a Forstner bit with him and the chuck jaws were quite small, so hollowing with a spindle gouge was found to be impractical due to vibration of the wood. To get around this, he shortened the blank and remounted it to make a goblet with a shorter stem.
With less vibration, Roger quickly hollowed out the cup with a spindle gouge and then supported the work with the tailstock live centre pressing against a rubber ball in the cup. With this support, he shaped the outside of the cup using a spindle gouge and a skew chisel.
Moving onto the stem, he cut slots to form two upstands and then started forming them into captive rings with a thin parting tool and a captive ring tool.
Roger used a wire to burn a line in each of the rings and then released the rings with the captive ring tool.
Holding the rings out of the way (fiddly), he turned the stem to it’s final shape and sanded it. The inside of the rings he sanded by securing abrasive around the stem with some tape and then running the lathe, manipulating the rings as necessary.
A final refinement of the cup was followed by sanding and the goblet was then parted off to complete the job.
The competition table had a good selection of items this month (sorry, no picture of the table).
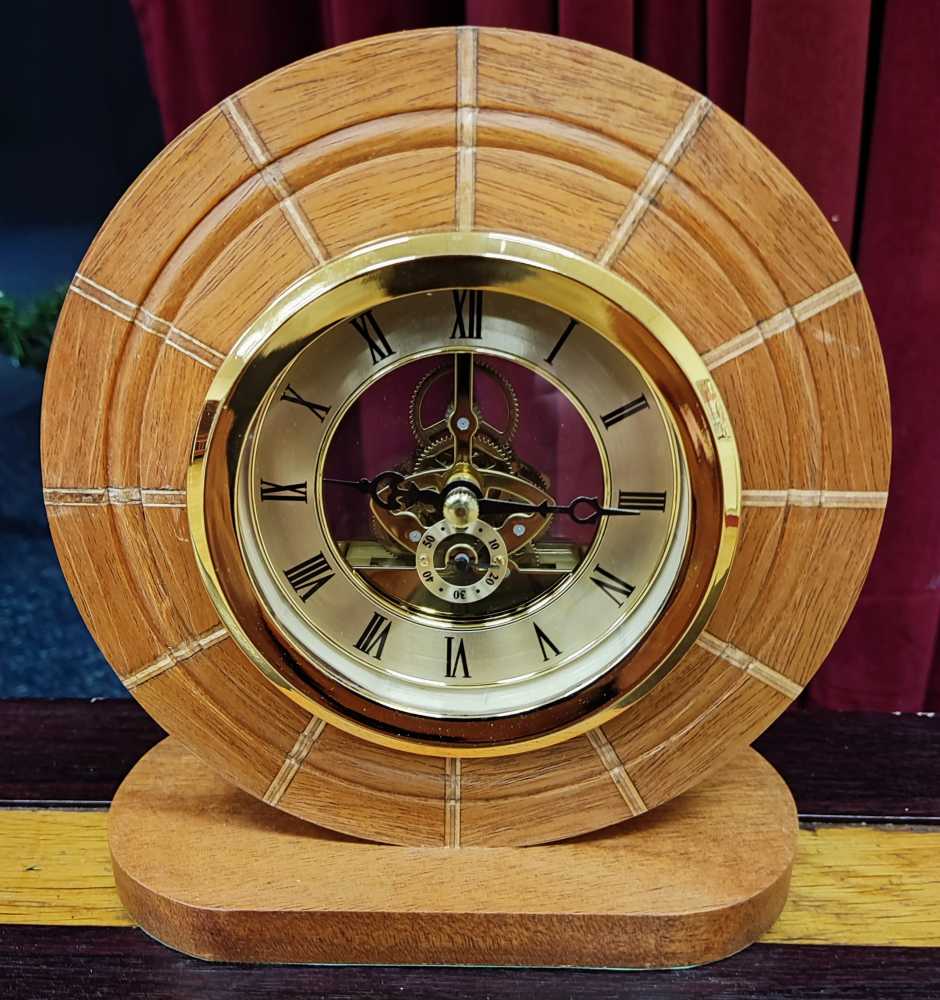
1st place was a segmented clock by Roger Gilbert.
2nd place was an ash bowl by Gerry Coles.
3rd place went to a box with a hinged lid by Chris Hawkins.
Arguably, the main attraction tonight was the food! As something of a social evening, members brought along plenty of food to tuck into throughout the meeting, and there was still plenty remaining after close of play.
Still, woodturning is what the club is about so two lathes were set up and Dave, Mick and Roger turned a variety of items which generated a lot of interest and some useful ideas for many of us.
Roger made a nice little baby’s rattle with three captive rings. He made the captive rings look deceptively simple!
Dave made a snowman (why do they always have top hats?) to add to his display collection of snowman and other items, some of them decorated to add a splash of colour.
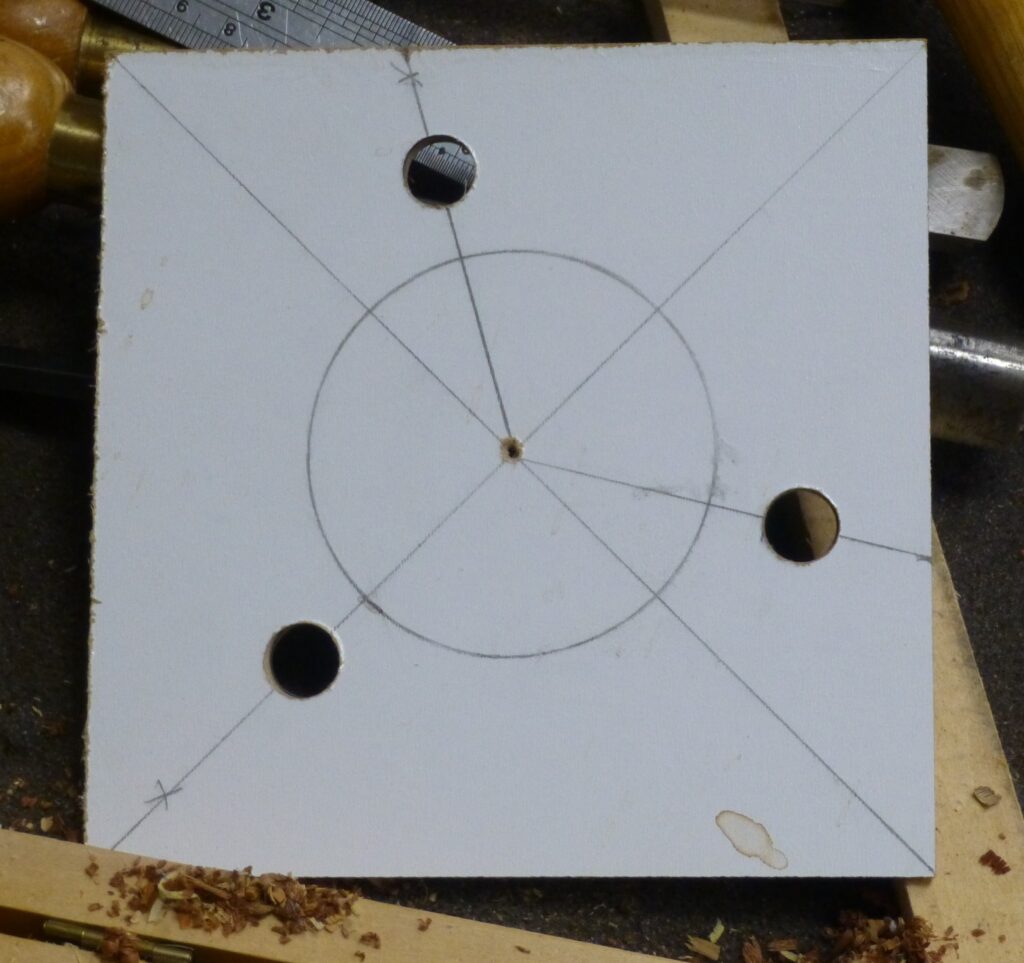
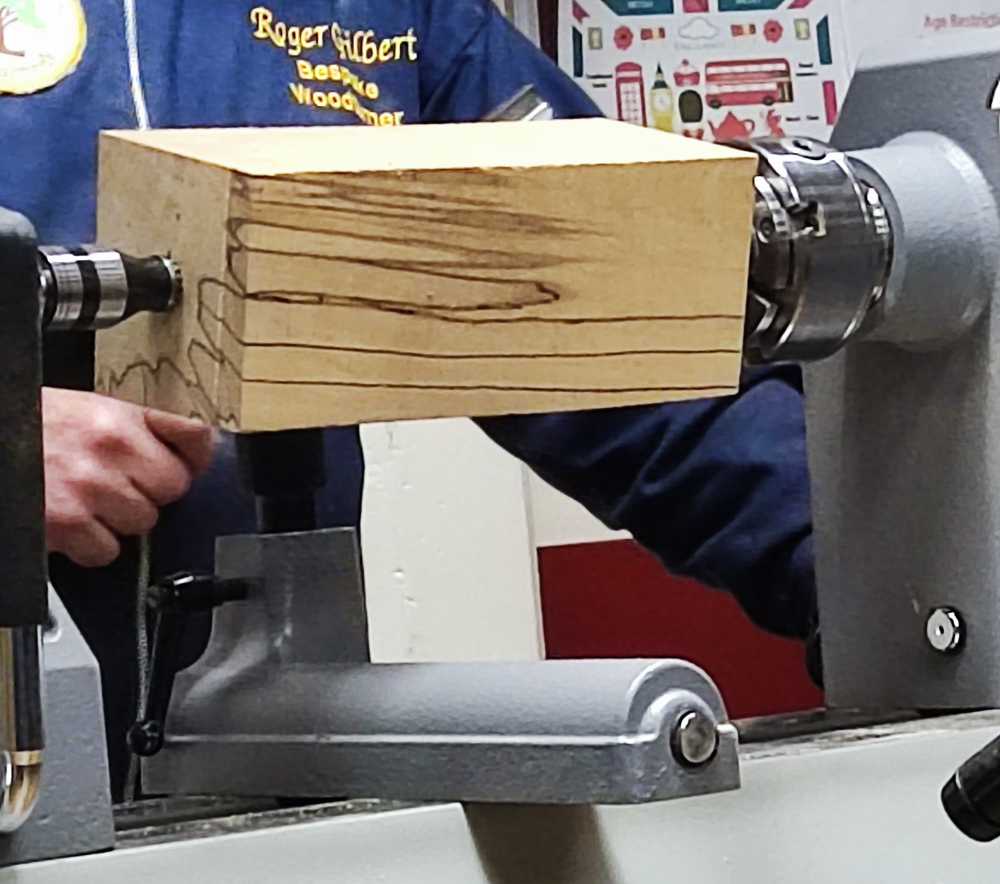
Mick turned a fencepost finial. As his blank was only just big enough for the desired diameter of the finial, he marked the centres very carefully to avoid undersizing. The marking-out method he used was a new one to many of us and was designed to obviate the inaccuracy of determining precisely the corners of a wooden blank when scribing the diagonals. He laid a steel rule carefully along each of the sides in turn and drew a pencil line along the rule in each position. This formed an inner square on the end of the blank, with sharp corners that allowed accurate diagonals to be drawn and thus the centre to be determined.
Sorry, I forgot to take pictures of the marking-out but here’s one of the nearly completed finial.
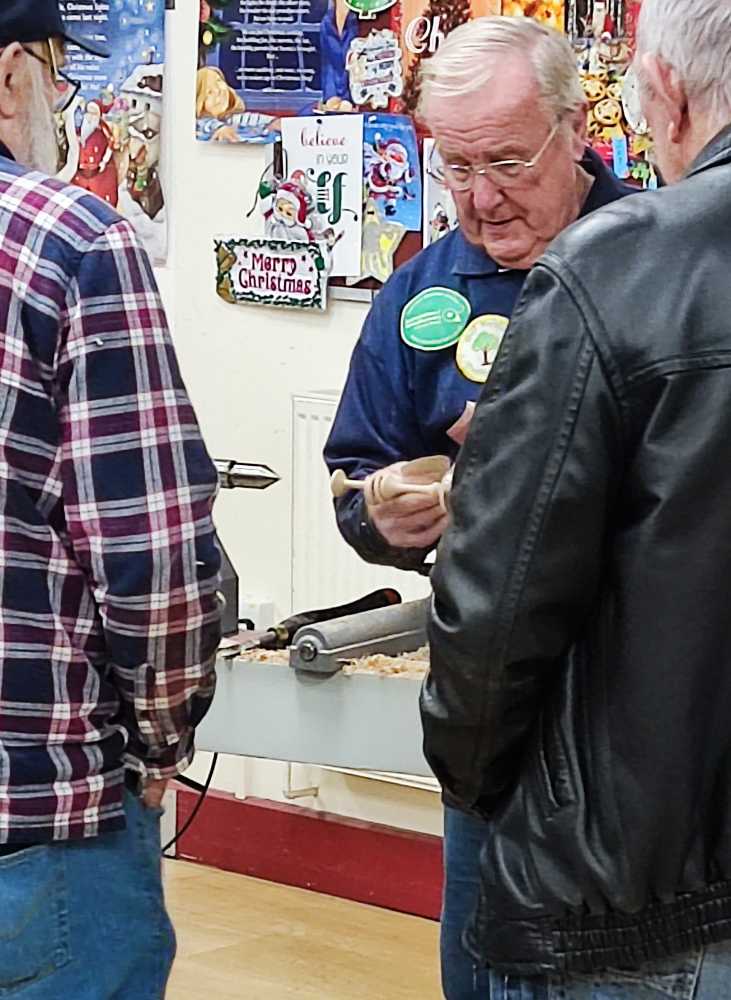
A number of potential new members also attended and were given plenty of advice (sometimes conflicting?) about what to buy, what not to buy etc. Mick also set up a sharpening station and sharpened new woodturner Kyle’s tools whilst showing him how to do it for himself.
All in all, a very nice relaxed evening with plenty of time to chat and catch up with each other.
After the hall doors opened there were a few side attractions in the form of some banksia seed pods on sale and a prototype carousel for discussion, but everyone busied themselves setting out chairs etc and after a welcome from Chairman Roger Gilbert our demonstrator tonight, club member Adrian Finch, was ready to make a start.
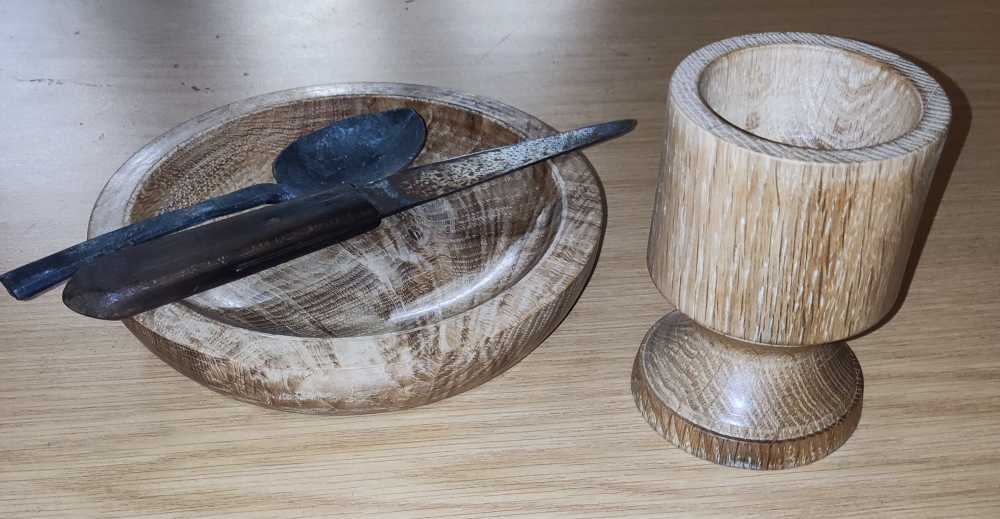
Typically, Adrian had come up with a slightly unusual subject for his demo – in this case, a meal kit for a Civil War roundhead soldier!
The first item was a plate, made from some very dry oak – something of a challenge but overcome without any fuss. The blank was about 200mm diameter x 50mm thick.
Adrian mounted the blank between centres in a similar fashion as for all three items, using his home-made multi-point centre to drive it, with a live cup centre in the tailstock.
He formed an internal tenon and then reversed the blank onto a chuck to shape the underside and place another tenon on it. After a quick sanding, he applied beeswax polished it and then reversed the plate and hollowed it out with a bowl gouge.
The surface of the plate was cleaned up with a scraper and then Adrian sanded, waxed and polished it.
The next item was a bowl, commonly used in the past for pottage, a thick soup or stew.
The oak blank, about 165mm diameter x 100mm thick, was mounted between centres and then turned to a bowl using pretty much the same procedure as the plate, but deeper.
A nice touch was the 16th century spoon that Adrian brought along to go with the bowl!
The final item was a goblet (very important!), with the an oak blank, about 100mm diameter x 150mm long mounted between centres as with the bowl. This though was endgrain turning, unlike the plate and bowl.
He formed and tenon and mounted the blank in the chuck then shaped the cup of the goblet and hollowed it out with a spindle gouge.
Next, Adrian shaped the stem and foot before partially parting it off.
It was finished off by sanding, waxing and polishing and then fully parted off.
Now he’s ready to go into battle.
Or at least he would be if someone hadn’t already claimed the plate!
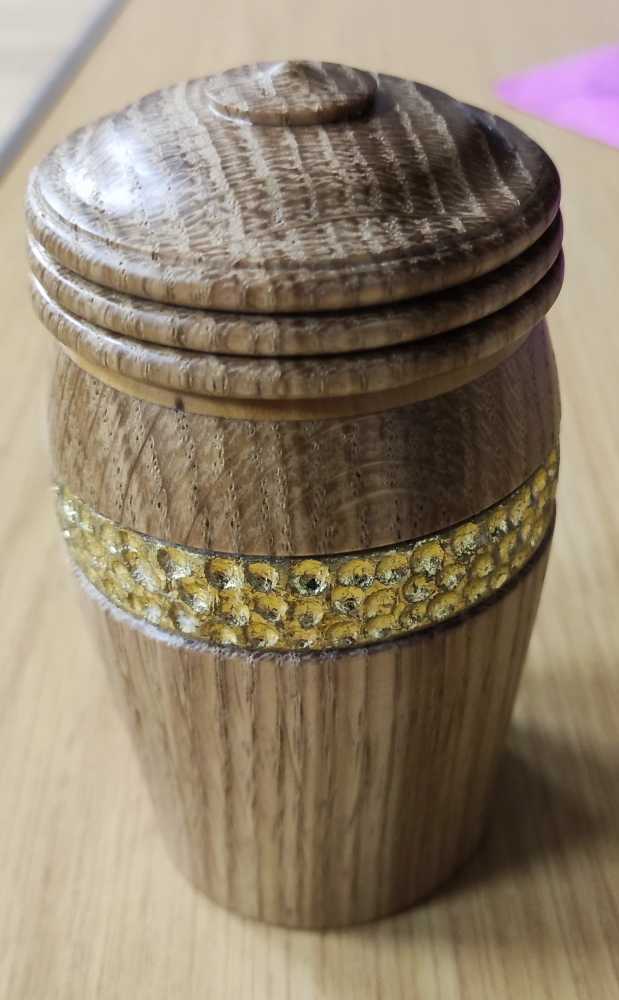
The competition table had a selection of smaller items this month.
1st place was a lidded pot by Dave Simms.
2nd place was another pot, this one by Gerry Coles, with threaded boxwood inserts for the lid.