Club Night – 18th April 2018

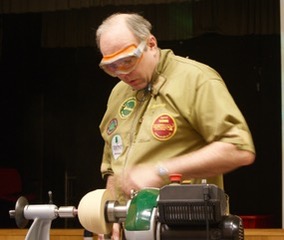
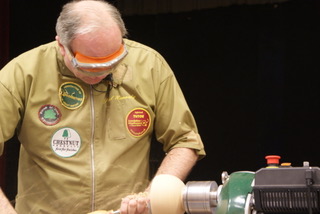
For today’s meeting, Gerald was demonstrating the techniques and tools he uses to make his lovely little boxes with screw tops. He also had a selection of other boxes on show to illustrate a few of the many variations on the box-making theme.

Demo by Gerald Hubbard

Boxwood Box – After a short introduction, Gerald mounted the boxwood blank onto the scroll chuck and parted off one third of it for the lid. Upon inspection, the parted faces looked good, with no voids as are quite often found in boxwood.
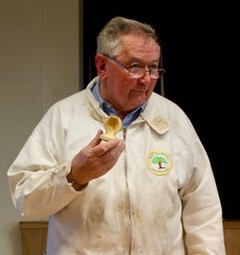
Showing sectioned box

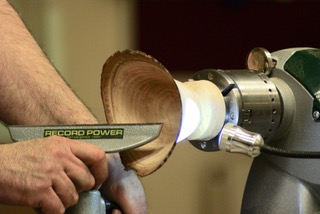
He hollowed out the box using a long-grind spindle gouge, forming a slight undercut to the opening and finishing off with a scraper to clean up the inside.
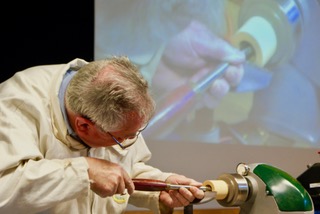
Hollowing out the body of the box

Next, he shaped the outside with a spindle gouge and formed a spigot for the lid using a beading and parting tool. Finally, a thin parting tool was used to form a rebate at the bottom of the spigot, for thread relief.

This spigot then had a thread of about 14 tpi formed upon its outside surface with the lathe running quite slowly. This is the bit that is considered difficult by many people but Gerald made it look easy, with deft use of the thread chaser supported on a Robert Sorby 893H tool support or similar type. The tool support is itself supported on the tool rest and allows free tool movement, invaluable when thread chasing. Gerald explained that, for thread cutting, the tool rest needs to be very smooth and the underside of the tool support needs to have a mirror finish to ensure smooth movement.

As best I can explain, the process was as follows. The thread chaser was first placed at an angle to the lathe axis against the top edge of the spigot to start the thread and then repeat cuts were progressively brought in closer to parallel to the lathe axis until actually parallel. As the thread chaser engaged with the newly formed thread it was engaged the thread and was pulled along to the bottom of the spigot, whereupon Gerald lifted it off before it struck the top of the box wall. This was repeated a few times until he was happy with the thread.

This left the top edge of the thread quite sharp and prone to binding up or breaking in use, so Gerald took the edge off it and then rubbed a bit of wax onto the thread to aid smooth operation.

He sanded the inside of the box and refined the outside shape using a skew chisel and a spindle gouge before sanding through to 320 grit, finishing off by applying a paste wax direct to the wood and buffing with a paper towel. The final finish was not gloss, but a very attractive matt sheen.

After a very welcome tea break, Gerald parted off the body of the box from the blank, and the (previously parted) lid was mounted in the chuck jaws.

Hollowing out the lid with a spindle gouge, there was more noise than expected; found to be due to a loose cover screw, quickly rectified. The lid was also checked for a secure fit in the chuck – just in case!

With nothing about to come flying off, Gerald continued with hollowing the lid, frequently offering up the box body to check the lid diameter, and to get a light witness mark to aid in the final shavings – which were taken with a scraper.

With the lid internal diameter now correct, he started cutting the thread at about 400 rpm. Although an internal thread, the procedure was the same as before, starting with the thread chaser at an angle to the edge of the lid, moving to parallel as the thread became established. This continued, with regular tests of the lid to check the diameter, until it would start to screw on, but then tightened up.
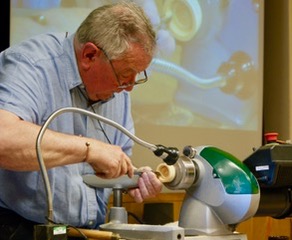
Cutting the thread on the lid

He explained that it is easy to carry on thread chasing until the fit is too loose so, at this point, he took the sharp edge off the top of the lid thread and tried the fit again. Perfect!

With the lid still in the chuck, the body was screwed onto it and the base cleaned up, taking light cuts with a spindle gouge, and detail lines added with a tri-point tool.

The base was sanded and waxed as for the other parts of the box.

In order to finish off the top of the lid, it needed to be parted off, reversed, and somehow held in the chuck. To do this, a piece of scrap was mounted in the chuck, turned to size, and an external thread put on it to suit the lid – same procedure as before. The lid was screwed onto this piece of scrap and shaped and decorated, the latter being in the form of beads generated with a tri-point tool. The technique here was to plunge the tool in, roll it, and drop the handle.

The lid was sanded and waxed as before, and the box was now finished.

A few tips:

  • If there is torn grain, sand it with fresh wax on the wood.
  • The body and lid edges can be adjusted so that the grain matches when the lid is screwed on.
  • Don’t start the thread on the first thread of the tool; start one or two threads back.
  • A thread may be easier to start if waxed the night before, giving the wax time to soak in.

For such a small box, this was a fascinating demo, and made to look very easy. Thread making definitely looks like a challenge worth taking on some time, although Gerald did say that most people need lots of practice to master it. Something else on the to-do list!

 

Club Night – 4th April 2018 – AGM

This was our AGM, so unfortunately more about business matters than woodturning, but there were some nice competition items to admire (first meeting of the month) which we’ll get to later.

AGM

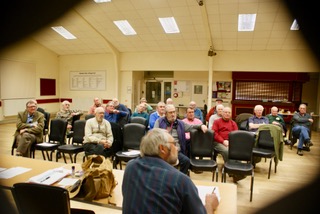
Chairman Mick Denton opened the meeting and delivered the Chairman’s report, followed by reports from the various other club officers. The Treasurer’s statement was accepted, subject to audit at a later date and it was agreed that subscriptions and the meeting entry charges would remain unchanged at £10 and £4 respectively.

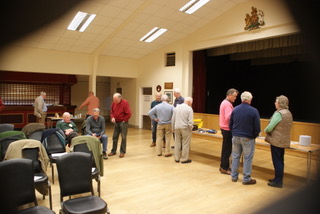
AGM in progress

All Committee Members were re-elected unchanged apart from the position of Webmaster which Ken Garratt agreed to take on from Duncan Anderson. The list of club officers on the website has been updated although the website is likely to be a joint effort for a while.

Turner Of The Year

After the main business was concluded, it was time to announce the results of the Turner Of The Year competition – awarded for the total competition points accummulated throughout the year. On this occasion, our very own Chairman, Mick Denton scooped 1st prize by a good margin:

1st Mick, 190 points

Turner Of The Year 2018

2nd Bob, 145 points

3rd Roger, 140 points

4th Gerald, 135 points

Congratulations to Mick, who has put in a lot of very nice pieces at the competitions and very well done to all who took part in the competitions – and we must all try harder next year to give him a run for his money!

After the raffle, it was time for tea and a general natter before the auction of member’s redundant equipment, some good bargains being taken away at the end of the evening.

Inspecting the auction table

Competition

Now that 2017-18 Turner Of The Year has been announced, it is time to start of the 2018-19 competitions and AGM or no AGM, the first meeting of the month is competition time with this month’s results being:

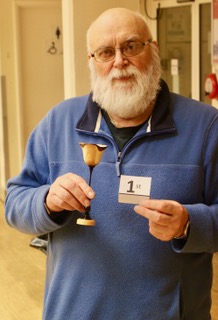
1st A beautifully turned yew goblet with blackwood(?) stem by Mick.

Yew goblet, Mick

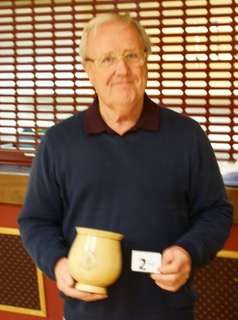
2nd A holly vase by Roger; very nice, we don’t see holly very often.

Holly vase, Roger

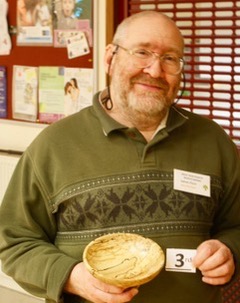
3rd A nice piece of spalted beech put to good use in this bowl by Adrian.

Spalted beech bowl, Adrian

Club Night – 21st March 2018

There was a good turnout for today’s meeting, with the demonstration by Paul Hannaby. As soon as everything had been set up, Paul began his demonstration, making two bowls. After the first bowl and a quick break for tea he resumed the demo, continuing until it was time to clear everything away.

Demo by Paul Hannaby (www.hannaby.com/) (www.creative-woodturning.com/)

Spalted Beech Bowl – After a short introduction, Paul mounted a spalted beech blank onto a screw chuck and trued up the face before forming a tenon using a spindle gouge with fingernail grind.

Beech Bowl, shaping the outside

He shaped the outside with a bowl gouge, refining the shape where necessary with a fine shear cut using the wing of the fingernail grind. A slicing bevel-supported cut gives a better surface finish but he finds that is not quite so controllable in shaping the curve. He also demonstrated the use of a scraper in place of the wing of the gouge.

Paul explained that a parabola makes a nice bowl shape, and this can be illustrated by holding a piece of chain at both ends, allowing the chain to fall into a parabola shape. By varying the distance between the ends of the chain, the height and curve of the parabola can be changed until a pleasing shape presents itself as the best option.

Once happy with the shape, it was chuck mounted on the tenon and the tailstock removed to allow room for sweeping the bowl gouge smoothly throughout the full arc whilst hollowing. This allows the gouge to remain supported by the bevel all the way to the centre of the bowl, making sure no pimple is left at the centre.

Beech bowl, hollowing

He started hollowing a few cm from the middle, working towards the centre. Taking care to start the cut positively in order to avoid the tool skipping, the tool handle was held well away and down, so that there was bevel support as it entered the cut, raising the handle as he pulled it towards him to finish at the centre.

Paul explained that it is important to stand in a suitable position to swing the gouge smoothly all the way through the curve – and to be aware that the range of movement increases as the hollowing progresses.

Once the basic shape was achieved it was refined: mainly by taking more out of the centre to deepen the bowl and maintain a regular wall thickness.

As the bowl became deeper, the 3/8” bowl gouge began chattering on the bottom – a sign that the bevel angle of just under 50 degrees was not suitable for the width/depth ratio of the bowl. He switched to a similar gouge, but with a bevel angle of just under 60 degrees allowing better bevel support. There was less chatter but the start position entailed reaching over the lathe still further.

At this point, Paul would normally have sanded inside the bowl but, as tea break was called, didn’t do so. Also to save time on this occasion he didn’t, as he would normally do, reverse the chuck onto a padded mandrel approximately matching the internal curve of the bowl, hold it in place with the tailstock, finish the foot, and sand the outside.

Beech bowl, completed

For a simple bowl like this, he would treat it with a foodsafe mineral oil, to be re-applied periodically by the bowl’s owner.

Natural Edged Maple Bowl – The blank for this bowl (thought to be maple) showed a number of small cracks, hopefully to be removed in the process. As usual with NE bowls, care is advisable in mounting the blank so that the bowl will be of regular thickness and even “wing” heights.

This was achieved by mounting it between centres (bark end towards headstock), and adjusting it off-centre on the tailstock end to orient the NE as desired in all planes. The blank was out of balance, necessitating low initial revs, but the main concern is to achieve even wings on the finished product.

Before starting turning, the 4-point spur drive was manually milled through the bark into solid wood, to give better contact. Paul did this by turning the wood by hand whilst applying pressure by winding the tailstock in but it could have been done by drilling with a Forstner bit.

Face protection is always advisable when woodturning, but doubly so when there is bark involved, as it is likely to fly off, and it may contain stones or other foreign bodies.

Paul trued up the end face, using light cuts initially to remove the high points, and then used dividers to mark a chucking tenon. The tenon was cut out using a bowl gouge, taking care to ensure that it was less high than the chuck jaw depth.

Initial shaping of the outside was at a slow speed, and cutting outwards towards the rim – but stopping short of the bark edge to reduce the risk of it coming off. Paul explained that winter-cut wood is also better in this respect; the bark is less likely to come off than with actively growing wood.

The outside edge was shaped by cutting inwards from the rim (against the grain), taking care to find the invisible, spinning edge before moving the tool forward.

Shaping continued with alternating the directions of cut as above until the shape was satisfactory.

The bowl was mounted on the chuck, taking care to centre it accurately as the final wall thickness will only be 2 to 3mm. If unable to to do this, Paul would first take a cut on the outside to true it up before hollowing.

As hollowing with the bowl gouge progressed, Paul noticed that the ings were thinner than the rest of the body so he corrected this on the next cut, removing wood only where required. Once below 5mm thickness, he continued in stages from the free end, not returning to the thin sections once completed as they were no longer stable. The thickness was gauged by shining a light through the bowl wall.

NE Maple Bowl, nearly done

Unlike the beech bowl made earlier, the shape of this bowl was suitable to complete using the bowl gouge with 50 degree bevel.

Having gone as far as time allowed this evening, Paul will later sand the bowl by hand, mounting it on a padded mandrel for doing the outside. He will finish it with oil and does not expect it to crack any further although an original crack was still visible. Being thin, such bowls will warp rather than crack if wet.

Paul gave a lot of tips and explanations while he was working, all of which made for a thoroughly engrossing demonstration, and the evening passed all too quickly before it was time to pack everything away. And… despite having crammed in so much into a short period, Paul also managed to find time to have a chat with some of us about AWGB membership in his capacity as AWGB Chairman – many thanks for your time Paul, much appreciated!

A good evening’s work